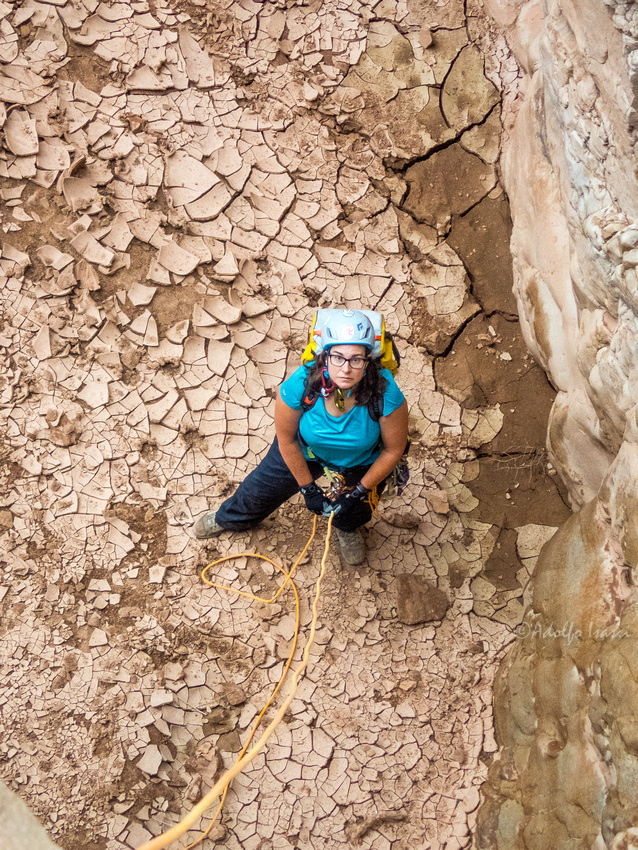
How to provide an effective bottom belay
One of most basic canyoneering tasks is to provide a safety backup, known as a "belay" to a fellow team member while the team member is rappelling down. In case the team member looses control while rappelling down, the belay will prevent the team member from falling down. There are several ways to provide a belay, the "bottom belay" also known as the "fireman's belay" is one of the simplest and most commonly used. It is simple, but in order to be effective and safe, you need to pay attention to the finer points on how to handle the rappelling rope, and your stance while providing the bottom belay.
The Effective Bottom Belay
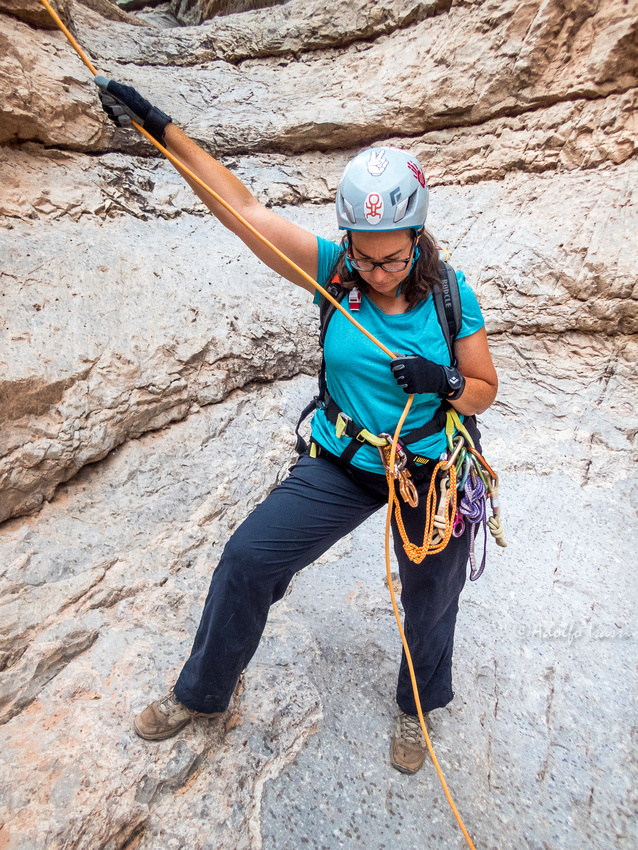
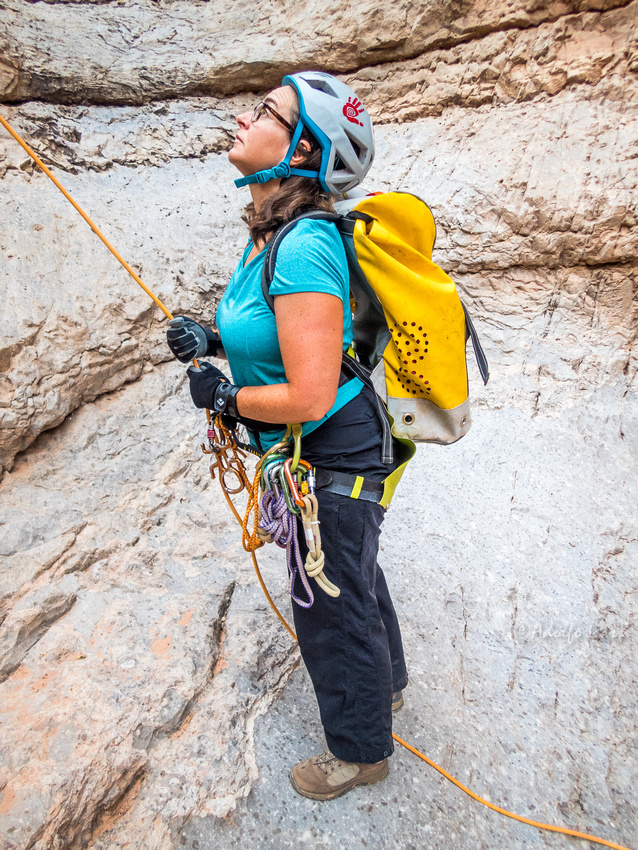
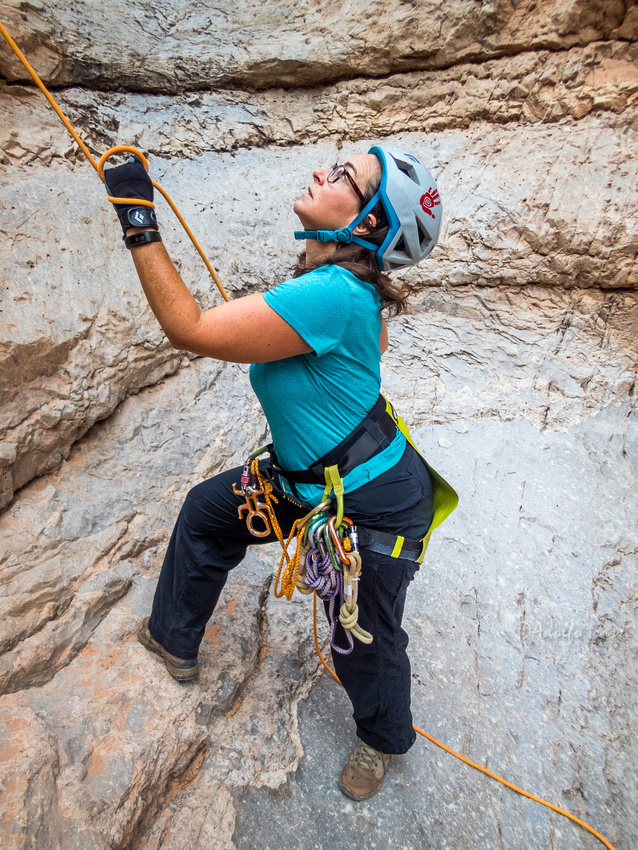
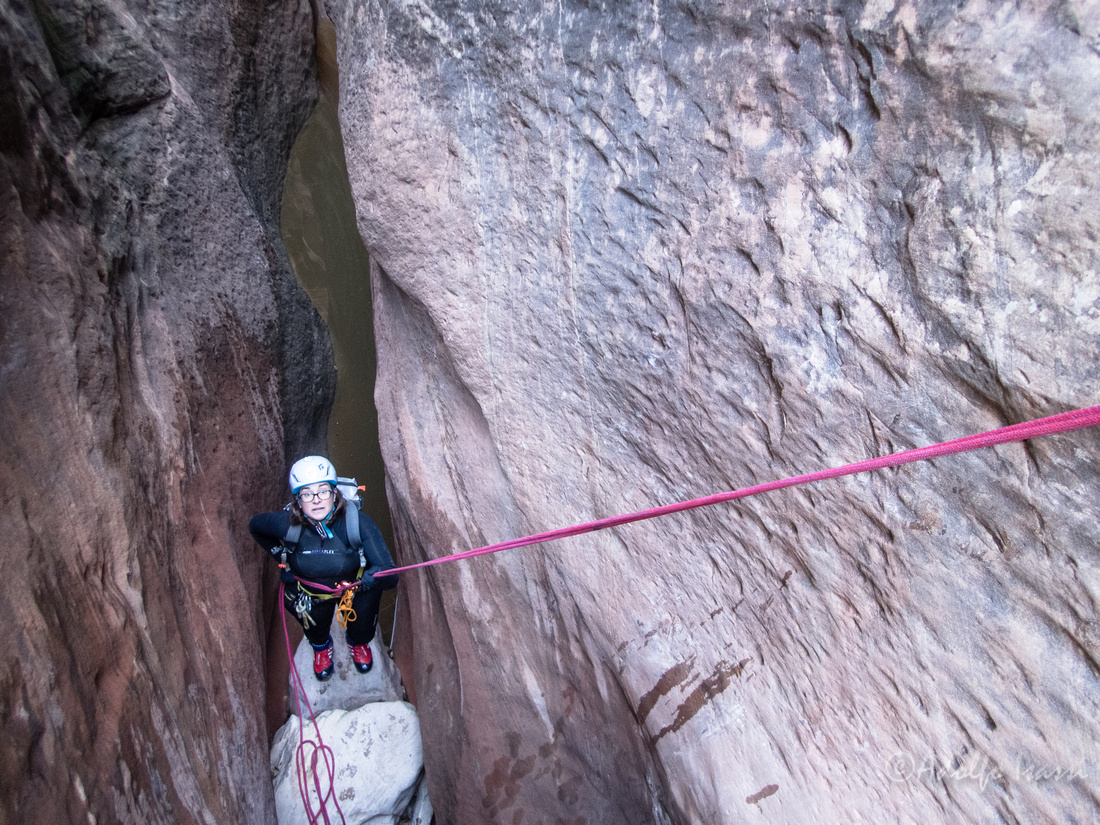
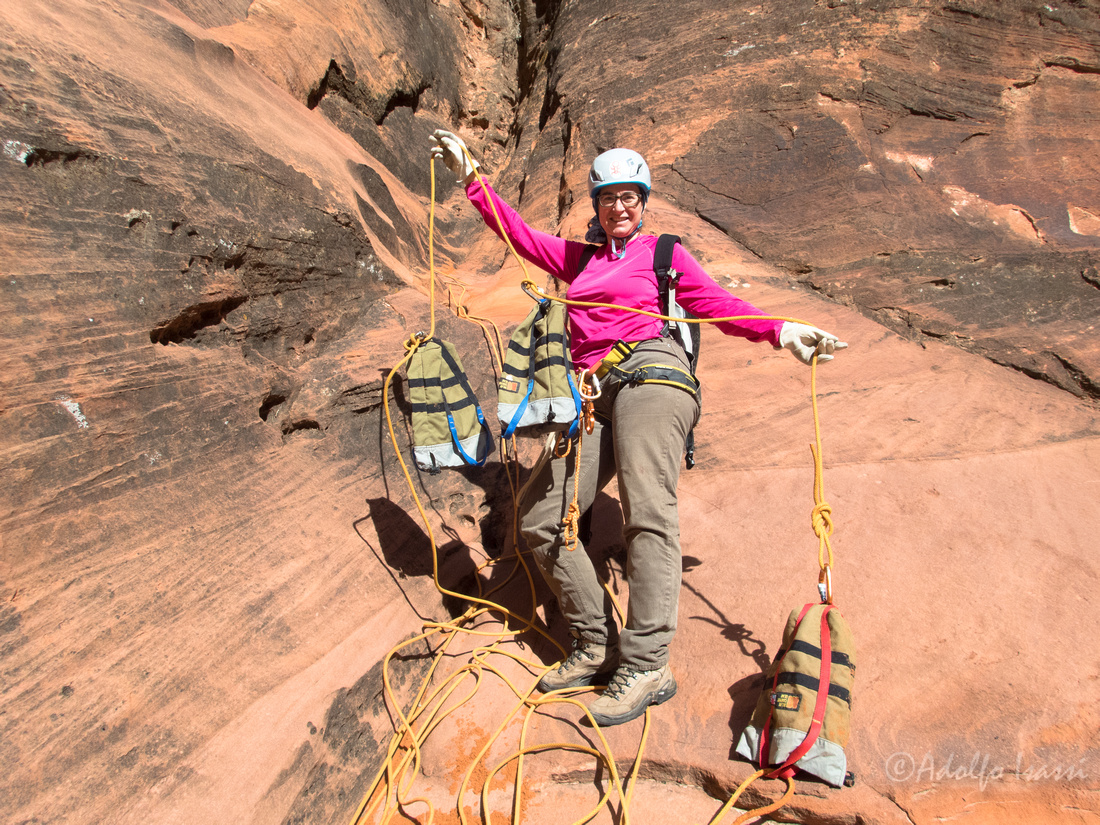
Stand side ways to the wall to minimize exposure to falling debris. Keep your head down to use your helmet as head protection. One arm high, and the other arm at chest level
****
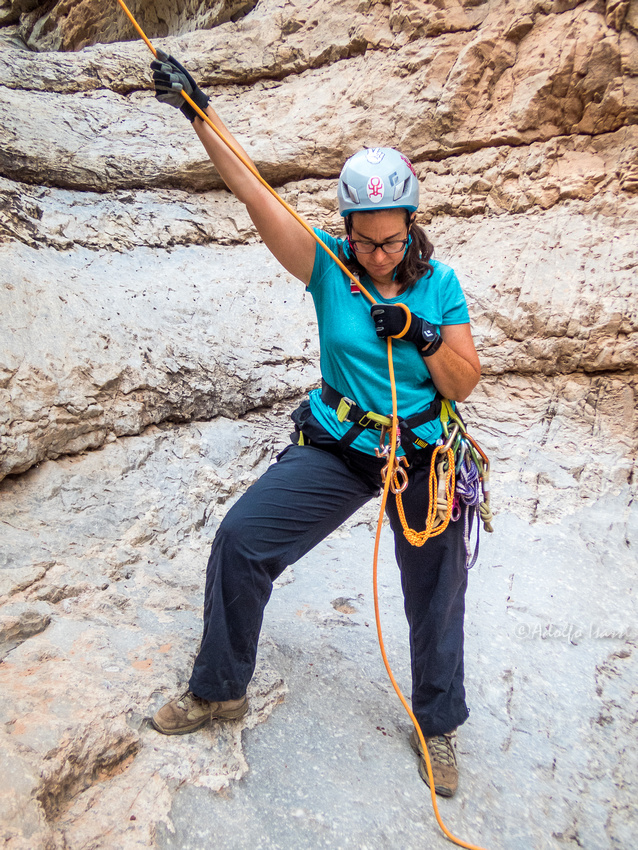
Put a wrap around the hand at chest level
***
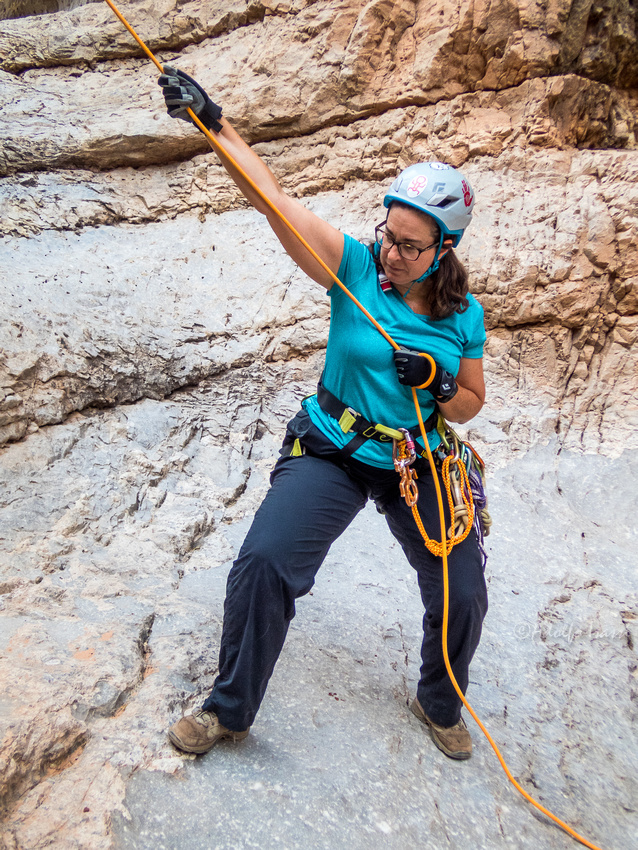
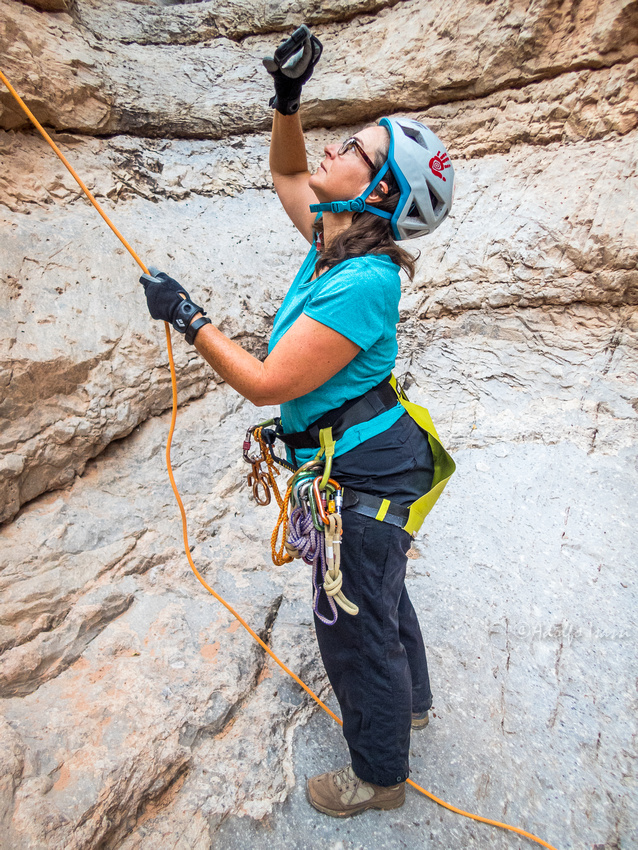
If a belay is needed, your team mate should alert the bottom belayer by shouting "tension!" Person on bottom belay immediately provides tension to stop the rappeller by flexing the knees and dropping center of gravity
***
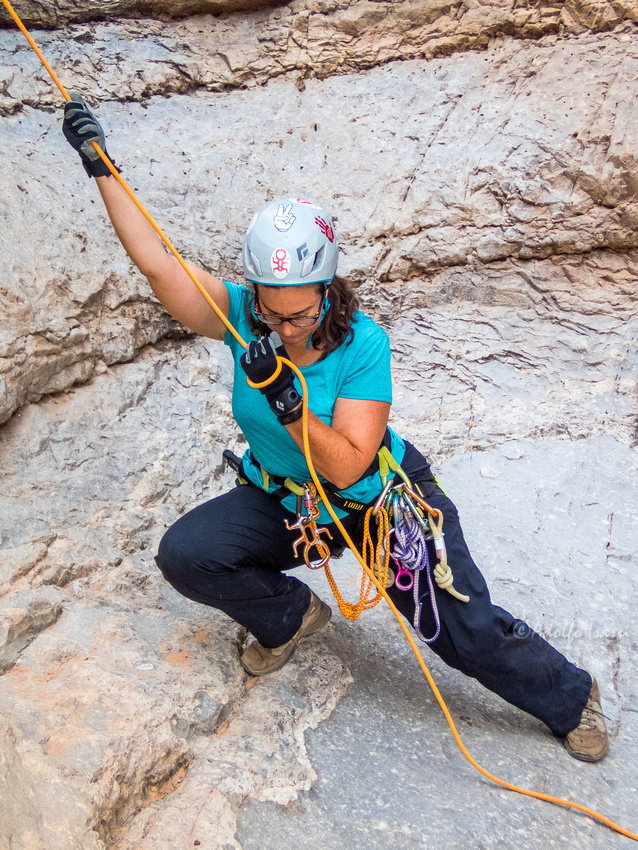
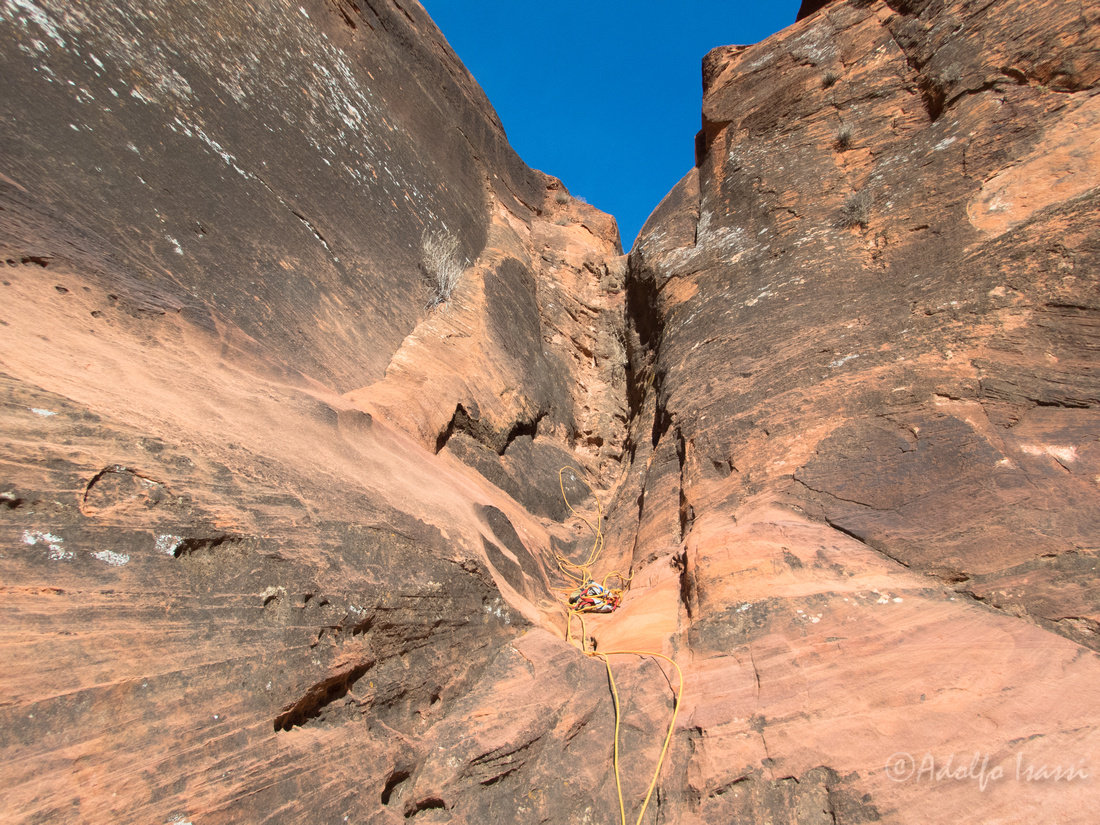
Stopping rappeller by tensionning rope from the bottom
***
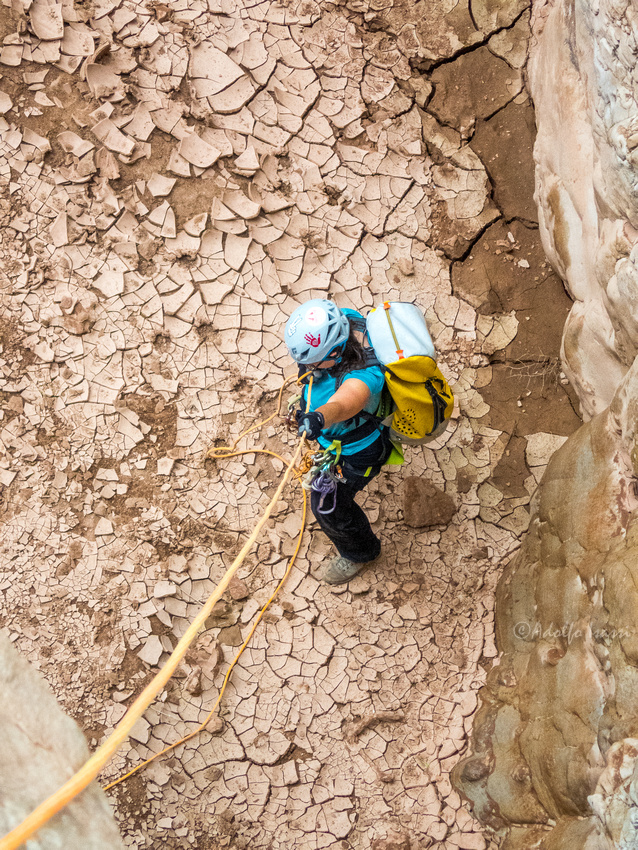
How an effective belay looks from the top.
***
How not to belay from the bottom
Wrong way. Body and face are fully exposed to falling debris. Hands and arms are not ready to effectively provide rope tension
***
Nope. Useless belay
***
Body and face fully exposed. Wrap is on the wrong hand.
***
How a wrong belay looks from the top. Body and face fully exposed, hands and arms not ready to put tension on rope
]]>
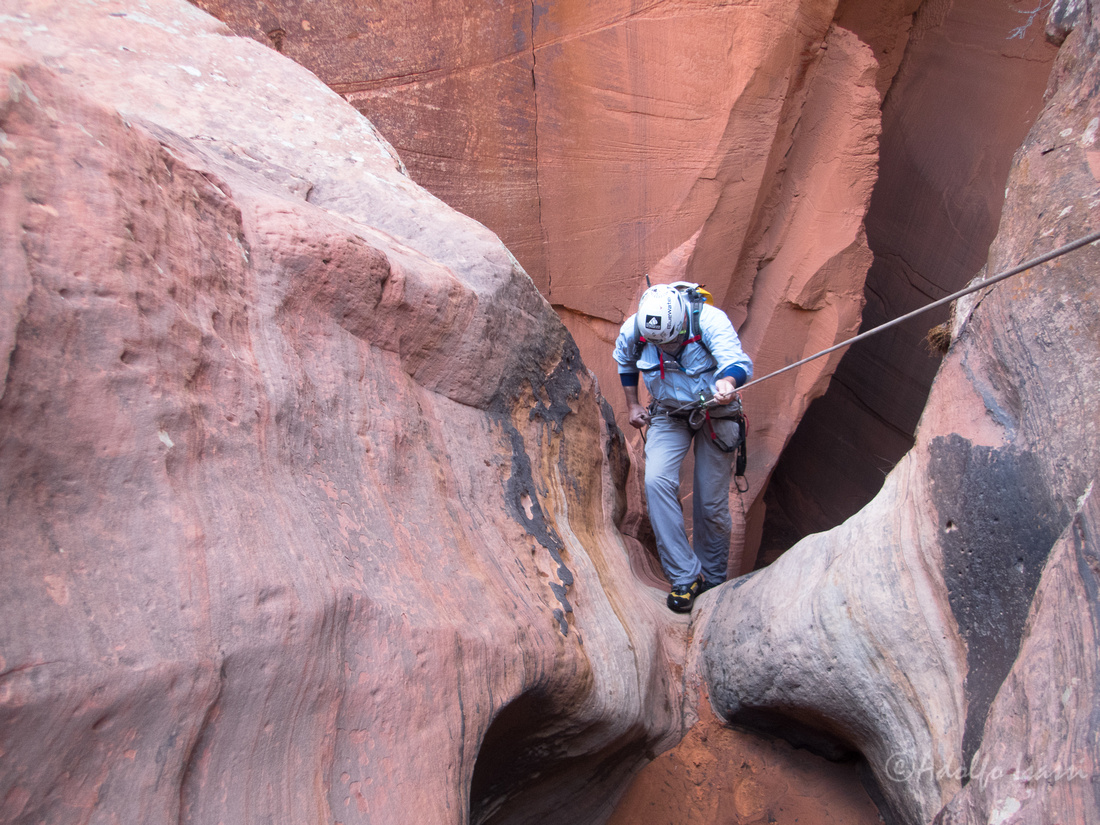
Twin rope systems are types of rappel rigging that offer 2 independent and isolated strands of rope available to rappel down to facilitate and move large groups of people down faster. While one person is rappelling down, another person is rigging her/his descender.
There are 2 types of Twin Rope Systems:
-
Static
- Rappeler can not be lowered in case of emergency. A "conversion to lower" needs to take place in case of emergency
-
Releasable / Contingency
- Rappeler can be lowered immediately in case of emergency
Static Twin Rope Systems
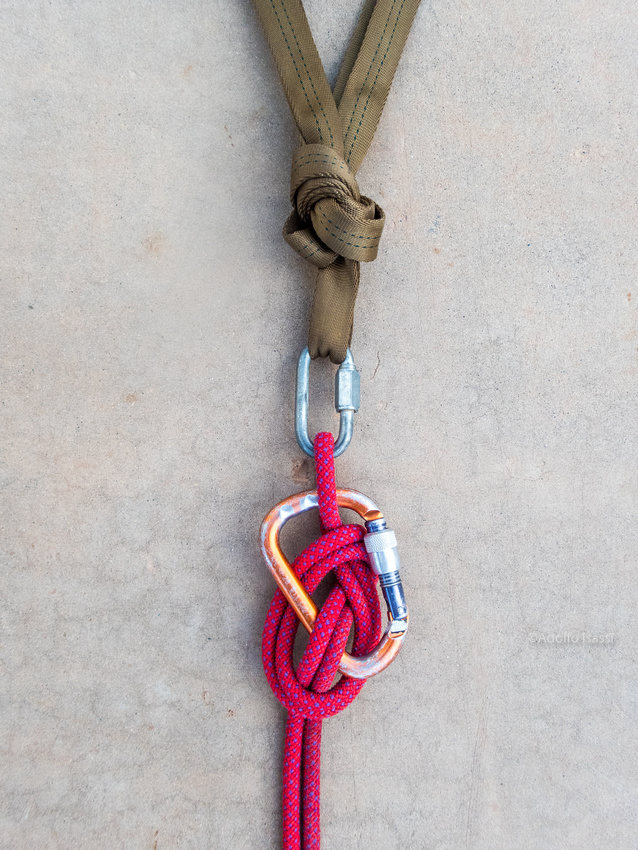
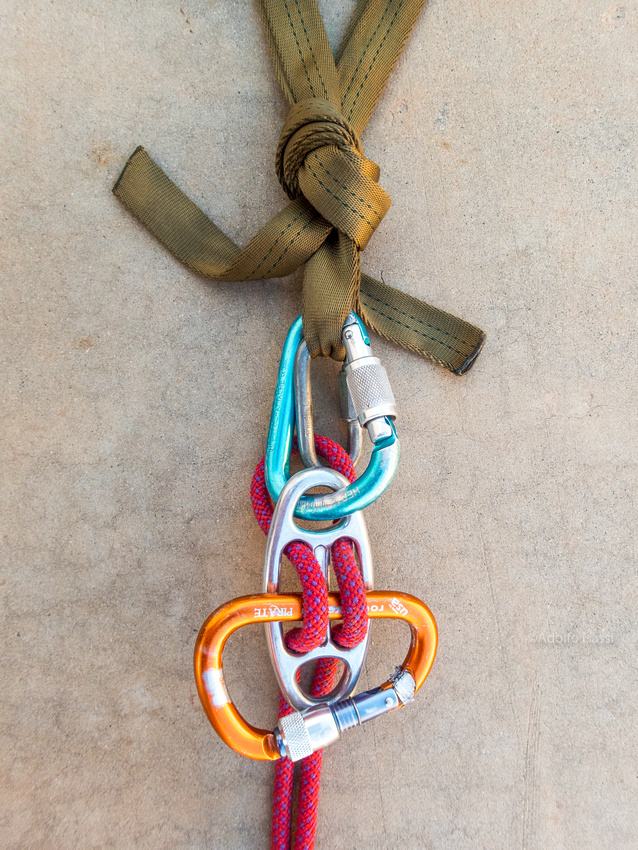
"Stone Block"
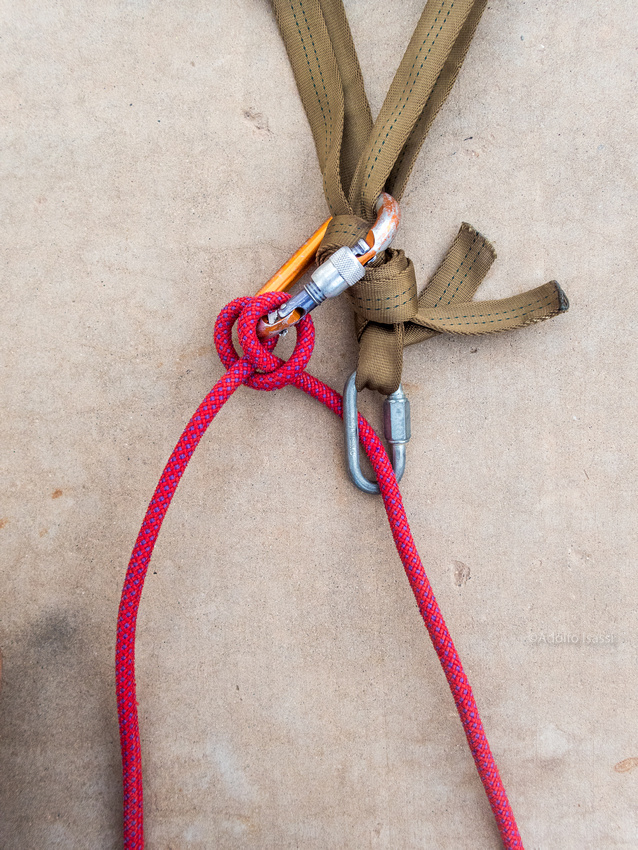
"Clipped Clove Hitch"
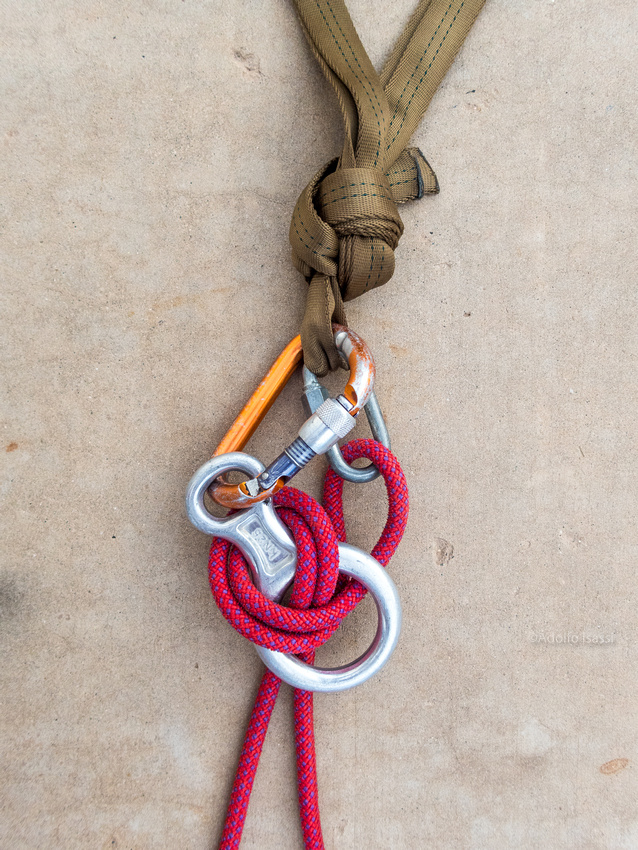
"Stone 8"
Releasable/Contingency Twin Rope Systems
"8 Joker"
(if rope is thin, 8 rigging may need wraps around the tails)
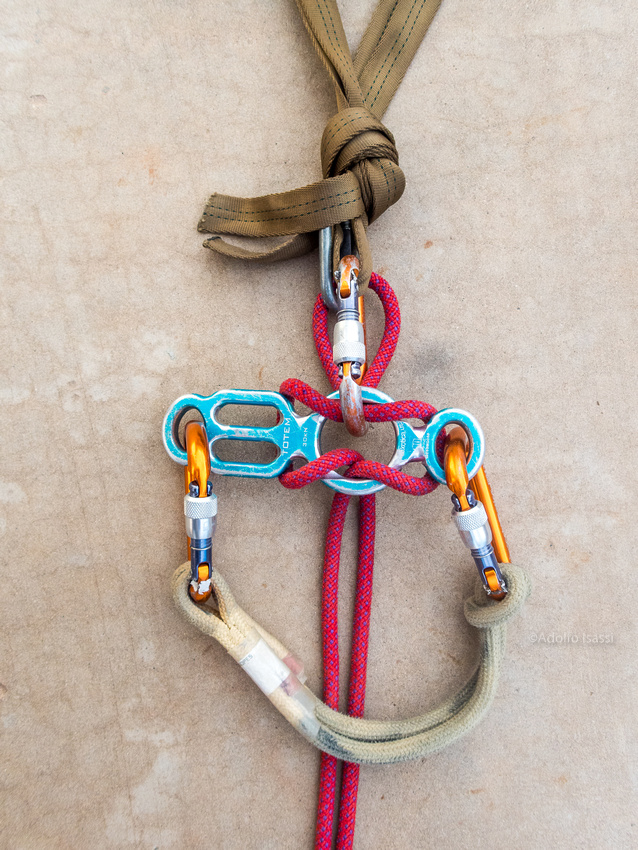
"Totem Joker"
(if rope is thin, rigging may need wraps around the tails)
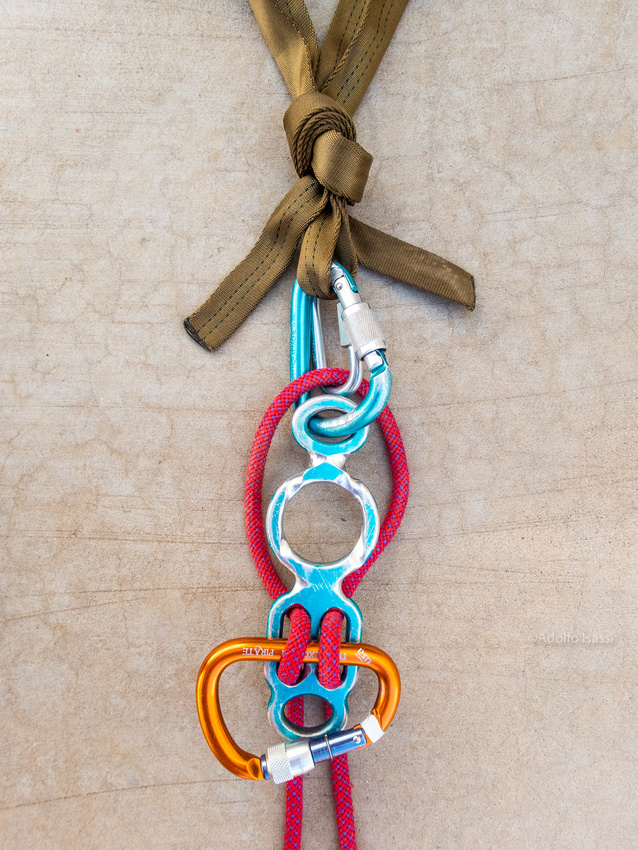
"Totem Jester"
(if rope is thin, plate rigging may need slip knots)
For Totem haters....
"Gigi Jester"
(if rope is thin, plate rigging may need slip knots)
]]>
The journey from thrifty canyoneering to over-geared canyoneering, and back
-O-
"Art of Canyoneering" is the first class that I took some years ago from Rich Carlson with the American Canyoneering Academy (ACA). Canyoneering is inherently a dangerous sport. This class aimed at giving you the knowledge to identify the risks and the tools to manage and minimize them.
Selecting and acquiring gear for canyoneering seems to be a hit and miss process. Lots of choices on the market, constant evolution of available gear, intersected with personal preferences, advise from instructors, friends, videos and....blogs! :)
There seems to be a range of types of canyoneers when it comes to gear choices:
On one end of the spectrum, the "Thrifty Canyoneer":
Some canyoneers are not only reluctant to purchase costly gear but also want to get by with a minimal amount of gear through canyons. I've seen some very skilled and experienced canyoneers perform technical tasks in canyons with minimal gear. These skilled canyoneers are not thrifty canyoneers. They carry plenty of gear, they just know how to perform tasks when gear is lost, broken, or forgotten. The actual Thrifty Canyoneers do not know yet the value of owning gear that is needed in case of emergency, or they hope that others bring such gear. I started as a thrifty canyoneer, trying to do canyons with my rock-climbing gear, and nothing else.
On the other end of the spectrum, the "Over-geared Canyoneer":
The canyoneer that has an over abundance of gear hanging from the harness, and he or she gets through the canyon without using it because some of it is not necessary. I myself, moved from a thrifty canyoneer to an over-geared canyonner, trying to match a piece of gear for every possible eventuality.
Finding a balance is an evolving process:
In all fairness, I think that there is a natural progression curve in which people start as thrifty canyoneers and move towards over-geared canyoneers, and finally dial down their gear to a personal, reasonable middle point.
Knowing what gear works best for you, what gear to bring depending on the canyon ACA rating, and what rescue techniques may be necessary in case of a mishap, takes training, experience, and willingness to experiment with different gear. It is a process that at some point feels like an art.
The Art of Canyoneering class approach was to let you choose your tools while exposing you to a range of choices, underlining that the important aspect, was not the particular tool or piece of gear, but the principle behind the usage and application of it. I've seen other more prescribed and dogmatic approaches towards gear selection, which makes teaching a simpler, faster process. Not sure what way is best. I guess as long as you know how to perform the necessary tasks safely and with a reasonable range of available tools, it's OK.
On the pragmatic side of canyoneering, let's face it, some of the routes out there are brutal, you do not want to carry extra gear that is not useful, and you want it to be as light as possible. Art of Canyoneering focused on how to select gear that could perform several functions on its own or combined with other pieces of gear: Multifunction gear.
This is the backstory behind my current canyoneering gear rack. I think is still evolving, as my skills evolve, I engage different type of canyons and gear choices also change and evolve.
As part of the ACA, sometimes I engage in leading canyons or practice sessions, and gear issues or questions come around. So I will go through my current gear and see if the selection behind it helps you in the selection of yours.
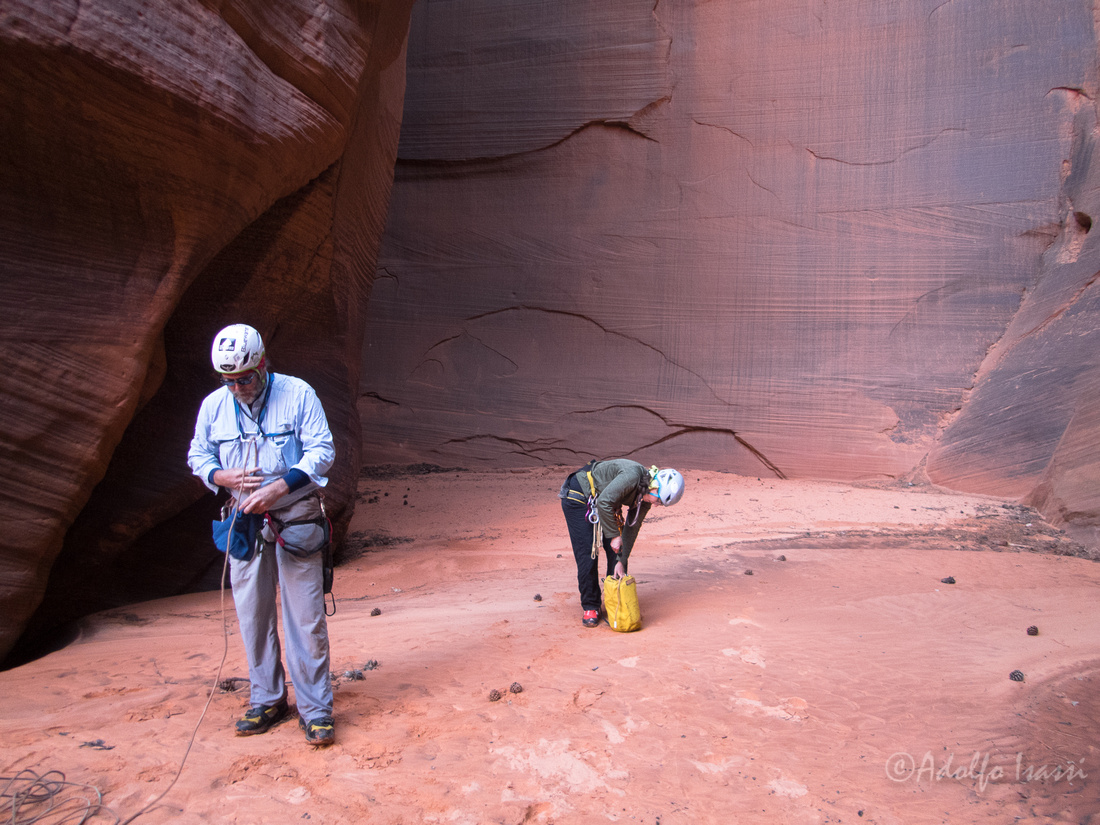
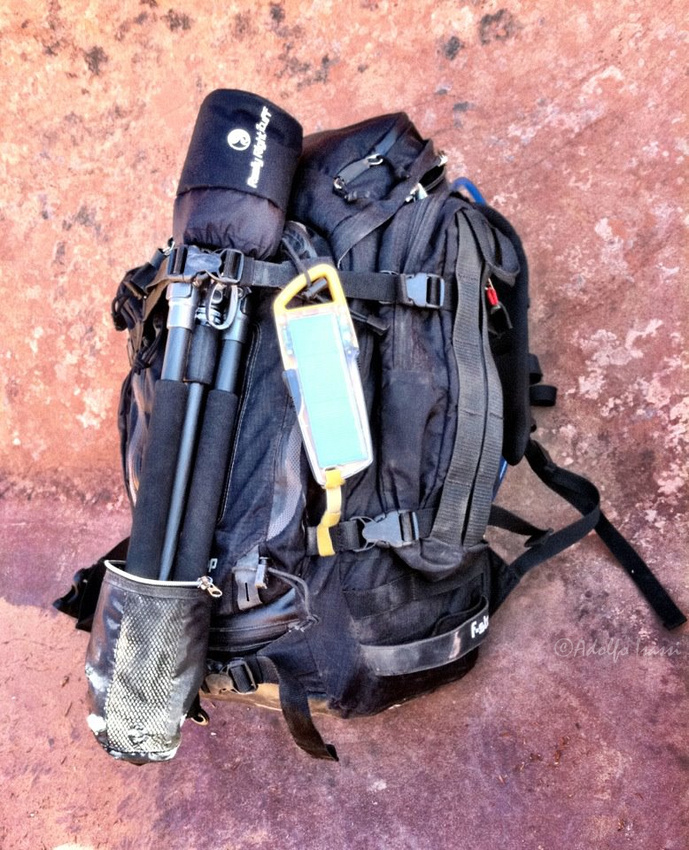
Everything that you will see in the next photographs, fits in this bag. This bag uses a fraction of my 45L standard canyoneering bag , and leaves room for a wetsuit, harness, helmet, up to 300' of 8mm rope, First Aid Kit, water, and food. Sometimes, this includes a small packraft. So, the point is, this bag size is not an issue. Even in small skinny canyons, this bag will fit in a 15L bag with all gear required for such a canyon. The bag is organized in a way where the items that are used the least, are at the bottom, and the items that are used the most, are at the top.
Bag from Top to Bottom
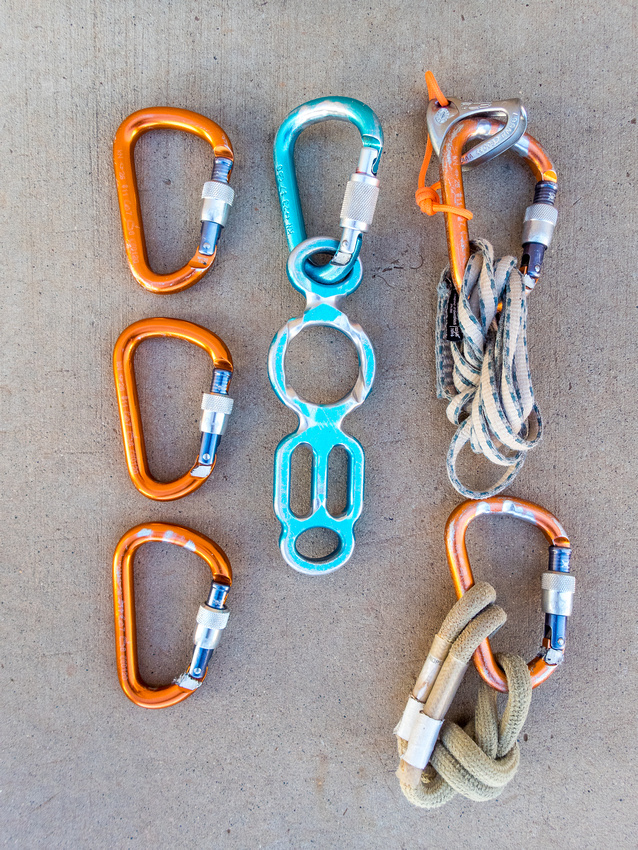
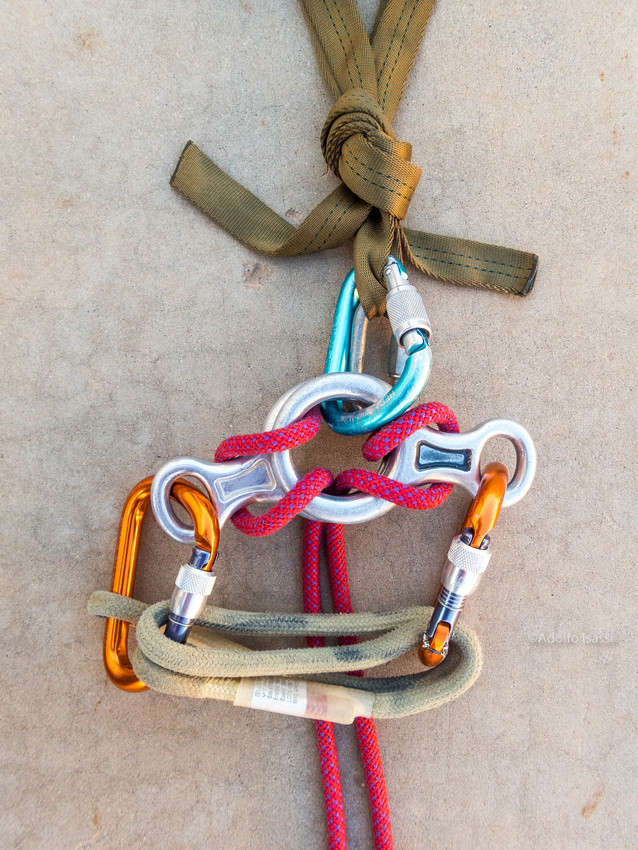
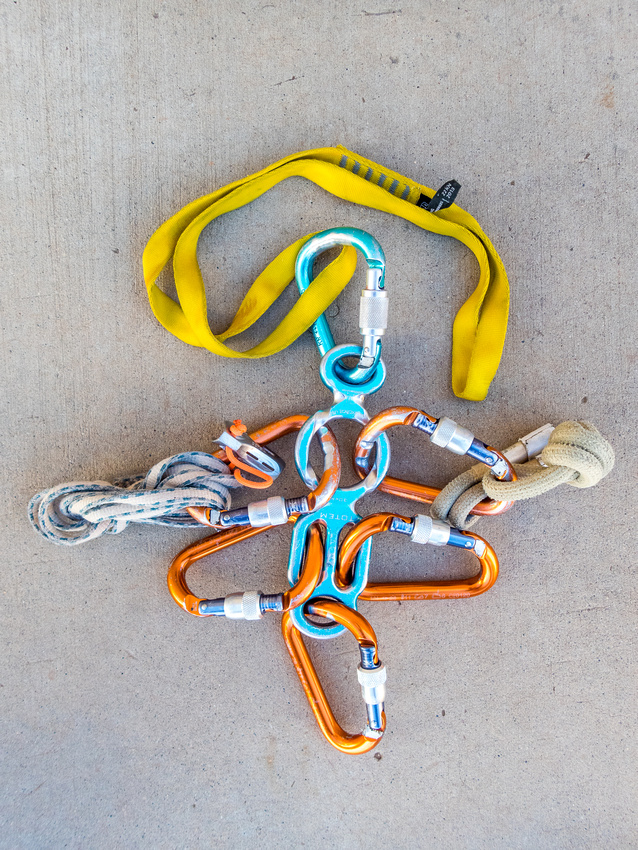
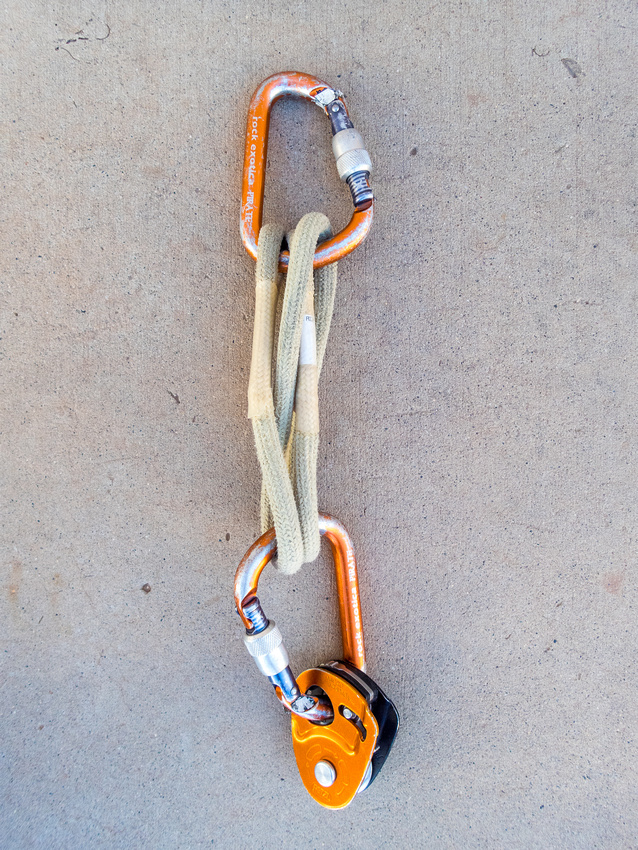
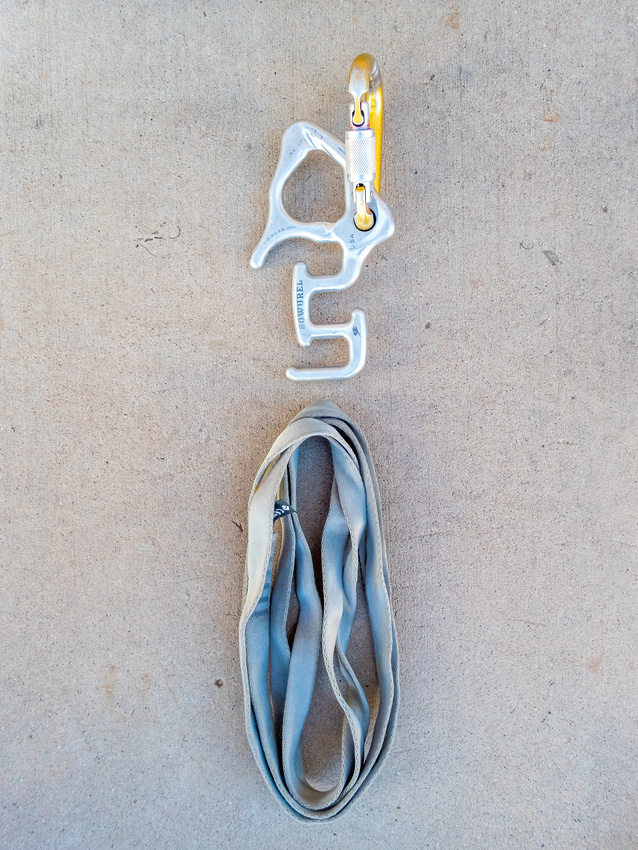
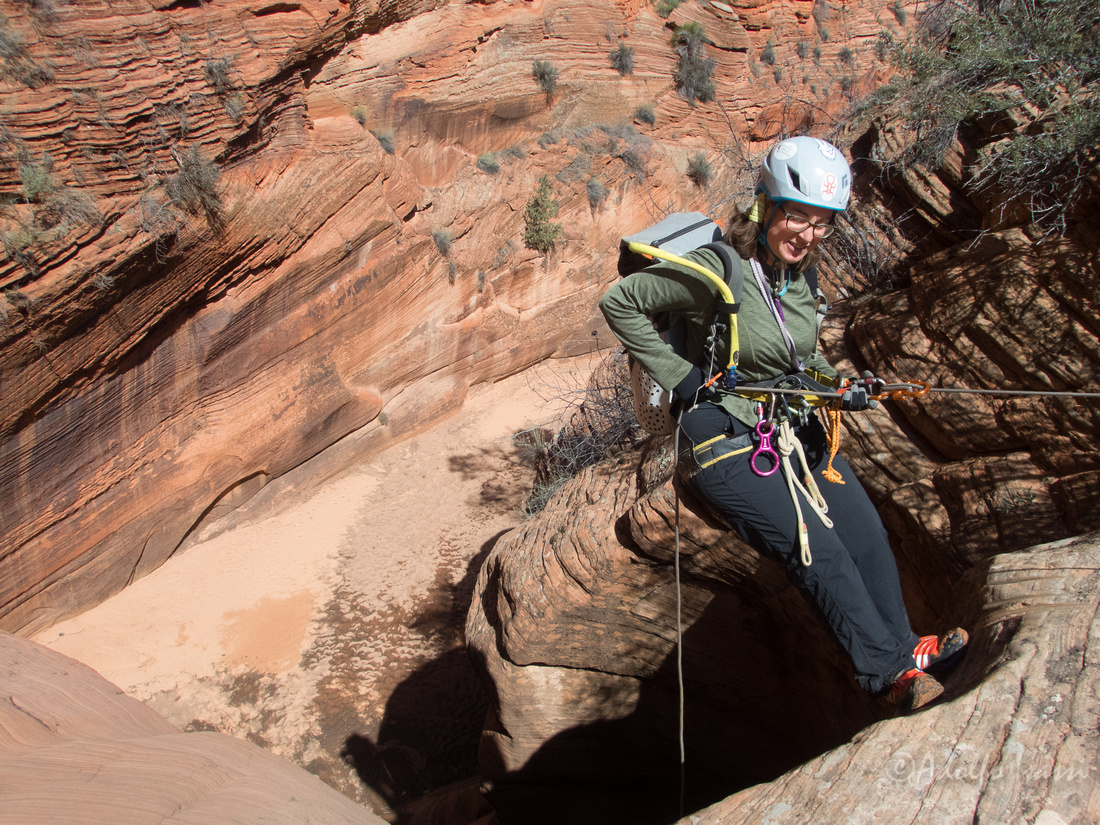
I call this, the "Totem Rack". It is at the top of the bag, and is the first thing that I pull racked like this:
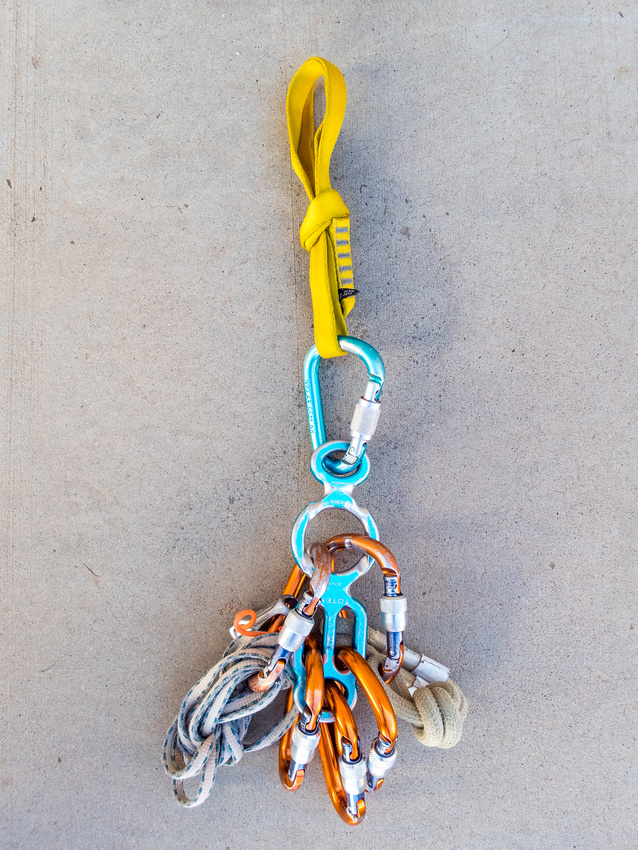
With what you see in this photo, you can:
- Rappel single or double stranded
- Rappel with a self-belay above, or below the rappel device.
- Rappel double without twisting the ropes, to have a clean pull.
- Rig static single or twin rope systems
- Rig contingency/releasable single or twin systems
- Rig Rig contingency/releasable single or twin systems + a top-rope belay
- Convert to haul on the fly
- Rappel down and pass a knot
- Rig a guided-rappel
- Perform basic self-rescue
- Ascend rope
- Ascent a tensioned tope
- Descend a tensioned rope
- Perform rescue conversion from static to lower on single rope, double rope or "tails up".
- Install a Dead-Man-Switch
- Install a Canyon-Quick-Draw
- Install a retrievable safety line
- Rap pack hanging and leave your safety tether free for self-rescue.
- Perform rescue pick-off with up to 3:1 mechanical advantage
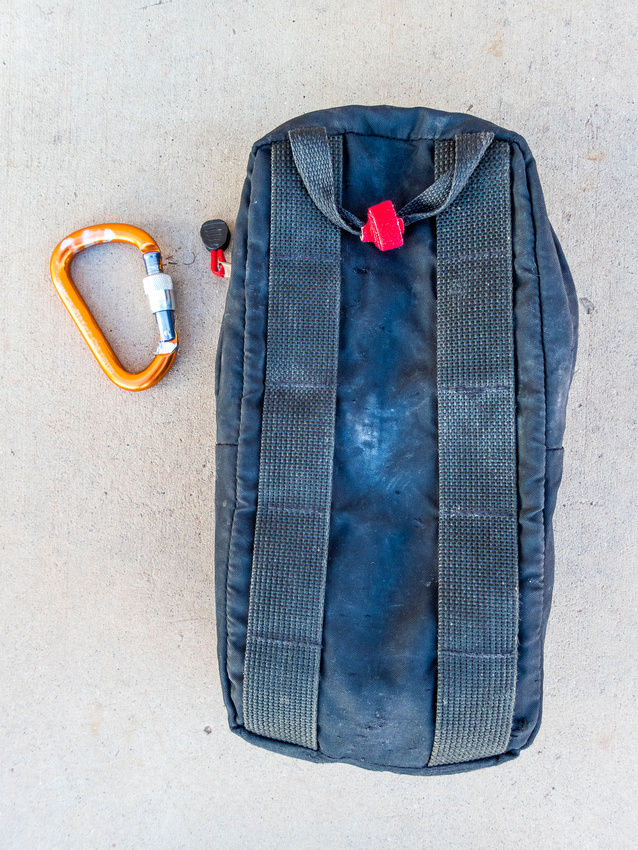
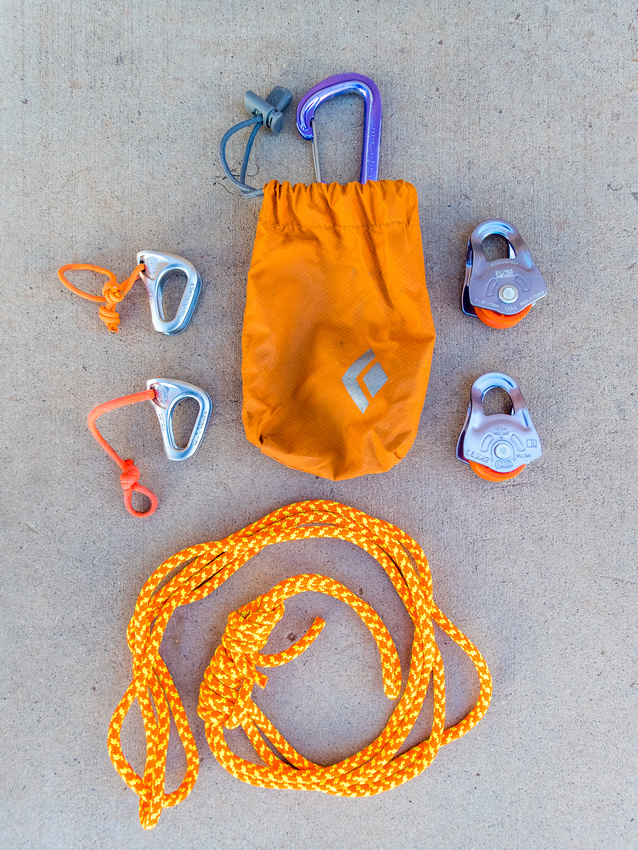
Next gear out of the bag in case I need to:
- ascend a long way (Microtraxion)
- ascend and pass a lip on the rock, or a knot in the rope
- perform a rescue by converting to a haul system
- haul with mechanical advantage up to 5:1 complex (combined with initial base gear)
Next gear out of the bag in case I need:
- to install a mechanical advantage in a haul system that exceeds a 5:1 complex
- install a system to tension rope that requires self-minding pulleys to protect the rope sheath.
- to perform a rescue Pick-Off where I may need 5:1 mechanical advantage
- a foot loop that cinches on my foot (long Purcell Prusik. Sometimes a shorter version in my harness as a safety tether)
Bottom of the bag:
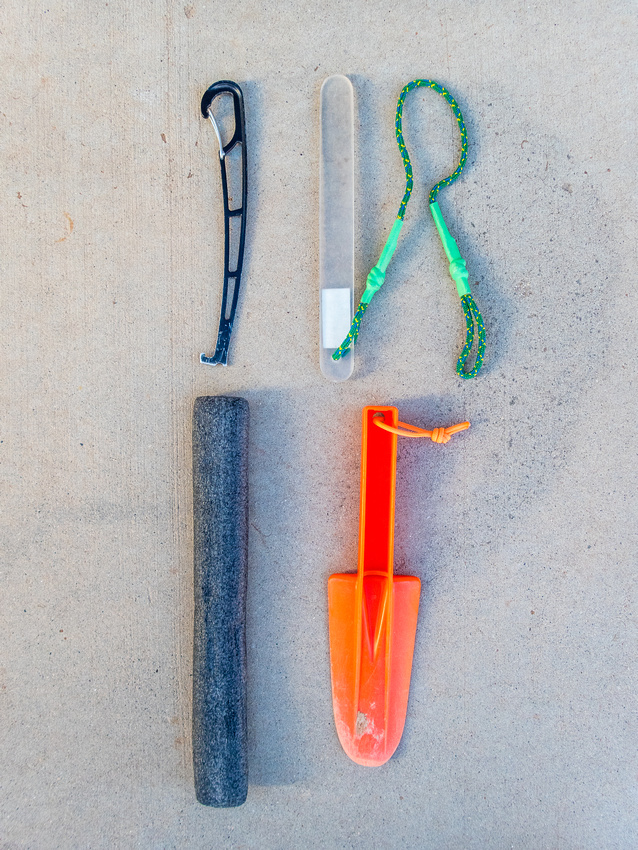
Anchor building bits:
- A crack cleaning/nut tool to clean cracks and pinch points. That tool can also check bolt heads. This tool can be used also to loosen tight knots after heavy loading.
- A "fiddle stick" for emergencies (like running out of webbing), very tricky rope pulls. Not an every day tool for me.
- A piece of pipe insulation for rope-edge-protection
- A shovel to dig dead-man anchors and fill potshots or sand-traps.
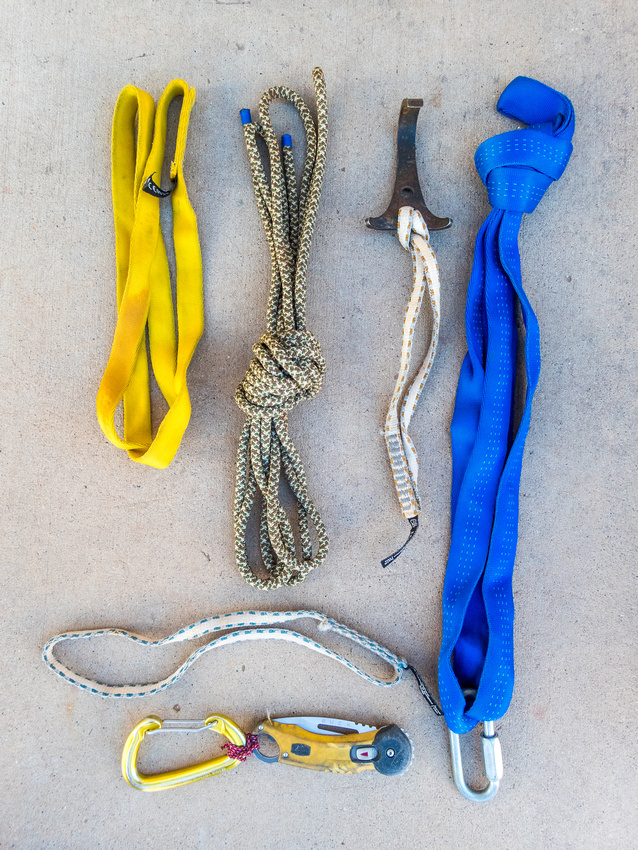
Rigging odds and ends that help.
- Webbing and rapide to build a "piggy back anchor" sometimes helpful is rescue scenarios
- Grappler hook for drops where LAMR was meat anchor (rarely used, but has saved me a couple of times)
- Short runners to extend master points in rigging scenarios.
- Accessory cord for more rescue tricks, repairs, emergencies
- Self locking knife for hard to cut webbing, cord, rope (I have a Trilobite EEZYCUT on my harness)
Depending on the particular canyon:
For 200+ overhang rappels on a skinny 8mm rope, I switch to a rack-inspired rappel device with which I can fine tune friction on the fly. Sometimes a double runner to rig a chest harness if needed.
Some notes:
The gear depicted in this post, is my personal selection and not an advertisement on the brands. The gear selection also reflects the type of canyons that I descend often in the American Southwest. The important concept is that the gear that you select, performs the often needed canyoneering tasks, the emergency canyoneering tasks, in the type of canyons that you descent.
]]>
Installing Sleeklens Lightroom presets was a breeze. Just unzip the package, and copy the presets to your Lightroom catalog "Develop Presets" folder and "Local Adjustments Presets" folder. The instructions are here:
How to install Lightroom Presets
How to install Lightroom Brushes
Sleeklens offers photography packages for Adobe Photoshop and Lightroom. I use both, but through the years, I've been sidelining Photoshop more and more and switching to RAW editors. I started years ago with CaptureOne, and eventually settled on Lightroom. There is plenty to write about the benefits of RAW shooting and the benefits of Lightroom. That could be a lengthy post, but during my review, I realized that these two aspects, Shooting RAW and Lightroom are relevant to the benefits of Sleeklens, and how to use its presets:
Benefits of Lightroom and Sleeklens:
One of the key benefits of Lightroom is that it is a "non-destructive editor": Non-destructive editing is a form of audio, video, or image editing where the original content is not modified in the course of editing. So, no matter how many edits or corrections are done on the photograph, they can be reverted, re-applied, or . . . saved independently of the original photograph! So they can be re-used on other similar photographs. Saving one, or a number of, edits into applicable actions is what Lightroom calls Presets. And what Sleeklens offers for Lightroom is a list of presets ready to be applied to your photographs.
Lightroom comes already with some basic Presets, and you can use your own edits to create and save your own presets. So why get Sleeklens presets?
To answer this question, let me jump first to point out another benefit of Lightroom: Great photography technical knowledge is embedded in the way the Lightroom user interface is designed and organized, particularly the Develop Module.
Develop Module
It is no accident that in the Develop Module the first thing to set/edit is the White Balance setting. This is the setting that will lay the foundation for the color and mood of the image. Next is all the Exposure related settings (exposure, contrast, shadows, whites, blacks). As you move top to bottom on the Develop Panel, you move from the basic settings to the finishing touches.
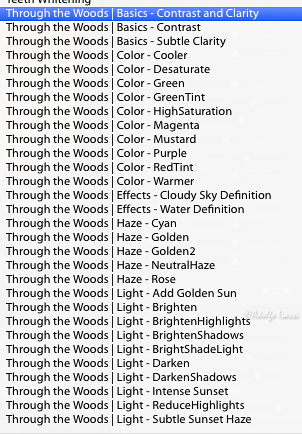
The Sleeklens Bundles present the same benefit: They have a great deal of image editing knowledge embedded in their Presets and Brushes. And its Landscape "Through the Woods" bundle is organized the same way: Base edits, to finishing touches.
What you need to know about RAW and Sleeklens:
The RAW file that a digital camera produces is akin to a film Negative that needs to be developed. Lightroom is one of the "dark rooms" that you can use to develop and print your "negatives." The key aspects of RAW shooting is the freedom to play with key specific camera settings in post production while minimizing pixel loss or degradation due to camera sensor native file format conversion to something else like JPG, TIFF, PNG, etc.
This technical aspect of digital photography is relevant to Sleeklens Presets because these presets do not alter certain aspects of RAW files. Most noticeable White Balance. I shoot with Canon, Nikon, and Olympus RAW capable cameras, and Sleeklens landscape presets do not alter CR2, NEF, or ORF white balance and other of these file settings. So, for example, when a "Warm It Up" preset is applied, Sleeklens uses "Tone & Tint" (Split Toning on shadows and highlights) to achieve a warmer overall color temperature.
This is perfectly fine. You just need to be aware of this, so you make a judgment call and apply your desired white balance before, or after a Sleeklens preset.
Hands on Sleeklens:
After installation and watching these video tutorials, I decided to select some recent RAW files that present some of the most common post-production landscape photography challenges:
- Bland and flat image due to overcast sky light
- Underexposed foreground due to high contrast scene with bright sky.
Bland and flat image due to overcast sky light
This is the original RAW file undeveloped
This is the developed RAW file with my usual workflow

This is the Sleeklens result after applying:
Base Punchy, Exposure Darken, Exposure Darken Shadows, Color Pop, Warm it up.
Right after applying these Sleeklens presets, I manually adjusted the contrast down to bring the image closer to the result of my usual workflow.
As you read the name of the applied Sleeklens presets, you can make sense of how the image is getting developed and refined.
Underexposed foreground due to high contrast scene with bright sky
 Here is the original undeveloped RAW file. You can always recover dark shadows, but you cannot recover overexposed, washed out skies. Knowing this, when you want to capture a high contrast scene, you need to expose for the sky and compensate exposure to pull out shadows out of total black. When the exposure difference between sky and shade is too much, usually more than 5 exposure stops, you will need to resort to some techniques like: Graduated Filters, Multiple Exposure Blending, One RAW Multiple Develop Blends, Tone Mapping Software, etc.
Some of these techniques are labor intensive and prone to contrived looking results. This particular problem, extending the dynamic range of an image has been the panacea of software tools in the last ten years or so. Now days, this is commonly referred as HDR (High Dynamic Range).
Here is the developed image by manually wrangling the shadows out, while keeping the sky under control. This was a time consuming process.
Here is the Sleeklens result after applying:
Base High Dynamic Range
This was for sure a "wow" moment to see a single preset getting a very similar result, yet saving me quite a bit of time. The rock has a blue cast, but here is where the Sleeklens brushes come in handy to apply small area corrections.
Sleeklens Brushes:
Similar to Lightroom Presets, at the top of the Develop Module, Lightroom has a set of "Local Adjustment Tools." One of these tools is the Brush where you can apply an array of corrections to a small area.
These Sleeklens Brushes also pack a lot of knowledge, and the names are intuitive and easy to understand:
Conclusion:
I really liked the basic concept of adding value by extending Adobe Lightroom's existing framework. The installation will not alter dramatically your existing Lightroom catalogs, and all the Presets and Brushes follow the same behaviors as all other Lightroom edits: Non-destructive, adjustable, reversible, stackable.
It looks like for both seasoned photographers, or beginners, Sleeklens will save time and teach you a thing or two while you work on your files.
You can check:
The Sleeklens landscape bundle here
Their professional editing services here
And the rest of the presets bundles here
]]>
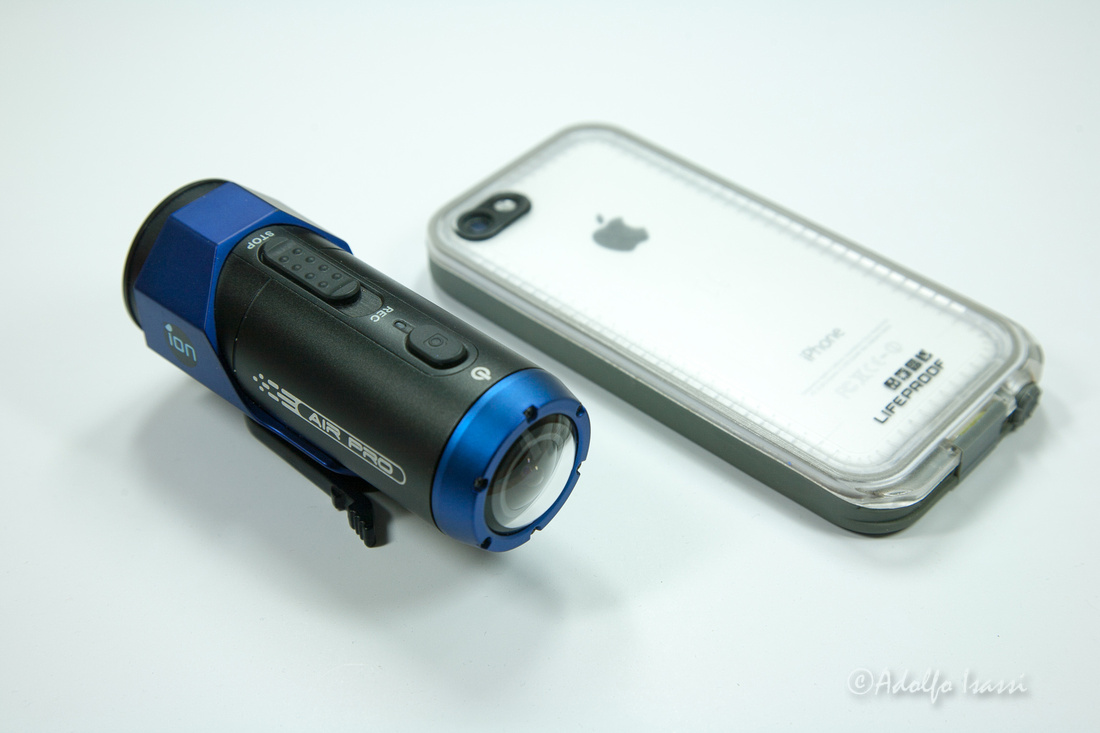
Ion Air Pro first impressions
Through the years, I've been resisting the lure to use video. During a long trip in 2010, I tried to use video as a way to document the conditions surrounding the endeavor of landscape photography. I think that effort was a failure. Lack of focus, too long clips, etc. I think I learned what not to do.
With my involvement in canyoneering, video re-surfaced as an attractive medium to document canyon descents. Photography cannot capture the whole experience. This time, I decided to leverage my photographer background and treat it as linked photographs: Framing & Panning.
Framing & Panning: Video taken with Olympus TG-4
Another source of great inspiration and experience was my involvement with the American Canyoneering Association's efforts to produce technical "know how" videos like this one.
My involvement in the production of these videos heightened my awareness of the importance of editing and post-production to making a compelling video.
For canyoneering videos, the Olympus TG-4 has proven to be a very capable tool to record footage up to 1080p through the canyons. The main issues that I've found with the TG-4 are:
- keeping the lens from fogging up
- zooming introduces motor noise
- the camera cannot be mounted/operated hands free
Initially, I stayed away from "action cameras" like the GoPro to film sequences that require "hands-free" operation. The main reason is that it is very difficult to frame the shot. You just do not know exactly what is in and out of the frame. GoPro and other action cameras have a way to add a small LCD screen for this purpose.
Also, the market got flooded with action cameras taking a shot at GoPro's market. Sony, Olympus, Garmin, are some of the big names that got in. One camera that got my attention was the Ion Air Pro, for the following reasons:
- It needs no extra waterproof housing.
- It can connect to iPhone to use phone's screen as a remote / framing screen.
- It uses vibration to indicate recording on/off (no there's need to confirm for that the red light is flashing).
- It has a big sliding button to record, so on/off can be operated with gloves.
- It can be held on hand steady w/o extra attachments.
Use iPhone to operate and configure camera
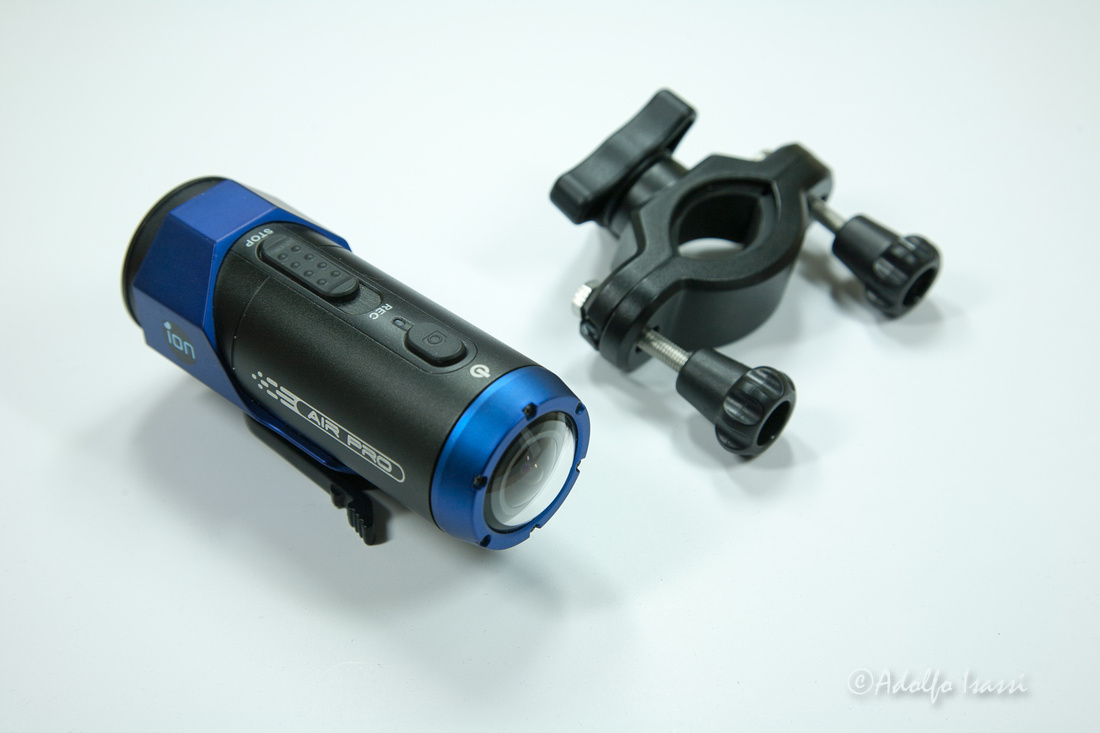
Mount on bike or hiking pole
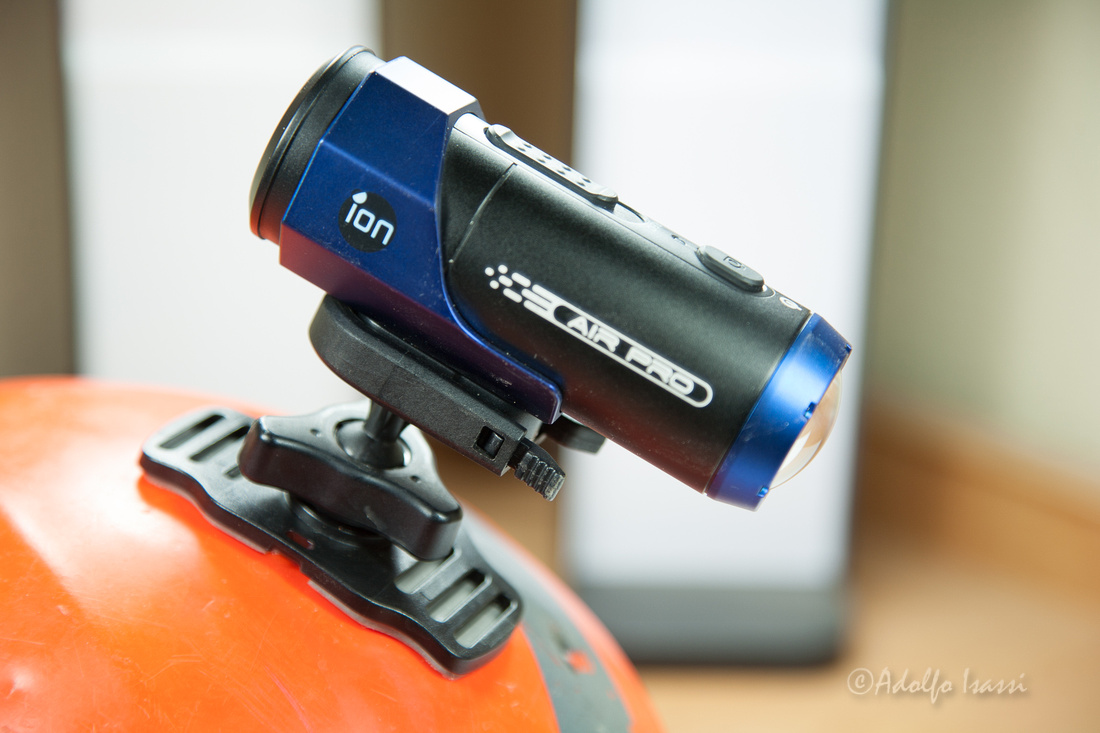
Helmet mount
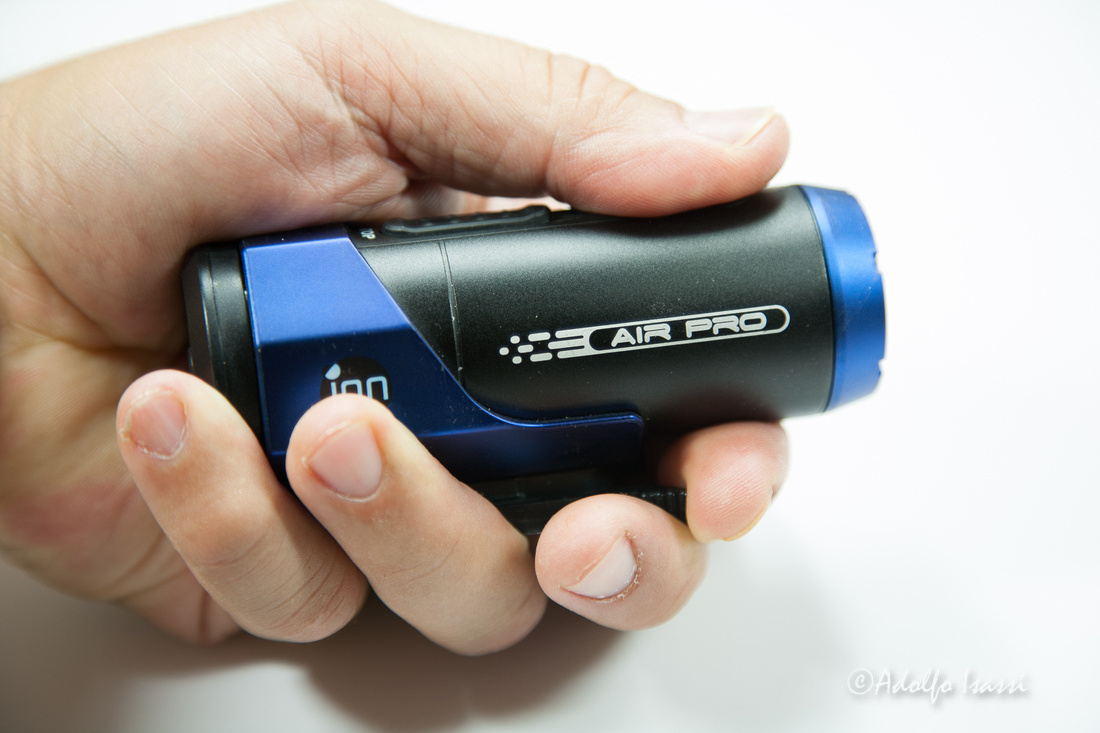
Great handling without any extra accessories
I have been using the Ion Air Pro camera for some weeks now, and I'm satisfied with the results. So far, some of the shortcomings for the Ion are:
- There's digital noise under low light.
- The curved housing for the lens does not allow camera to focus under water.
- For fast moving videos, like Mountain Biking, you need to set the camera to 720p to shoot at 60fps. If you leave it at 1080p, you will get 30fps that results in rolling shutter effects.
Video taken entirely with the Ion Air Pro camera
One other camera that I would love to test is the new Olympus TG-Tracker.
]]>

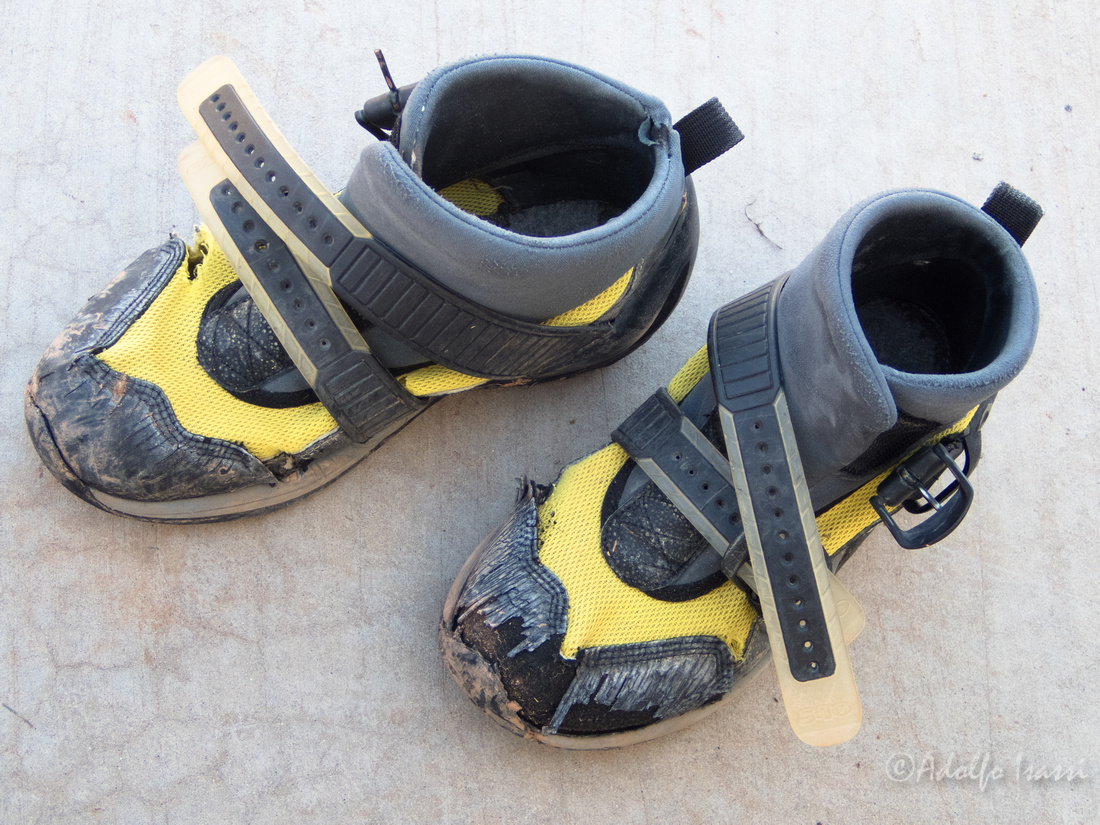
Old 5.10 Canyoneers. This design held for years. The goofy look and recognizable tracks on dirt made it easy to spot them in the wild.
It looks like this model hung in there for years. The rand was kind of low, and they would wear fast in exposed areas, but early runs of this model were pretty OK. In later years, runs of this model became famous for delaminating early and often.
In 2015, my 5.10 SARs delaminated after 3 canyons.
5.10 replaced my Canyoneers 2 SARs with a pair of the new 3s. While waiting for the replacement, I got a pair of Bestard Canyon Guides. These are boots made in Spain and it looks like Bestard is a serious brand of mountaineering boots (www.bestard.com) from Adventure Plus
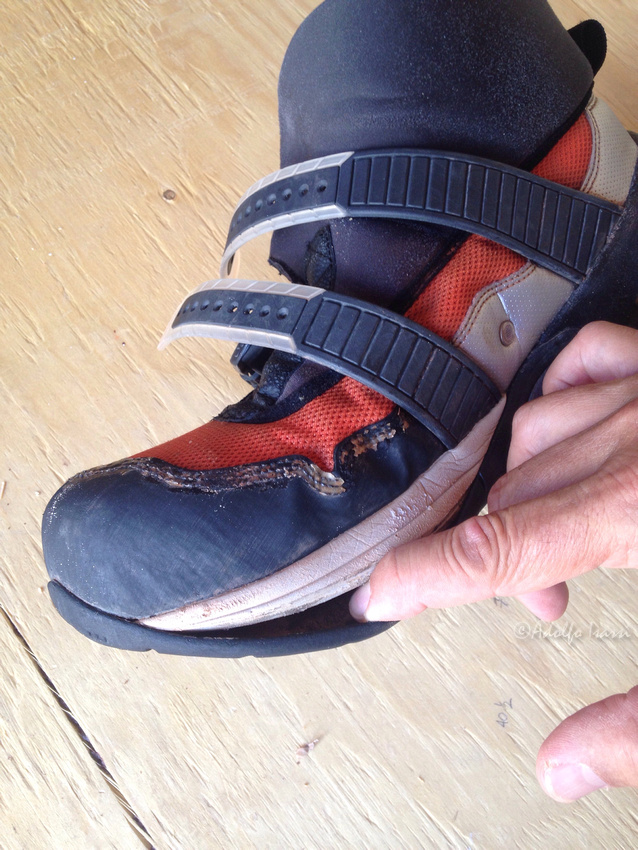
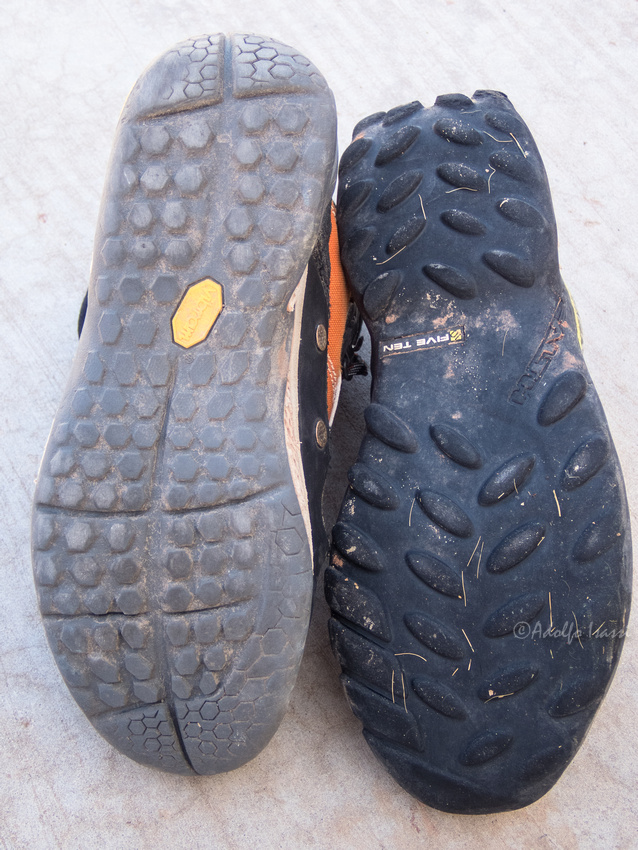
On the left, Bestard Canyon Guides. On the right, 5.10 Canyoneers 3. Both after a year of canyoneering.
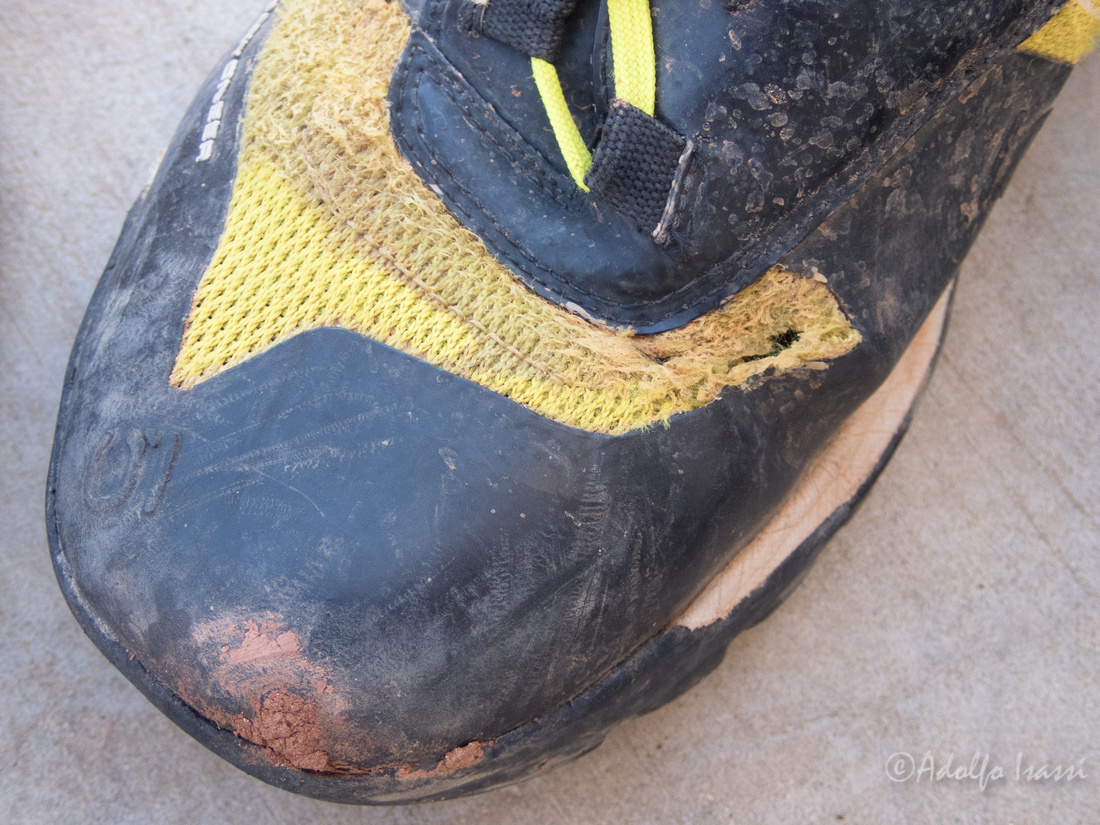
5.10 3's Do not delaminate, but have weak spots in the front. I had to cover the front mesh in Aquaseal to keep the mesh from disintegrating.
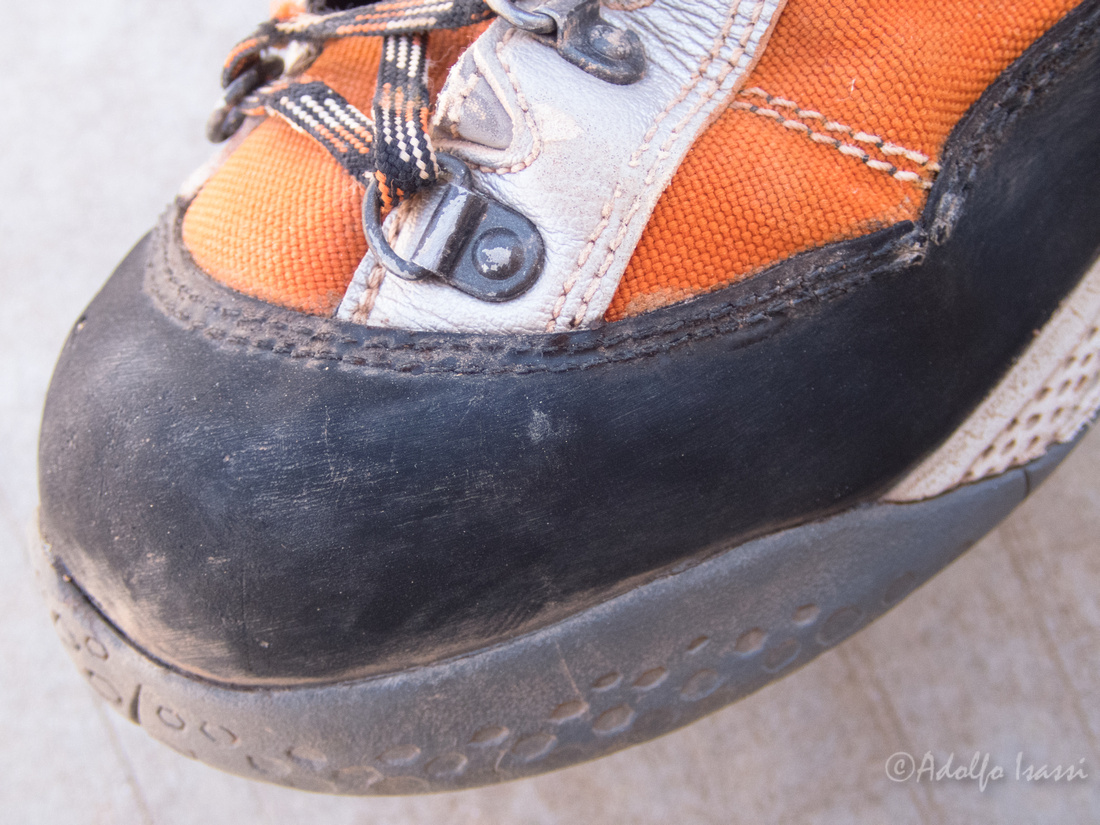
Bestards holding pretty good after a year. Weak spot seems to be the rand where the foot bends.
5.10 Stealth rubber is famous for being sticky. I found Bestards to be just as sticky. I like how the Besatrds have a better edging zone on the inside foot.
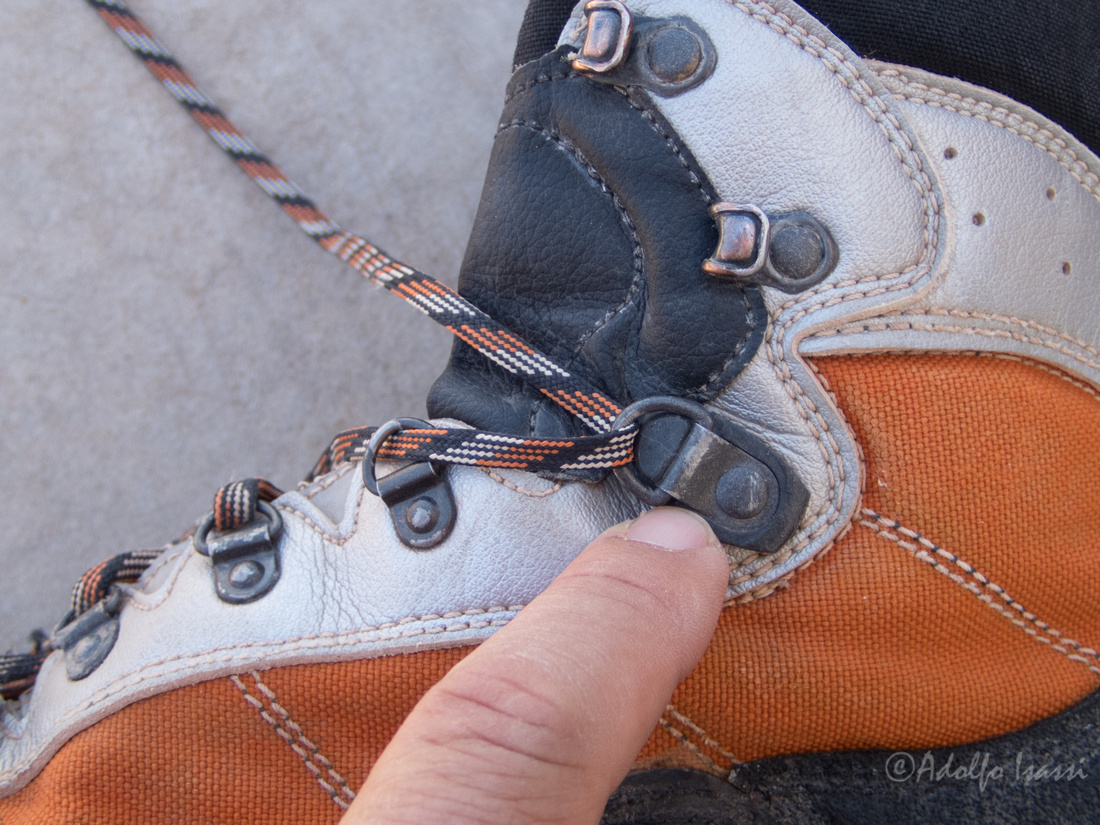
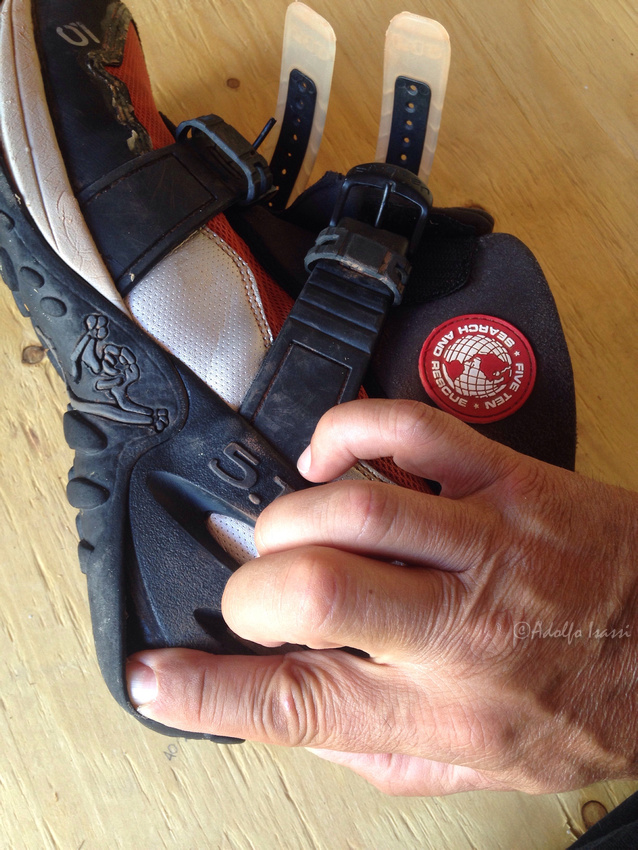
Cool lace locking mechanism.
Neck is useless to keep sand out.

5.10 sole profile with notch under the arch gets stuck in rock features.
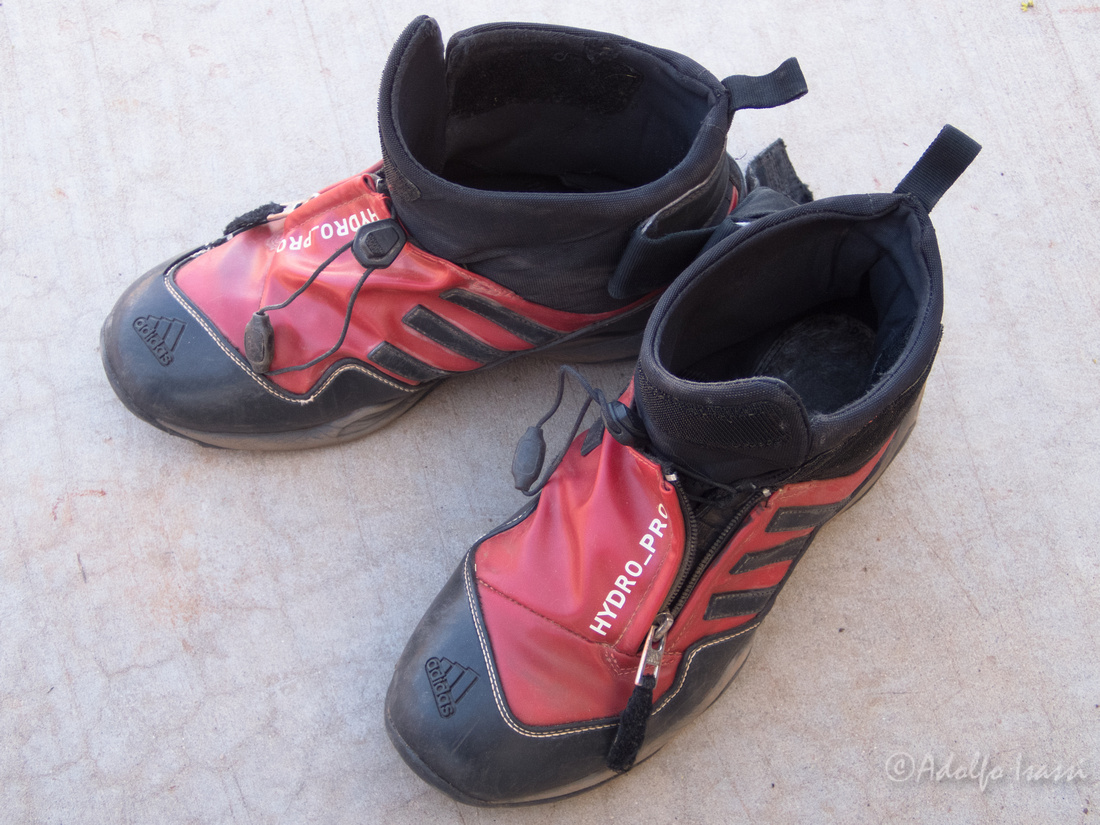
Other options are in the Adidas lineup.
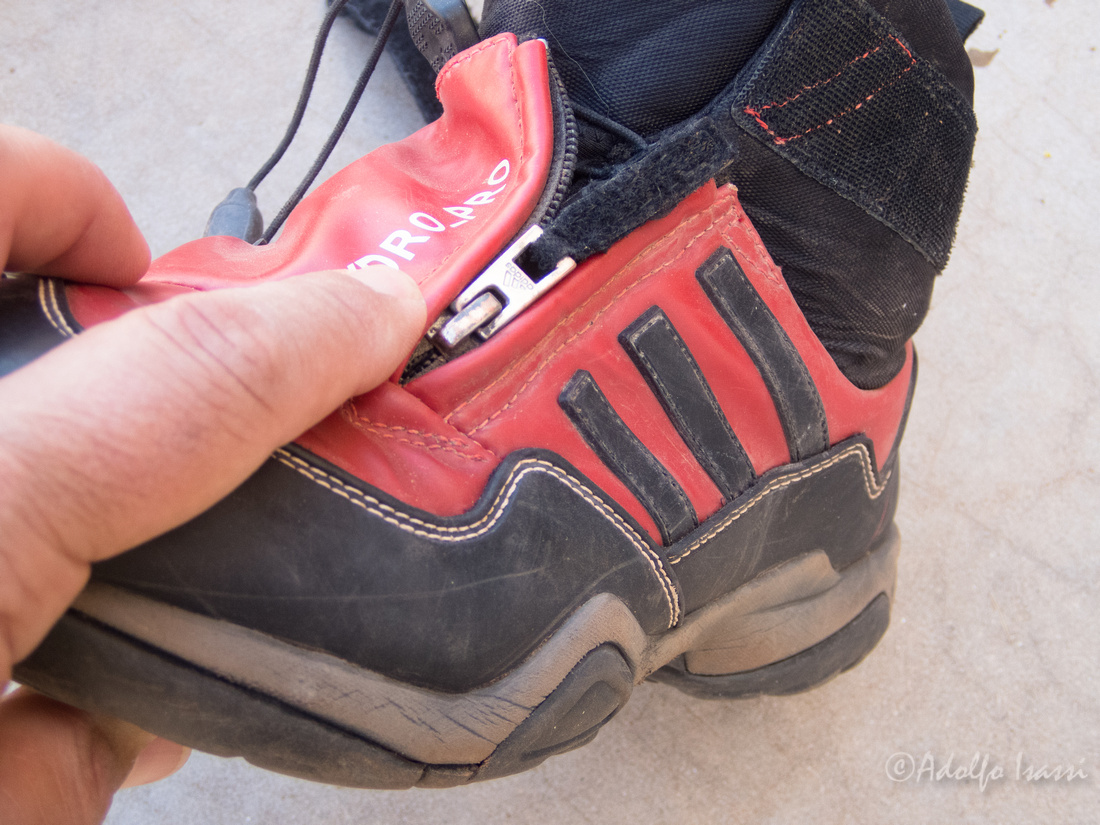
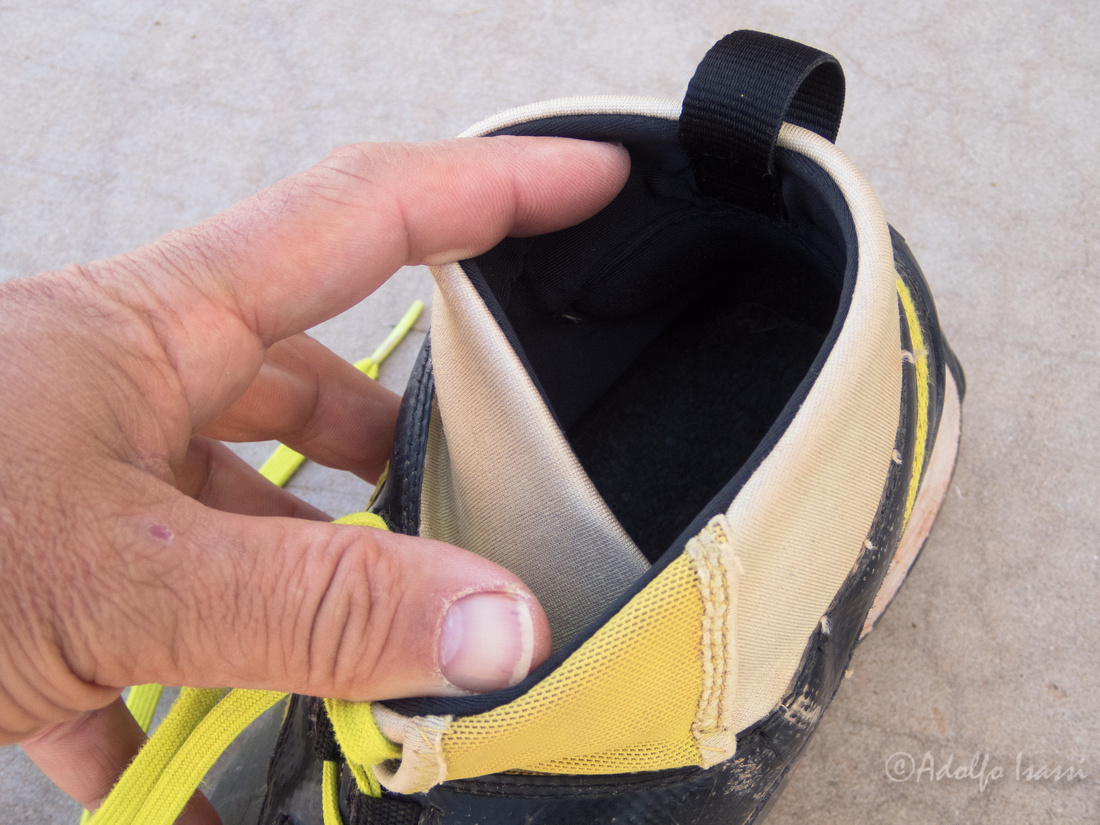
Adidas Hydro Pro and Hydro Lace are OK for class C canyons. In sandy canyons, the zipper gets clogged fast. The lace-up model fares batter, but both models develop sand-pockets between their lining and exterior. The fine sand gets in there via sandy water. After the water dries, the sand remains there. After several canyons, your toes do not fit in the toe-box anymore. You need to slash the lining.
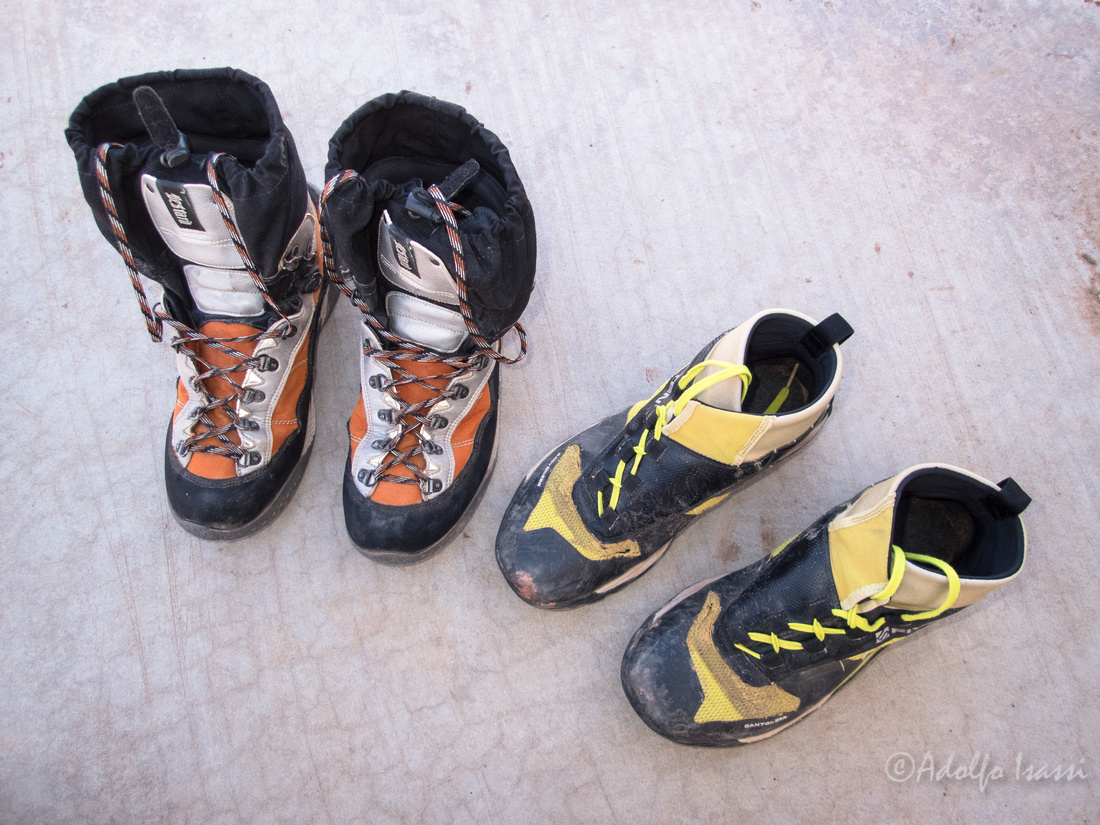
After a year of wearing both Bestards and 5.10 boots, these are my impressions:
Bestard Canyon Guides are super light and comfortable. They seem to withstand abuse better than the 5.10s. Bestard's sole pattern and rubber are sticky enough, and I like the flatter thread better with a generous edge zone for climbing. Bestards provide great ankle support. I have taken these boots in a couple of multi-day Grand Canyoneering trips with a 45 lbs pack. I feel like they are a bit too much for shorter dry canyons, and that is where I use my 5.10 Canyoneers 3s.

Bestards Canyon Guides in the Grand Canyon: 12 Mile approach, climbing, edging, canyoneering, rafting.
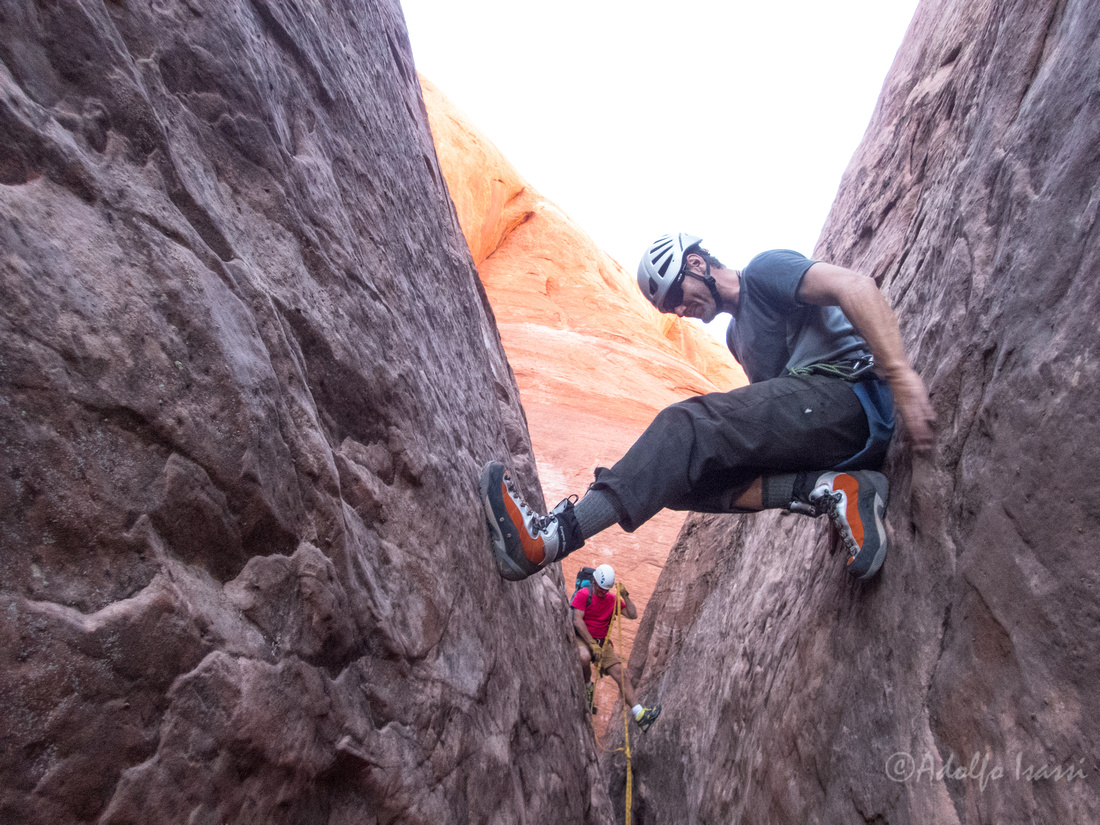
Lee T Wilson stemming high on Bestard's Canyon Guides.
The ideal canyoneer footwear should:
- Be comfortable enough to use on day or multi day routes.
- Offer enough ankle support to carry heavy packs on very uneven terrain.
- Be made out of materials that do not get degraded by constant water exposure.
- Drain fast and not allow excessive amounts of sand in.
- Have protection for very high abrasion enviroments.
- Have soles that are very sticky and shed mud fast.
If you want a "do it all" tough, comfortable canyoneer boot, give Bestards a try.
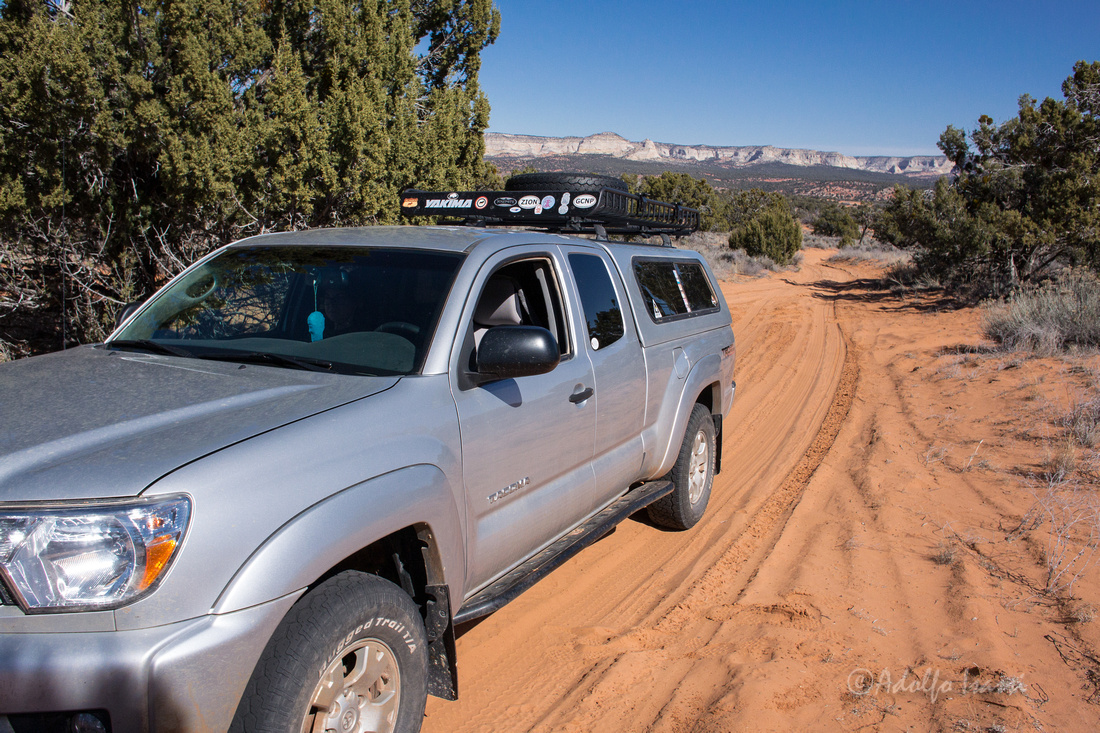
]]>This was kind of what happened in this trip. We went out looking for a canyon and the roads leading to it, were basically sand traps. The sand was so deep that the truck will glide in random directions regardless of the steering. We got stuck a couple of times. 4L and some burned clutch smell got us out there in one piece.
Oh! yeah...the canyon was nice also.
]]>
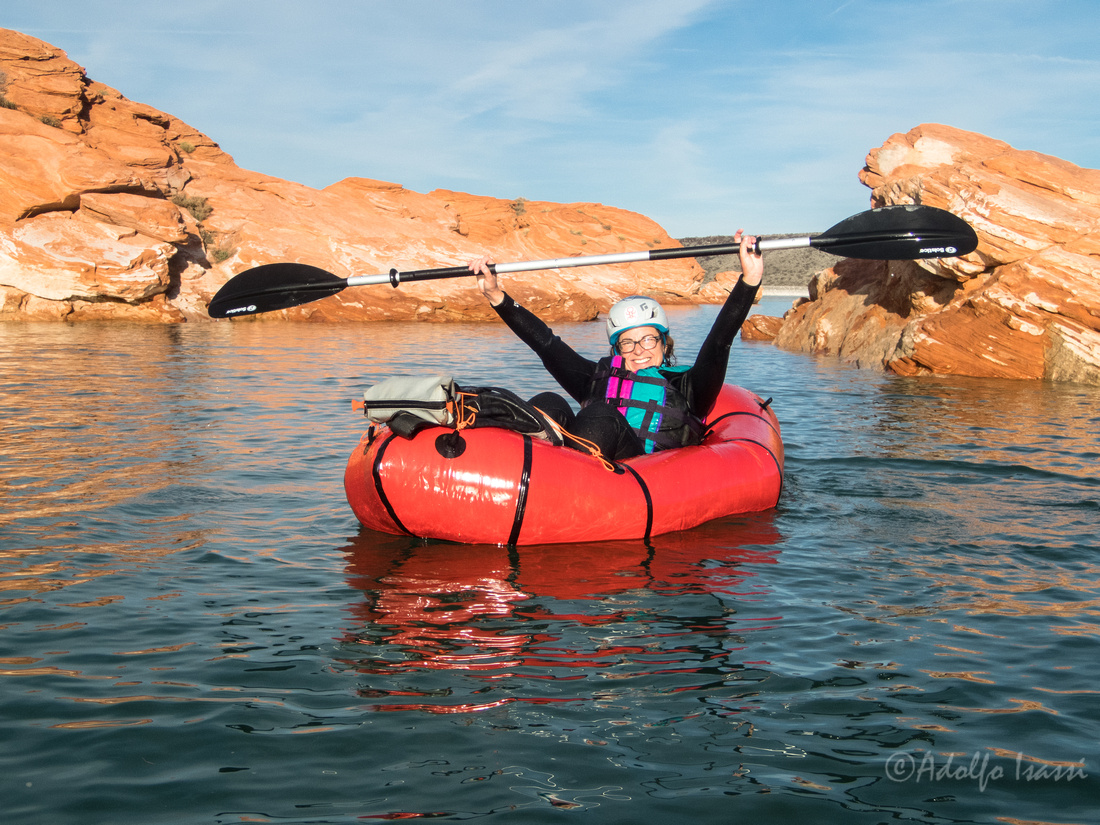
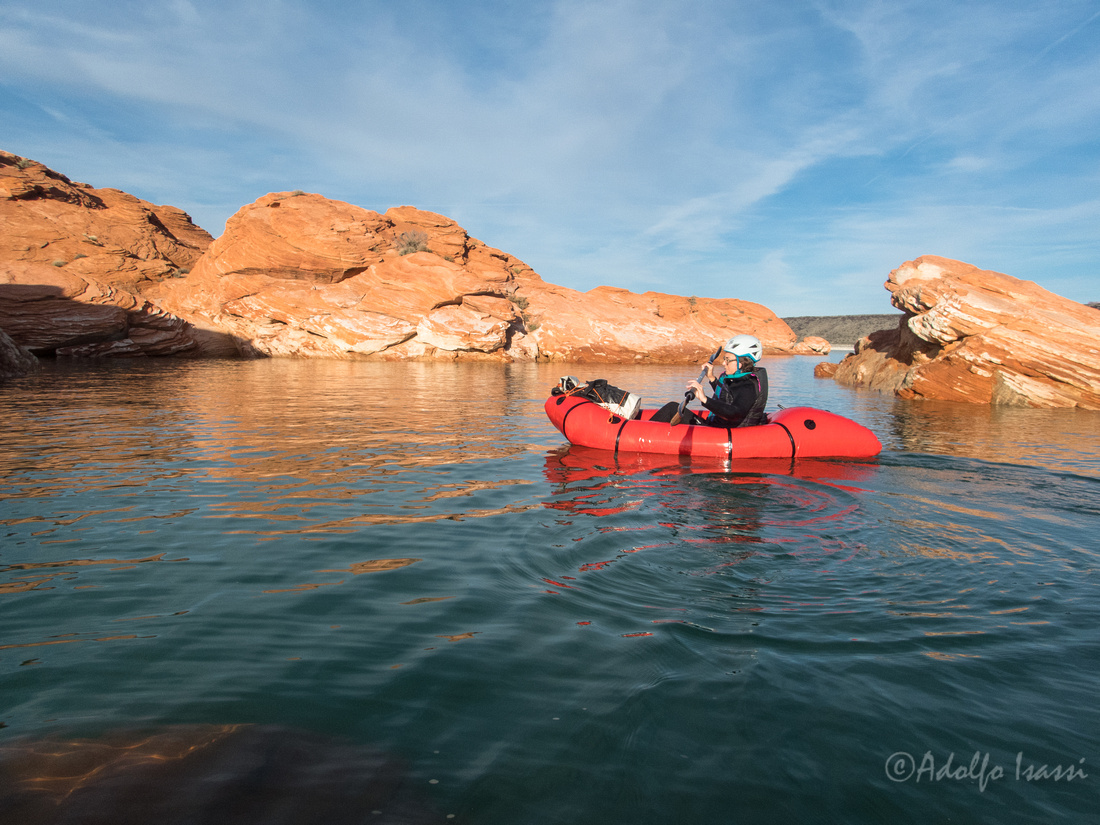 Vic prepares for the flipr
 Raft flipped!
 Flipping the raft back. It is easier on the long axis of the raft.
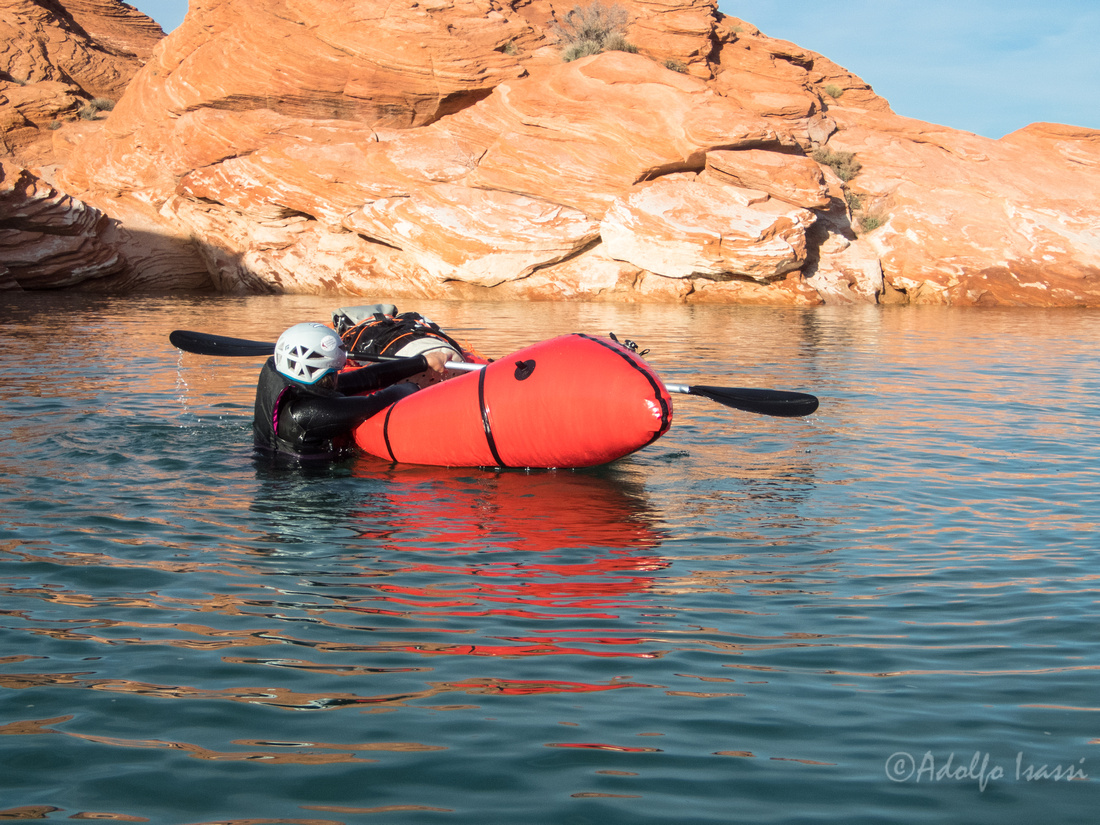 Using the paddle as a hand rail to get back on
 The slide in
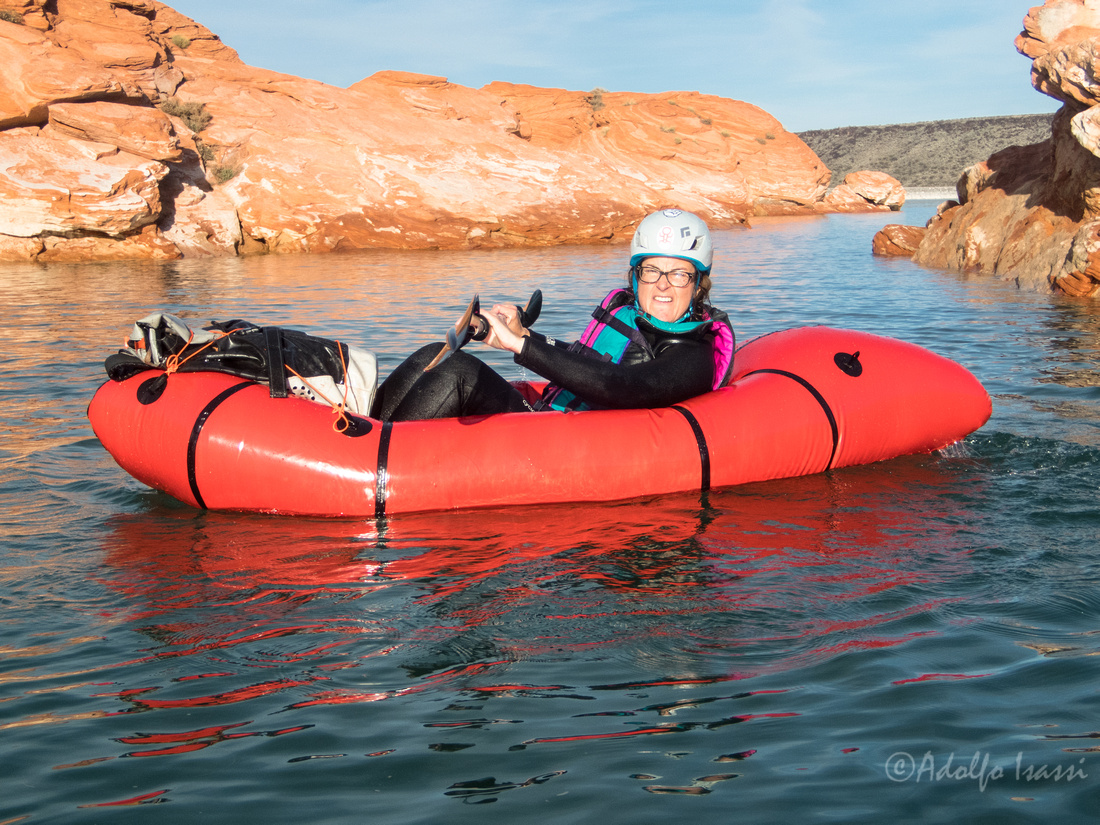
Look at that "Game Face"....like saying: "wazz-up homie!....problemas con el raft?"
]]>
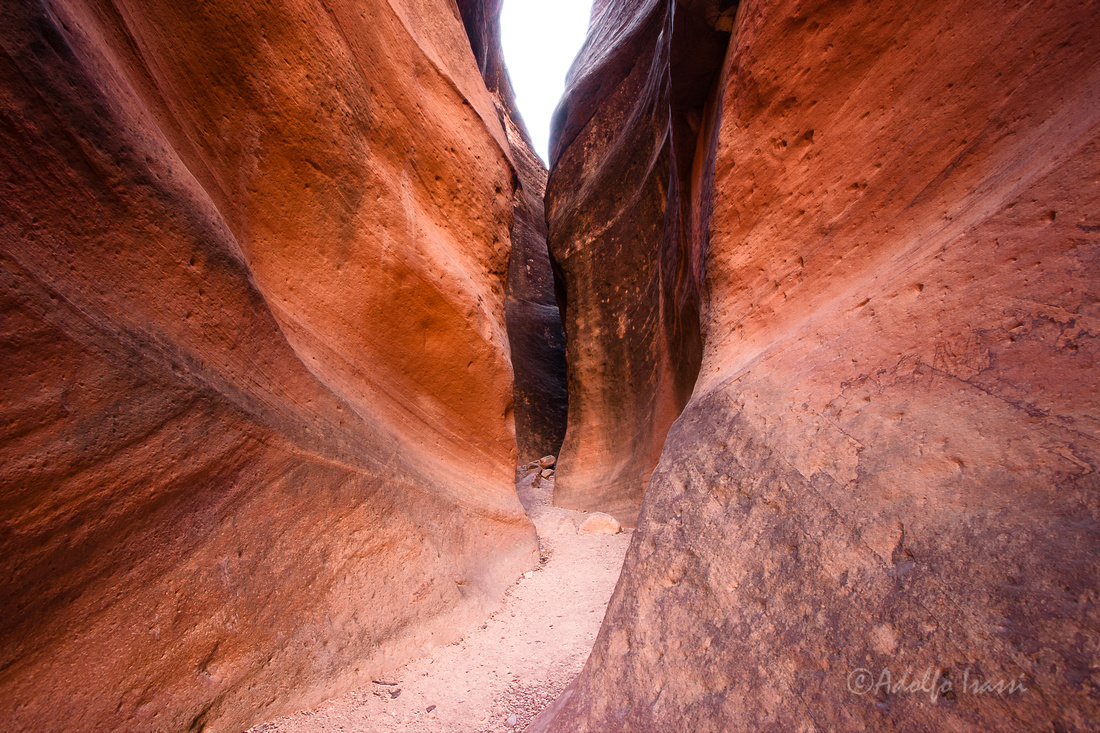
Canyons change from season to season. Some a little, some allot. So, we headed to this canyon to check just how is going to look for the 2016 season.
We decided to suit up right at the entrance, and as it turns, we were glad we did.
Sling was missing, so we rigged one.
Wet suit or not? That chest deep pool at the bottom said: "Yes"
Wet suit or not? Breaking ice in the pools.
Wet suit or not? First full swimmer.
Wet suit or not? By this time, we were plenty cold, even with wet suits.
Wet suit or not? The face tells it all....already whoa! cold!
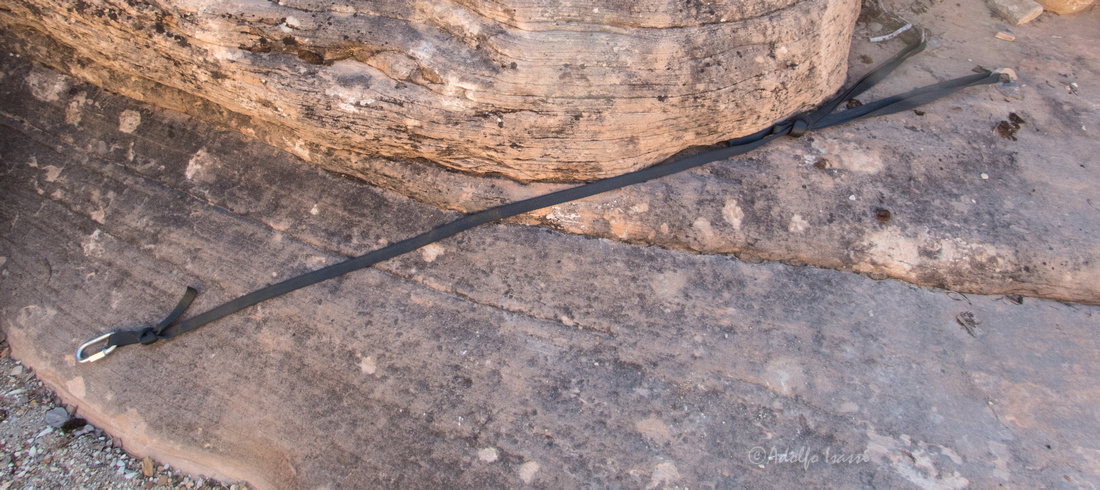
This bolt went missing. In 2015, there was a bolt here.
This is a May 2015 photo. The missing bolt was used for a small rap, or a handline.
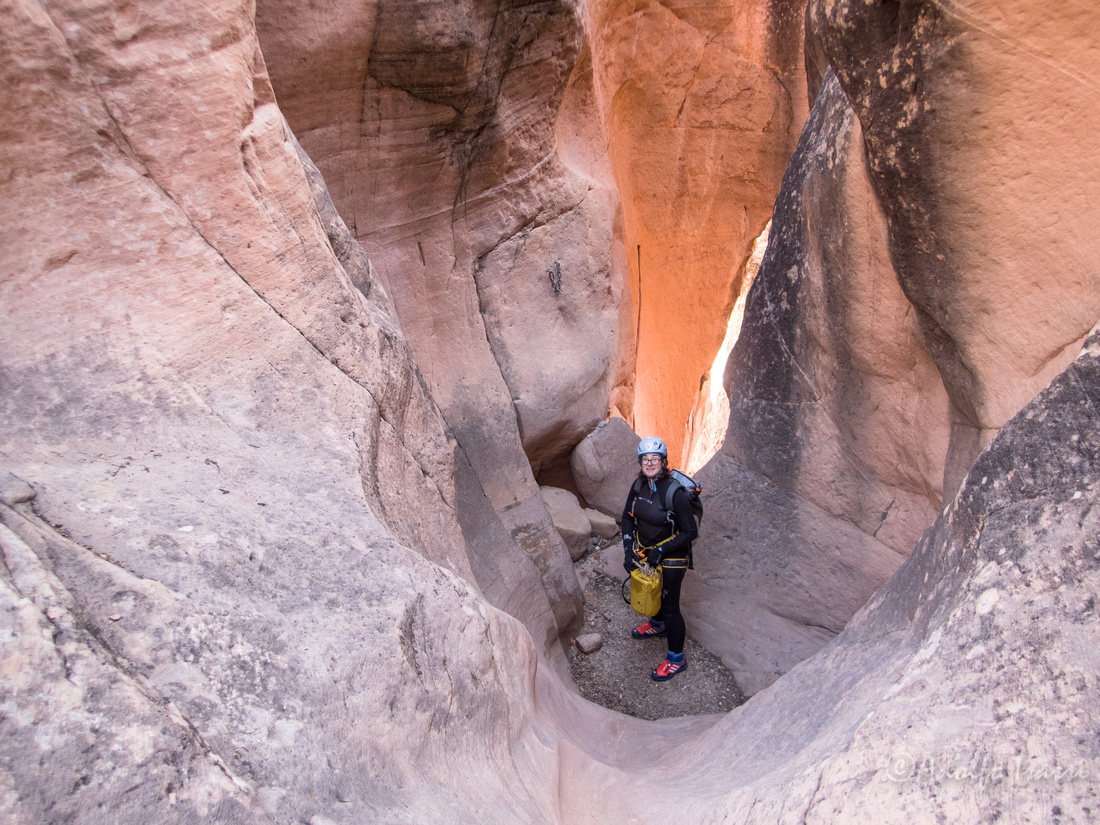
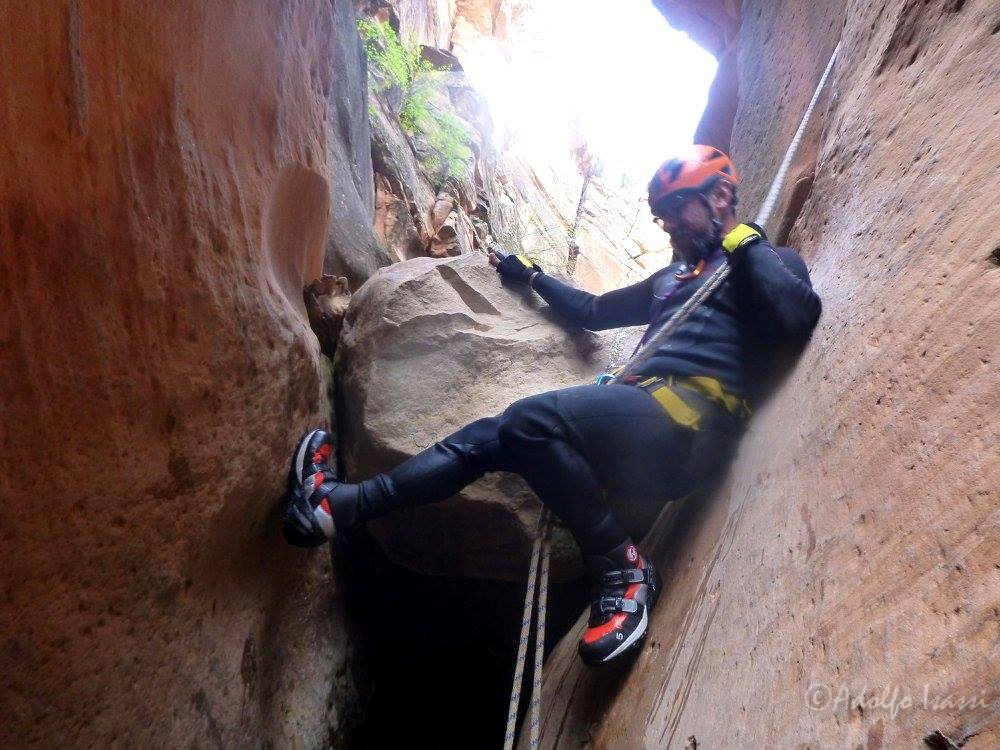
This one gave us a chance to do some little problem solving.
 When this lip gets slippery enough, it gets interesting.
We skipped the change to dry clothes and hurried out to a sunny spot.
]]>
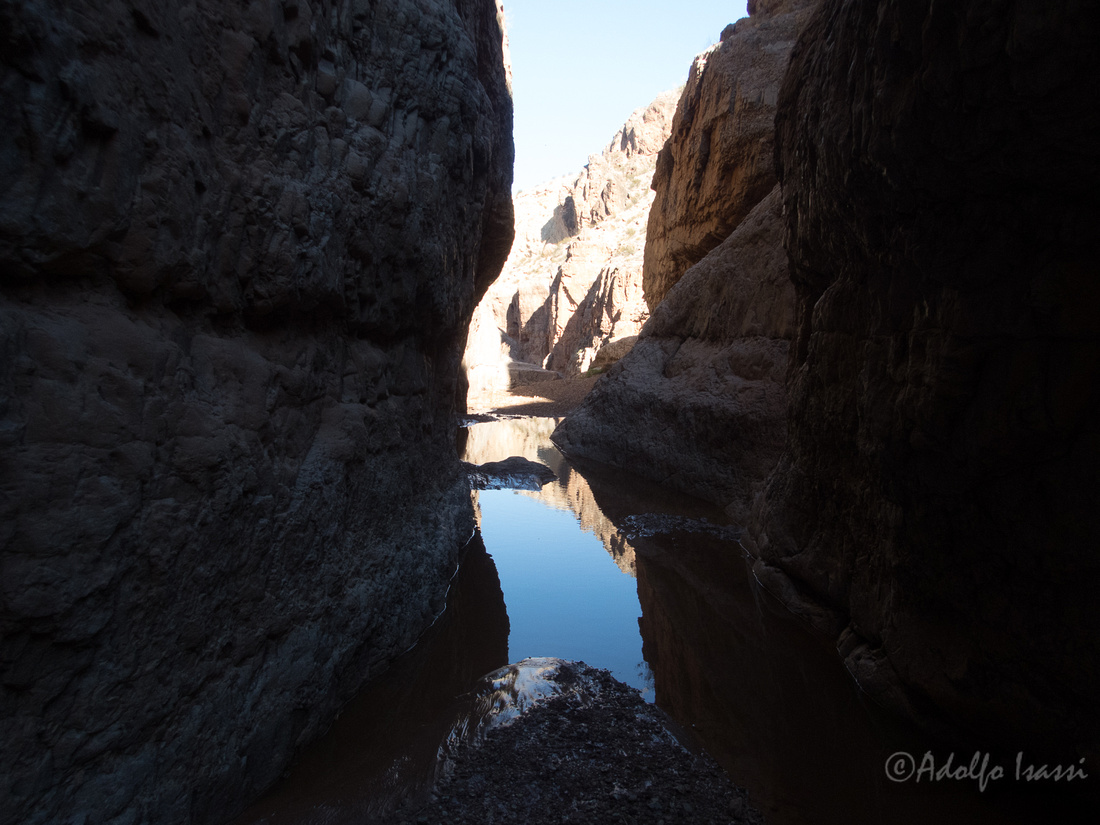
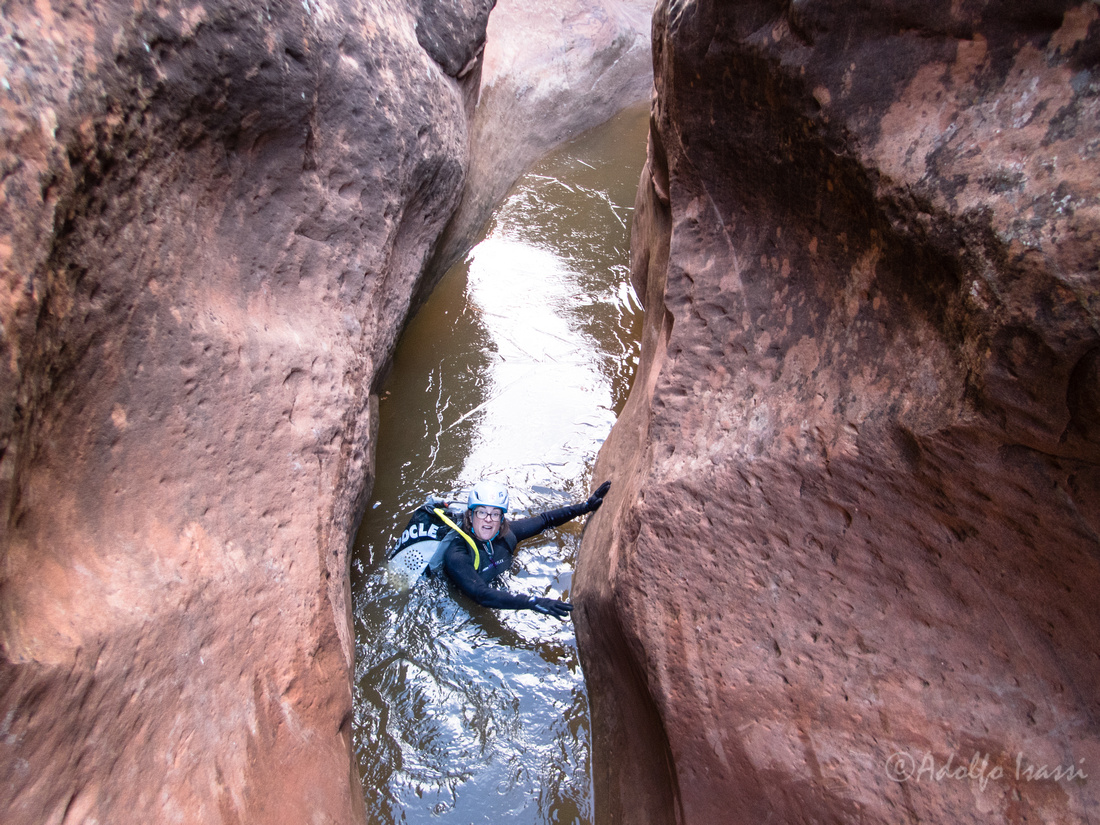
 Second Rap gotcha: More water - Can you spot the potential anchor down there for a guided rap?
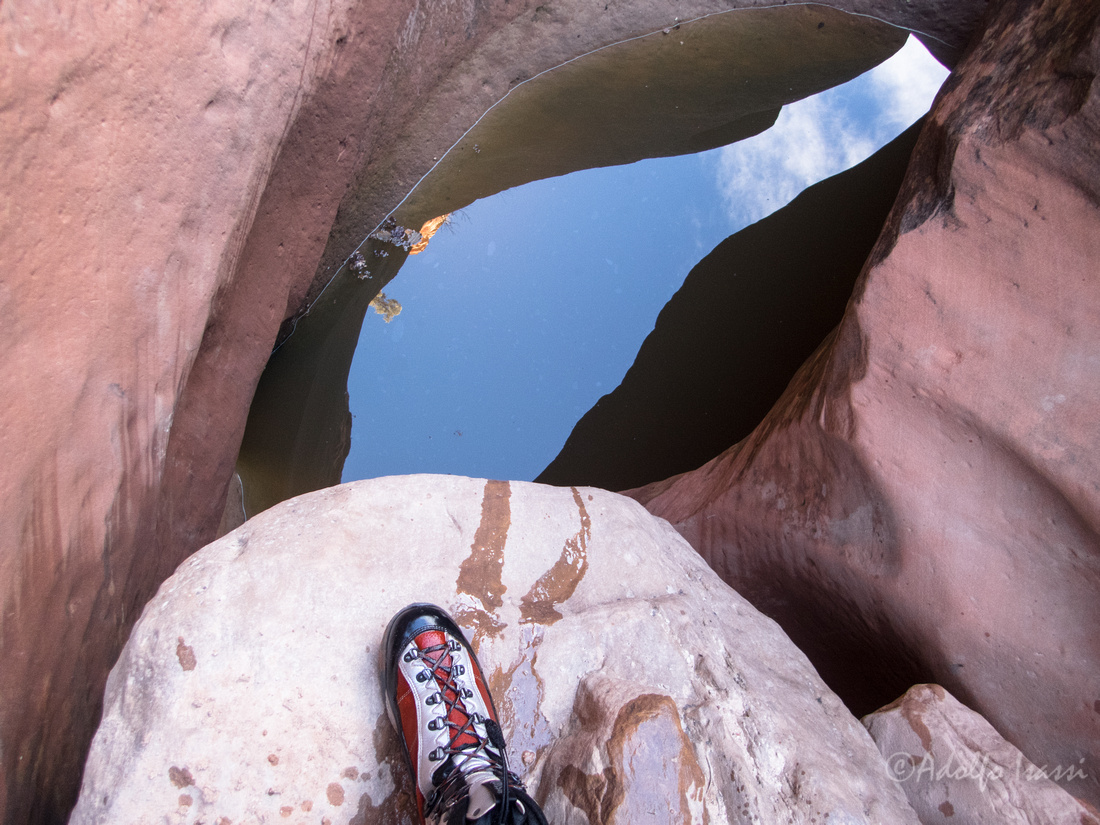
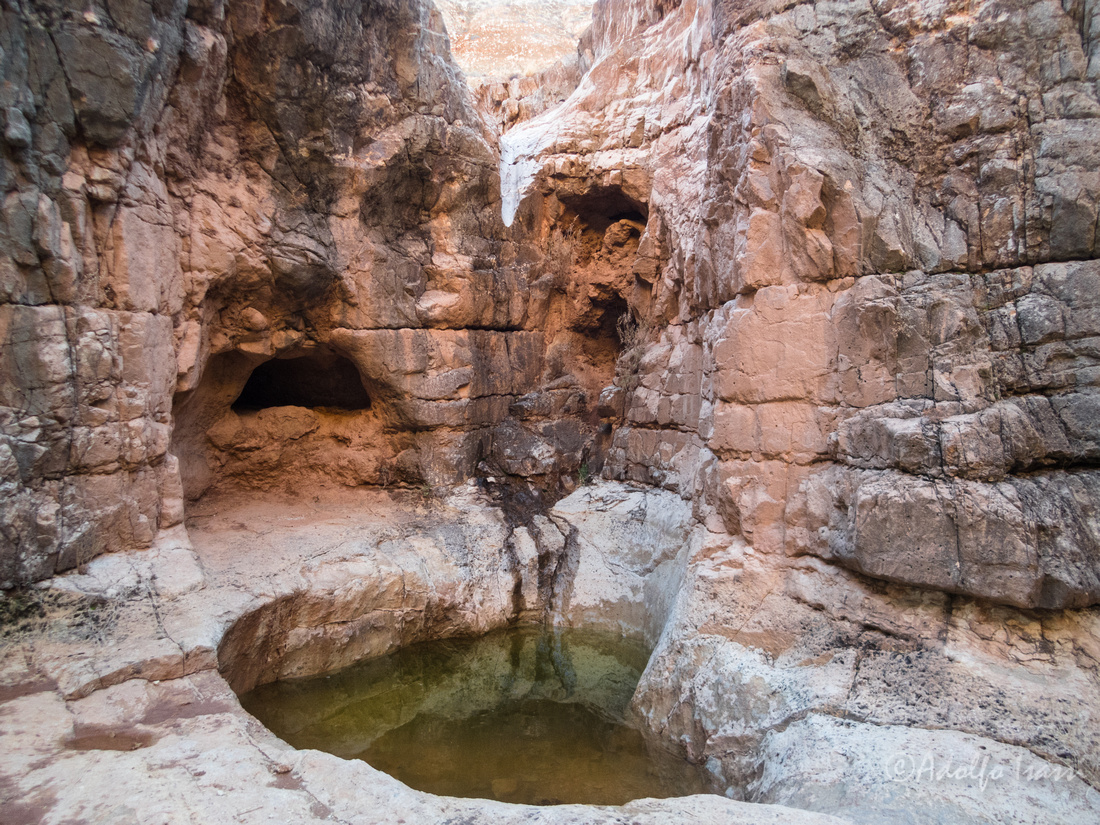 A pothole, and 3 habitats. 2 birds on the right, and one mammal on the left. Nice neighborhood.
As I got deeper and deeper into canyoneering, it became obvious that I needed to minimize my photo equipment and needed more protection from impact and water. For a while, a small Canon DSLR, with either a 10-22mm EFs or a 17-40mm EF lens in a Mountain Smith photo cube inside a double dry-bag was my "to-go" setup. Sometimes, when logistics permitted, I would take a Gitzo Traveler tripod into the canyon.
Canon bodies and lenses. Gitzo tripods. RSS Heads and brackets. F-Stop bags
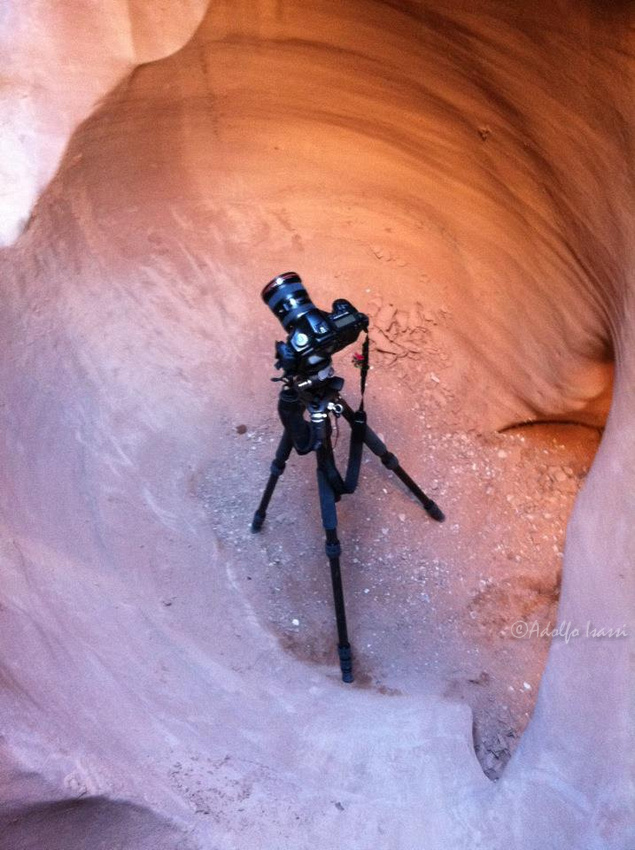
Carrying gear deep into canyons
As the canyons got more technical, the approach to photography transitioned to a hybrid of "Landscape Photography" and "Action Photography"....something more in tune with "contextual portraiture". The determining factors shaping the equipment selection are:
- Low light -> Resulting in either:
- Use of tripod -> Resulting in:
- Route logistics become dominated by photo gear limitations.
- High ISO capable camera -> Resulting in:
- Camera needs to offer RAW format to have control over image noise associated with high ISO settings.
- Use of tripod -> Resulting in:
- Water Protection -> Resulting in either:
- DSLR water protection:
- Dry bags -> Resulting in:
- Not very reliable and constant in and out packing.
- Water Housing
- Expensive and bulky. Some cameras overheat inside these housings.
- Hard access to camera settings.
- Dry bags -> Resulting in:
- DSLR water protection:
- Wide angle availability:
- Canyons are narrow. Camera needs to support at least an ideal range of 16mm ~ 24mm.

This worked for a good while, until things became more vertical
For a while, all these factors kept pointing me back to some variation of my current gear, but sometime around 2014, Nikon released the AW1. A waterproof body with inter-changeable lenses, (10mm f/2.8 lens avaialble Nikon CX format) equivalent to ~27mm) high ISO settings and.....able to deliver images in native RAW Nikon format NEF.
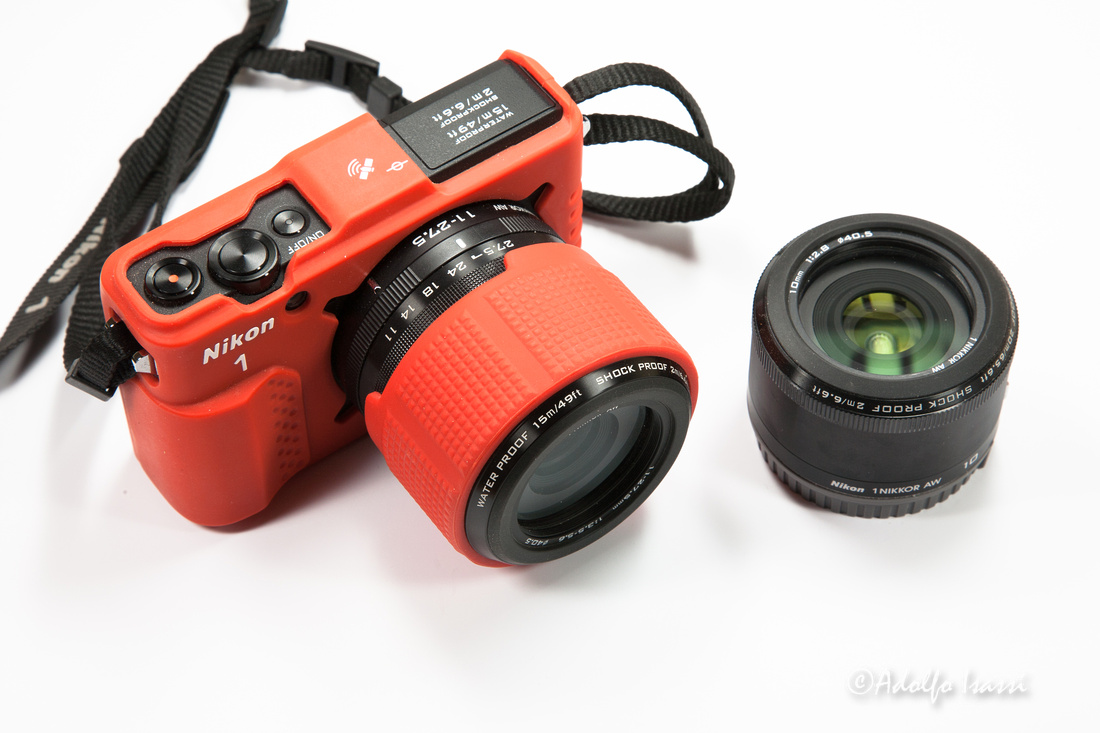
Nikon AW1 with 10mm f/2.8 lens
This seemed like the perfect camera for canyoneering. And for a while it was for me. This camera takes beautiful photographs.
AW1 down in Keyhole
But during a photo-session in Keyhole in Zion....the camera developed a water leak. The leak manifested itself in the form of unresponsive buttons in the camera's back panel. Preview, menu, mode...buttons became unresponsive. The camera would turn on and off and take photos, but you could not change any current settings. A closer inspection revealed water inside the battery / memory card compartment. Somehow, water leaked through the back panel. The camera was still under warranty, so I sent it back to Nikon. They repaired the camera and sent it back. It took about 2,3 weeks. It took only about 2 more canyon descents for the repaired camera to fail again in the exact same manner. This time, I asked Nikon to replace the whole camera, no more "repairs". This process took a....long time. I think it was a couple of months for Nikon to inspect the camera and agree to replace it with a new one. All this this gave me ample time to research online and find similar reports of AW1s water leaks.
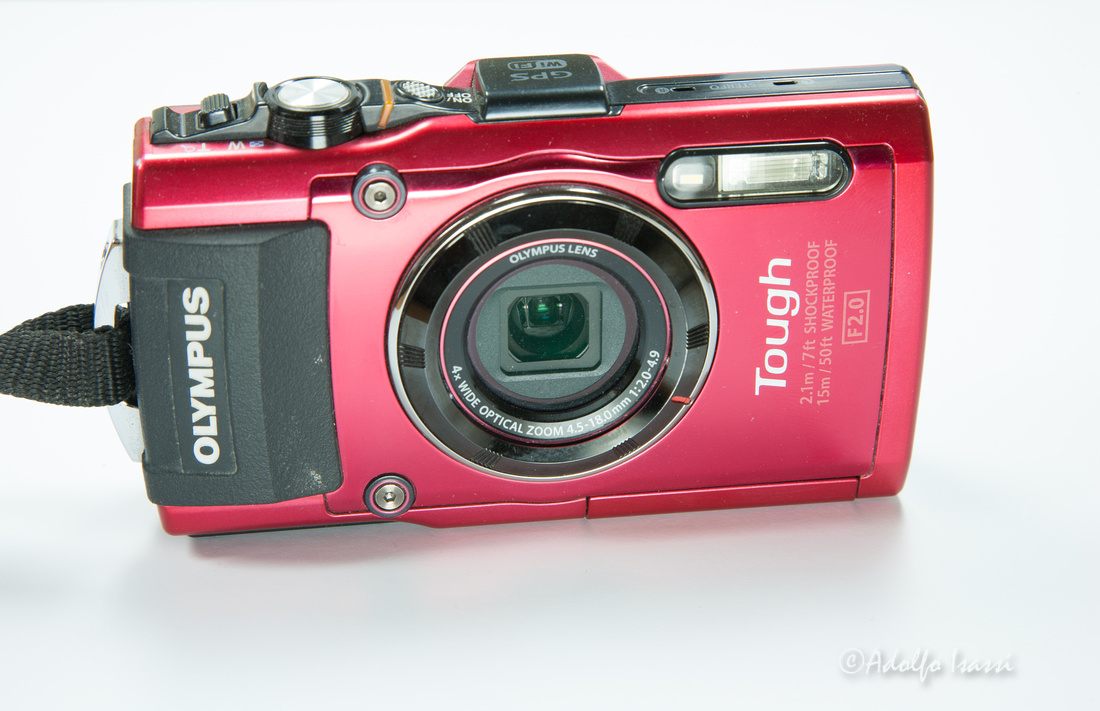
Olympus TG4
About this time, Olympus announced the release of the TG4. At the time I got my AW1, Olympus only offered the TG3, which had all the required specs, but no RAW shooting. But now, the new TG4 offered Olympus native RAW format ORF. I got the TG4 and it turned out to be a very versatile more agile camera than the AW1, but not without its drawbacks:
- When shooting in RAW format, 4/3 format is not available, only the more squarish 2/3
- The Olympus built in lens, is super prone to chromatic aberrations, i.e purple fringing with counter-light shots.
Still, with the proper knowledge of the TG4's limitations, in the right hands, the camera can deliver stunning photos.
TG4 hand held down a technical beautiful canyon.
TG4 crisp detail and rendering
Nikon finally sent me back a new AW1, and I started to compare the 2 cameras head to head. I like AW1 photos better, both because of the 4/3 format and the crisp, clean quality seems more consistent under almost all conditions.

Nikon AW1 vs. Olympus TG4
So far the new AW1 has not leaked, but I am definitely baby sitting the camera against hard splashes and dirty / muddy water....two factors present in previous failures.
So there you have it. Two cameras to consider for the rough task of canyoneering photography.
]]>
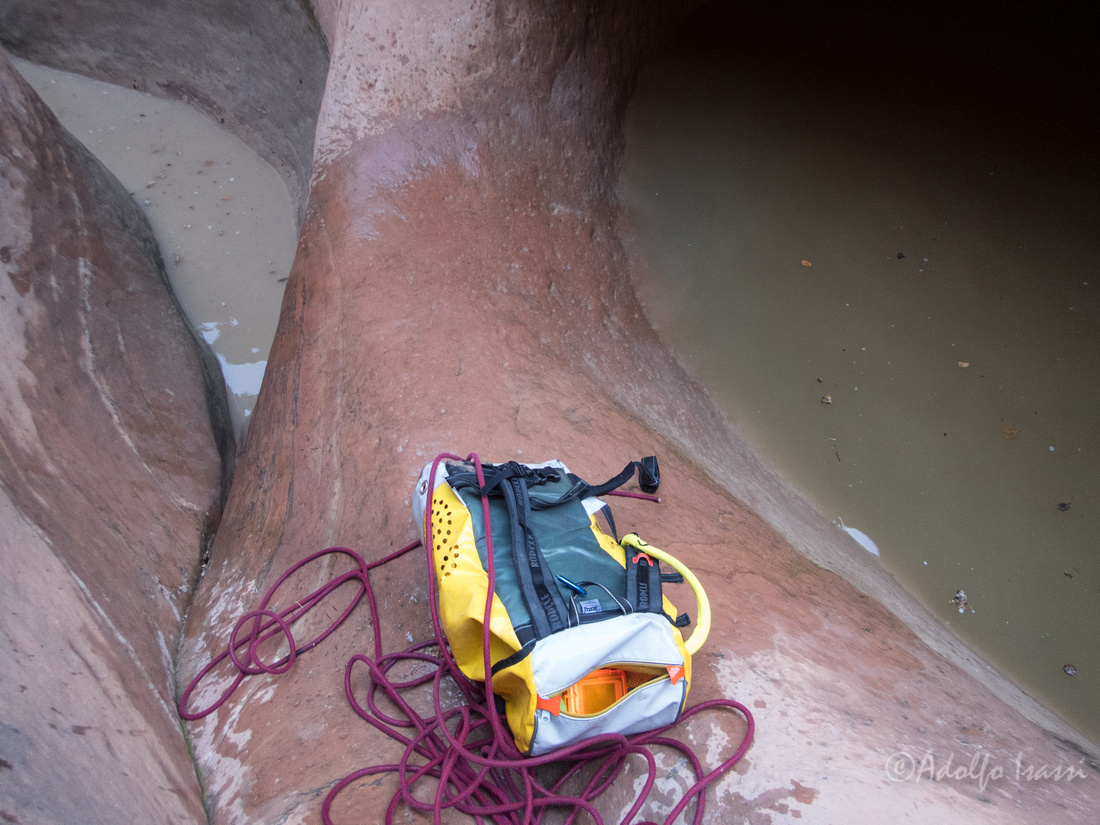
Also, the Cheapo bag did not free-stand, which made rope stuffing awkward compared to Imlay or Werks bags. My lovely wife found these gardening pads made out of closed cell foam that are just the perfect size to inject new life into the Cheapo Bags.
Eventually I end up buying some $$ bags that are bulkier, but totally worth it.
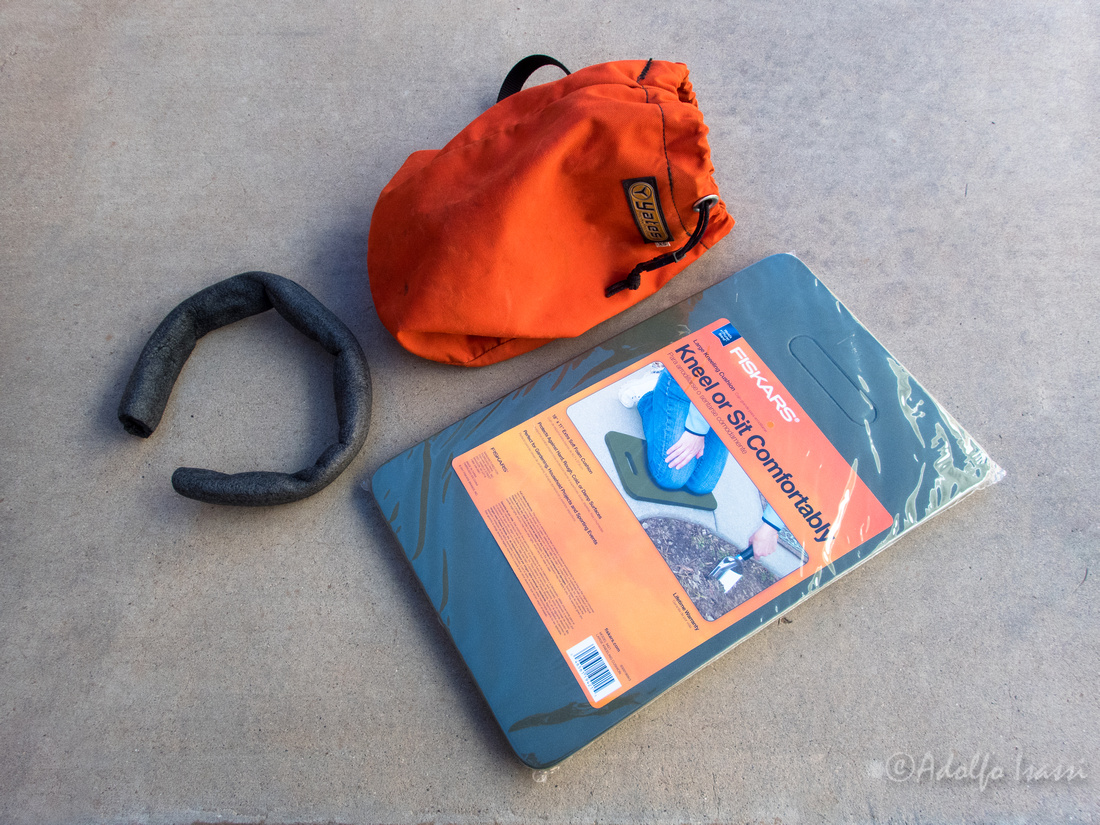 Replacing the pipe insulation with the chunkier rectangular knee pad
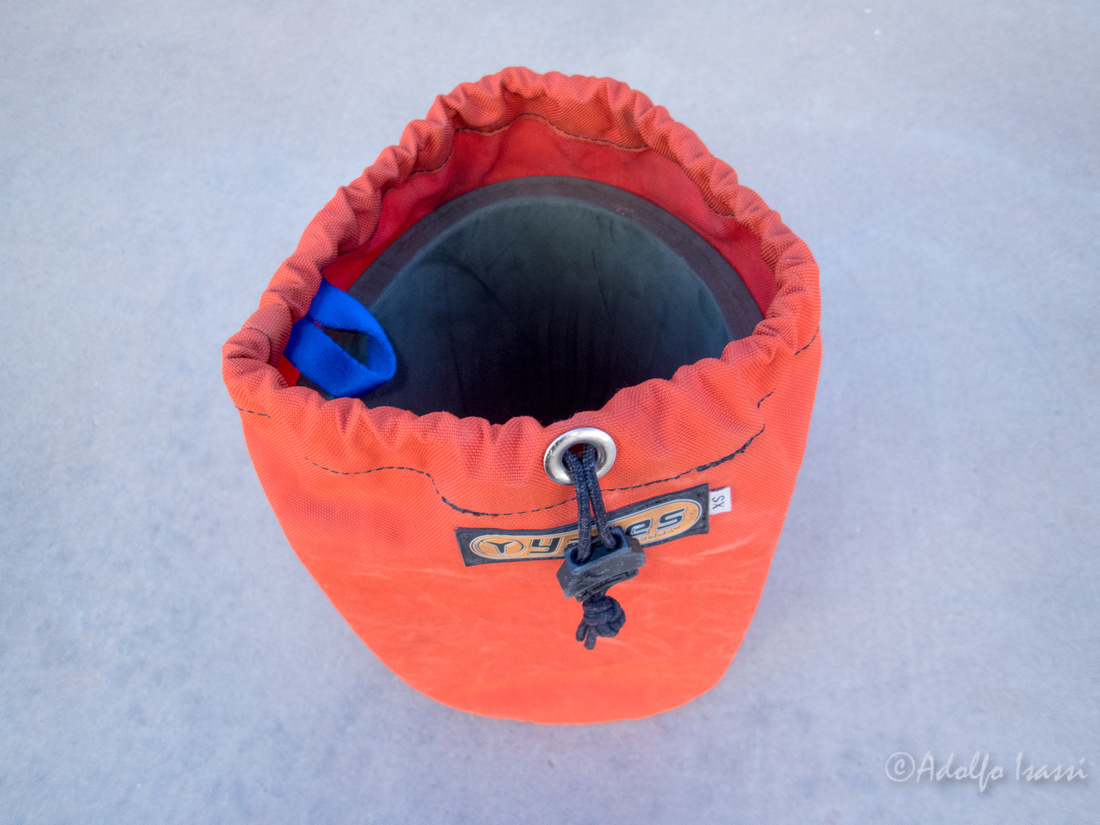
Pad inside. Now the bag can free-stand and stay afloat no matter what.
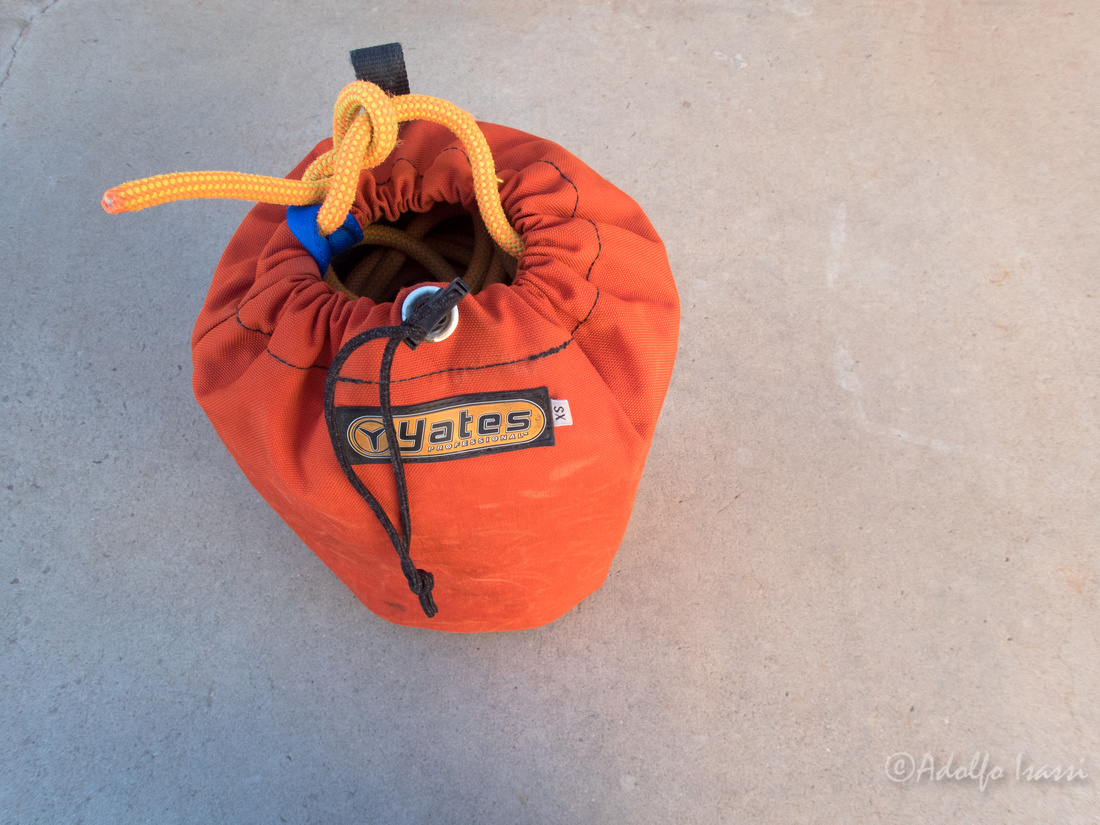
Bag with 120 feet of Imlay Canyon Fire 8.3mm. Perfect fit.

Cheapo XS bag with new floating pad and 200 feet of Blue Water Canyon Pro rope. A bit cramped, but still OK.
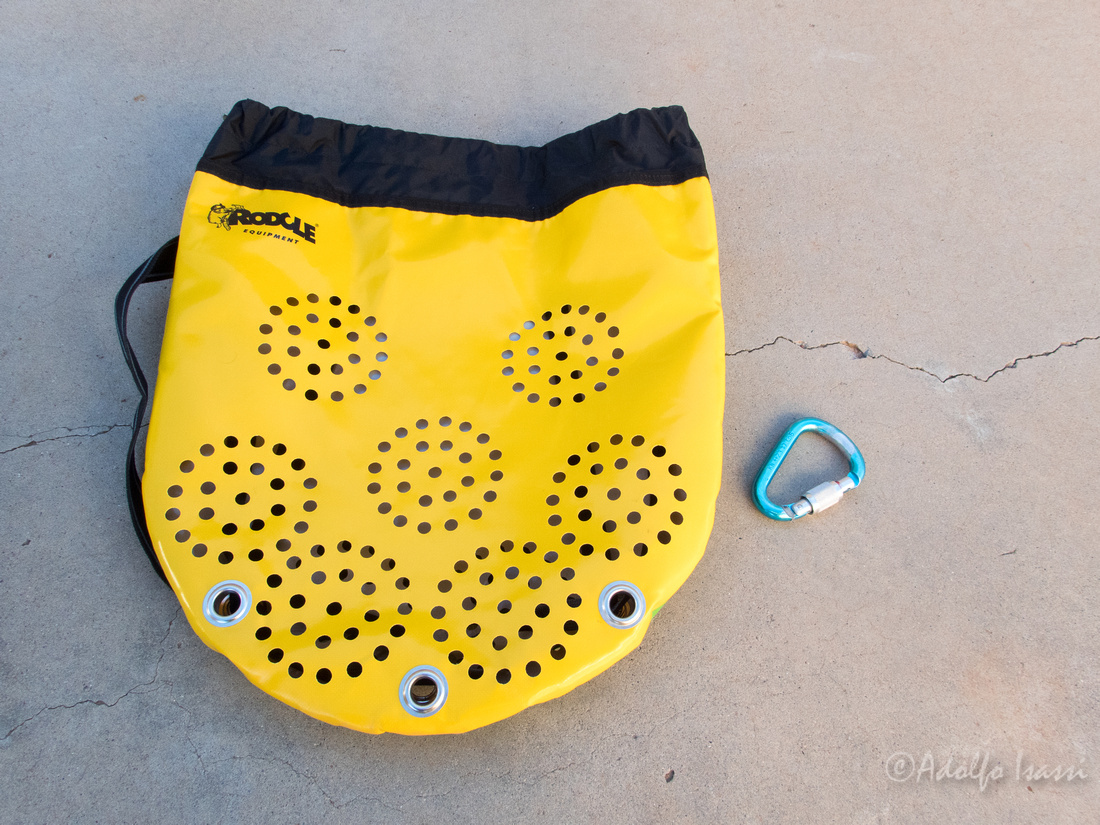
Rodcle rope bag. Future home for a 300 feet rope. Very cool bag. Attachment points are both at the top, so you can check if rope is secured to the bag.
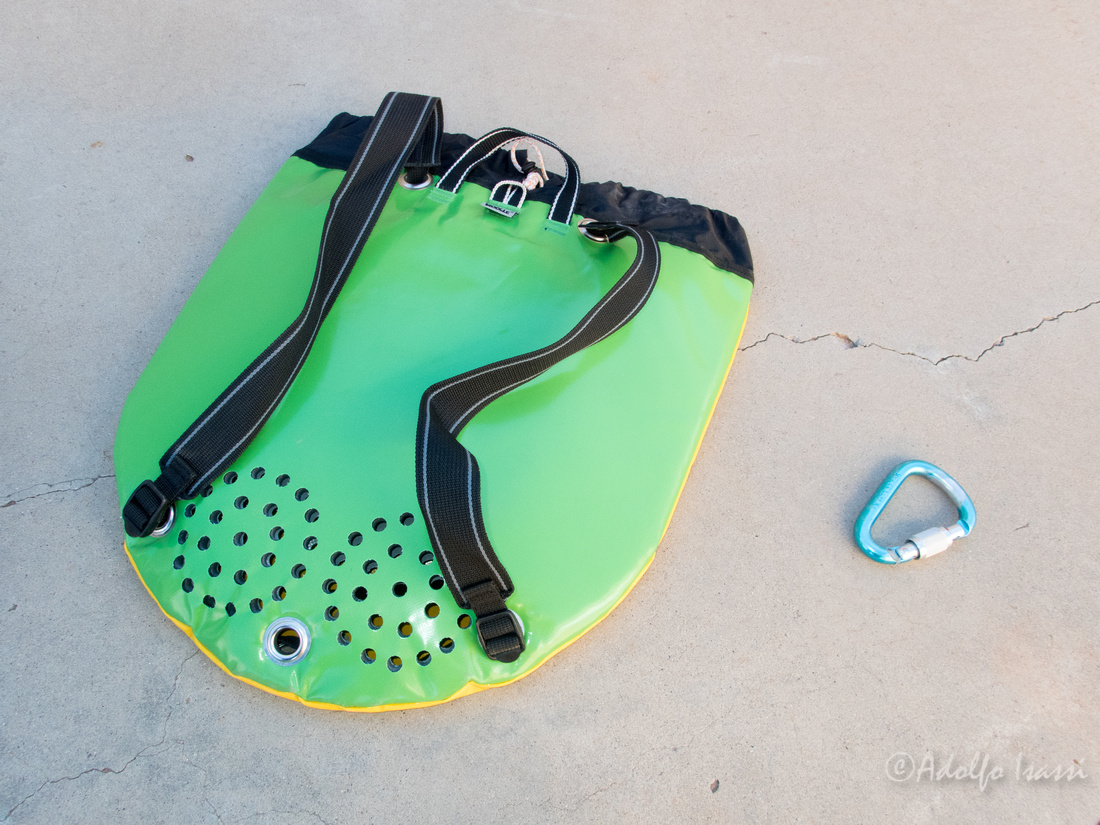
Rodcle rope bag can double as a small Mea West Slot canyon bag.
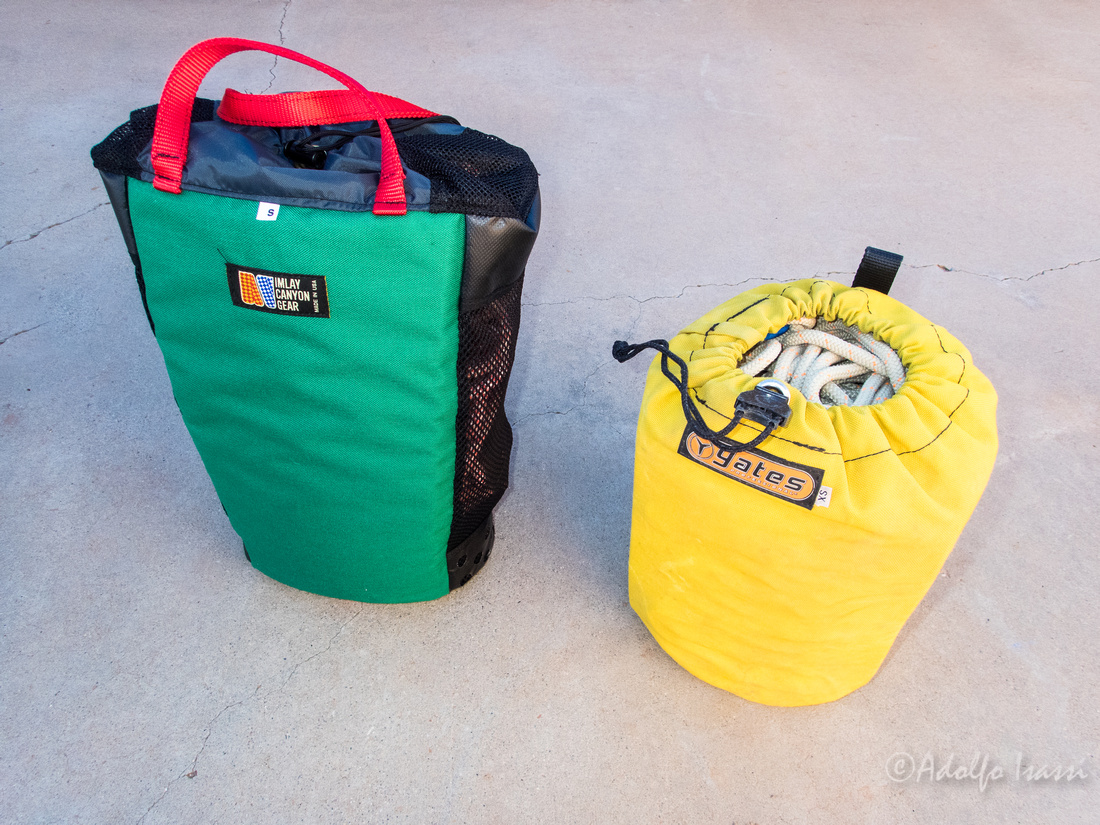
Small Imlay bag hosting 200 of Imlay Canyon Fire 8.3 rope. One cool feature of newer Imlay bags is that you can remove the floating foam if you need a super compact bag.
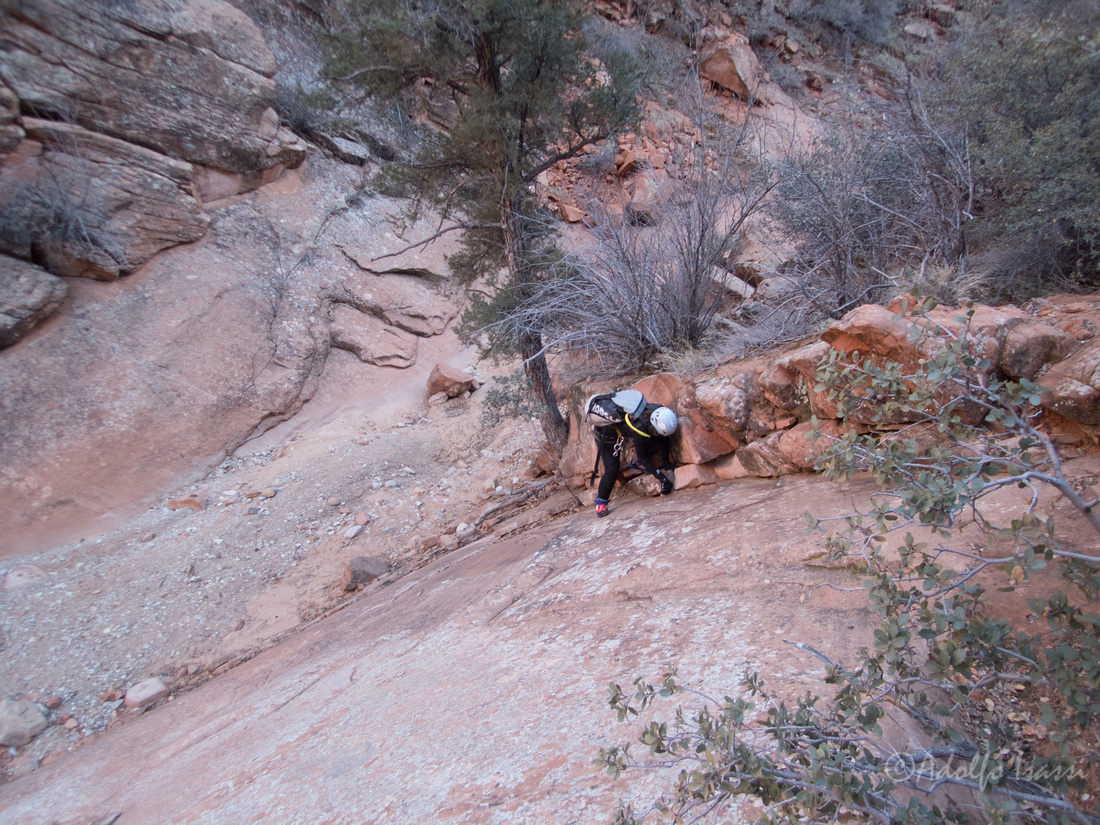
]]>We scrambled to the bottom of the first drop. That looks like 60', 70' rappel. Back at home, snooping the area with satellite images and topo maps, the area above did not show much promise. Still we came back with gear to scramble our way to the top, and drop.
We got to the rim and found a way to drop to the wash: Virgin wet sands. We explore and enjoy the area, then we proceed to descend. We look around and there are no signs of slings, bolts, dead-mans....nothing. It's all us, a fresh problem!
Candidates for an anchor: A tree high-up on the rim. Farming a rock into a pothole for a dead (drowned) man. A 30' extended sling around a big friendly boulder. Use a stack of potshots. This was one of those situations where the closer you get to the drop, the anchoring options become slimmer. The tree was too far up and back, our 120' will not do. The long sling felt...dirty, not a clean solution. The deadman required trashing about 30' of canyon fluted walls to reach the intended pothole. So we opted for 3 stacked potshots against a good lip. The only problem was that in front of that lip, there was still another small pothole that could catch the potshots during the pull. And moving the potshots further near the drop, will prevent us from load testing them. After filling the 3 potshots with sand and stacking them, they felt bomber solid. The trick was the pull. So I chained them real far apart.
Potshots stacked against the lip. For the first person down, a sling was used to extend the reach for a releasable block. For LMAR, sling was removed and a double bowline + double fisherman was used to fix the rope to the bottom potshot.
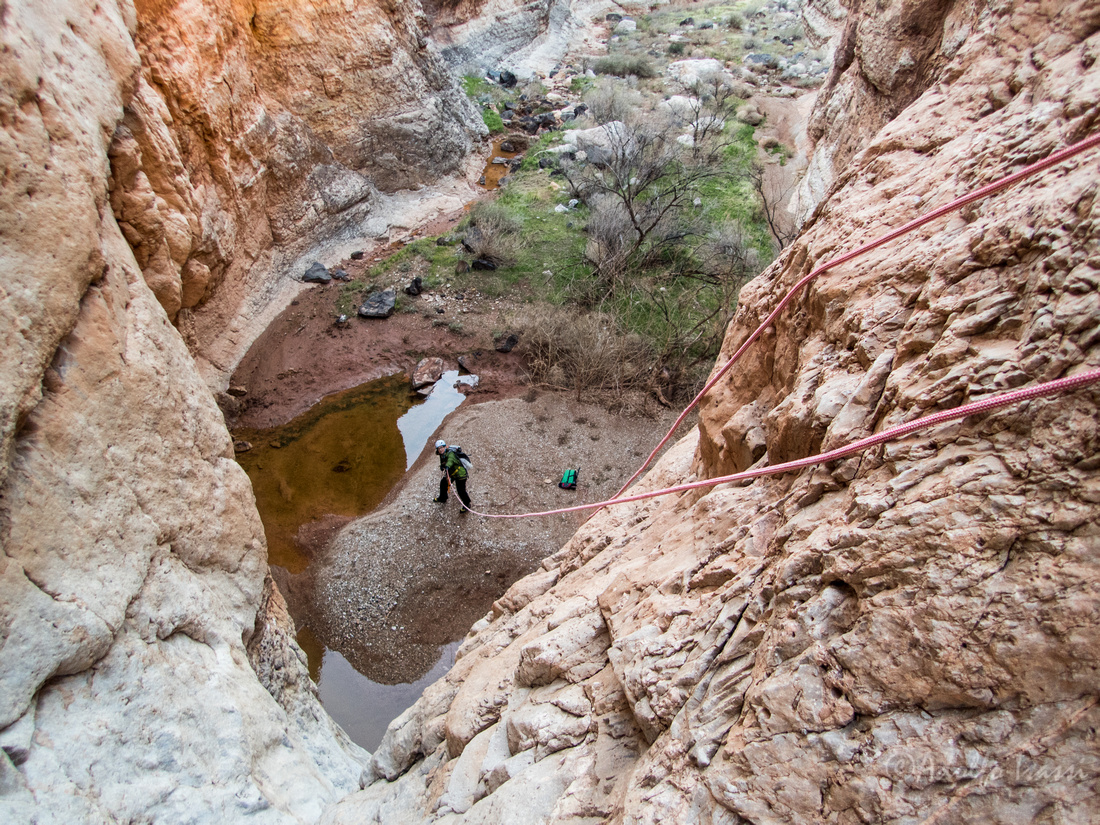
Potshot chain coming down the cliff
Clean potshot chain pull. The trick was to chain the potshots far apart, so each one could clear the potential jam individually.
]]>
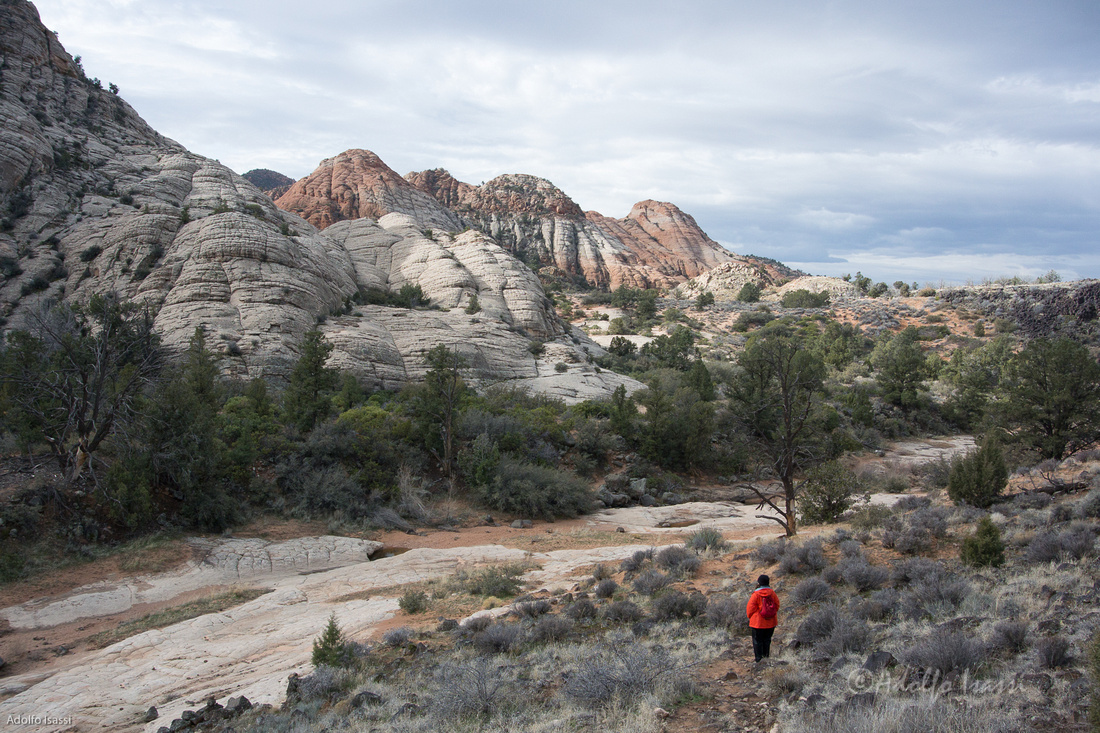
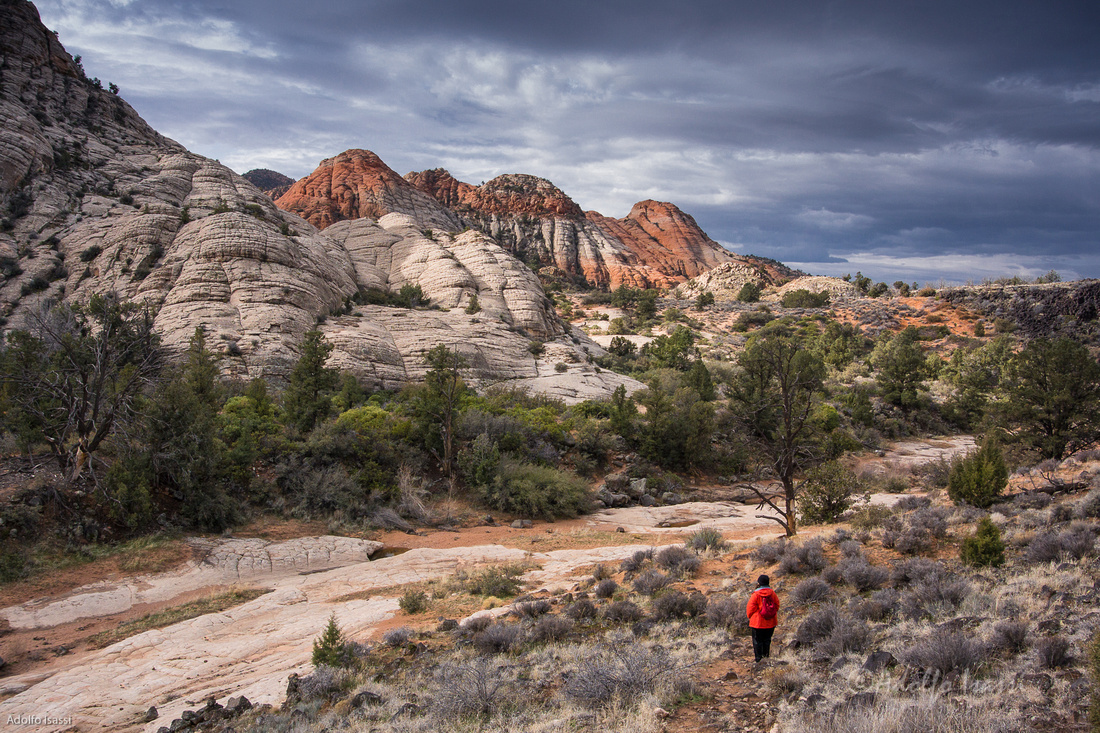
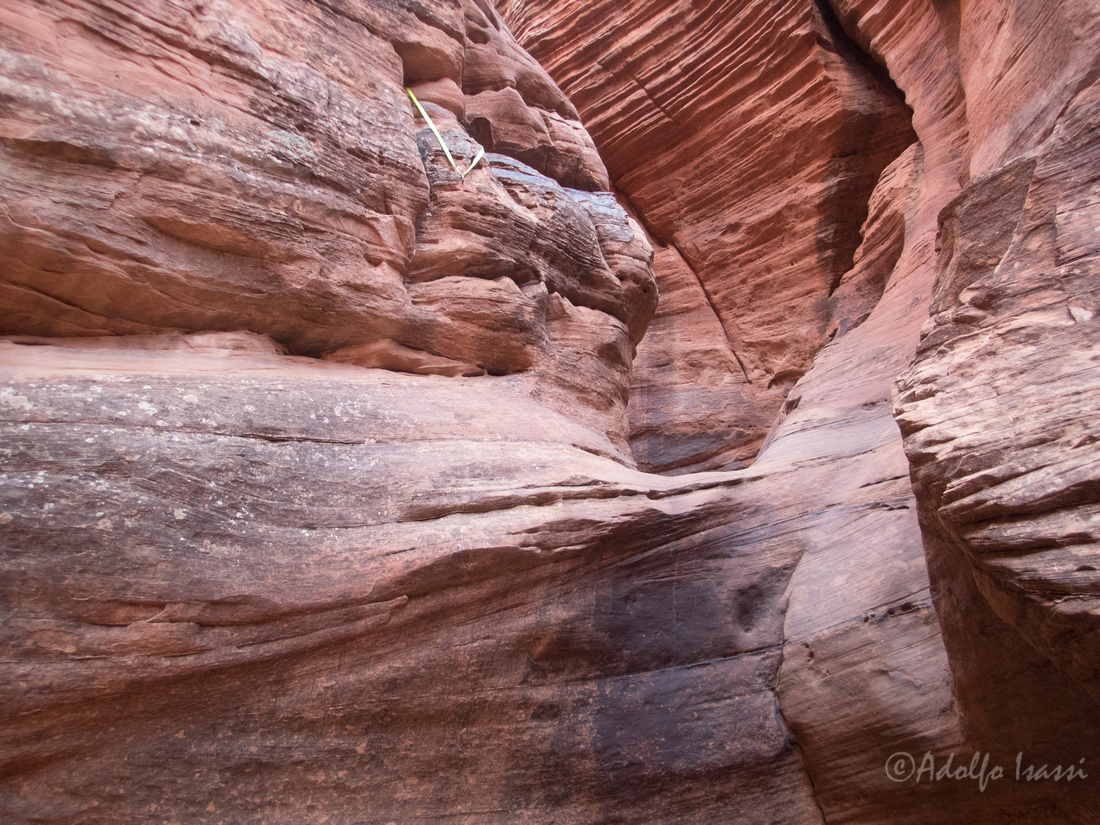
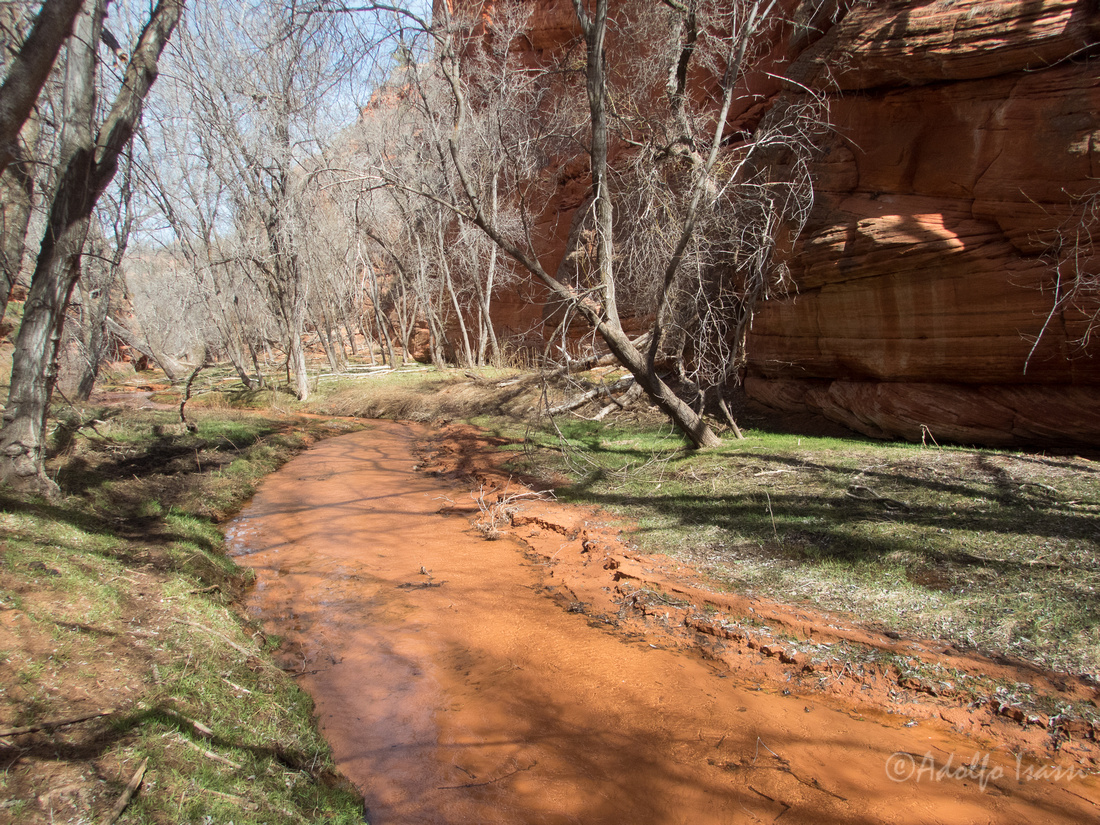
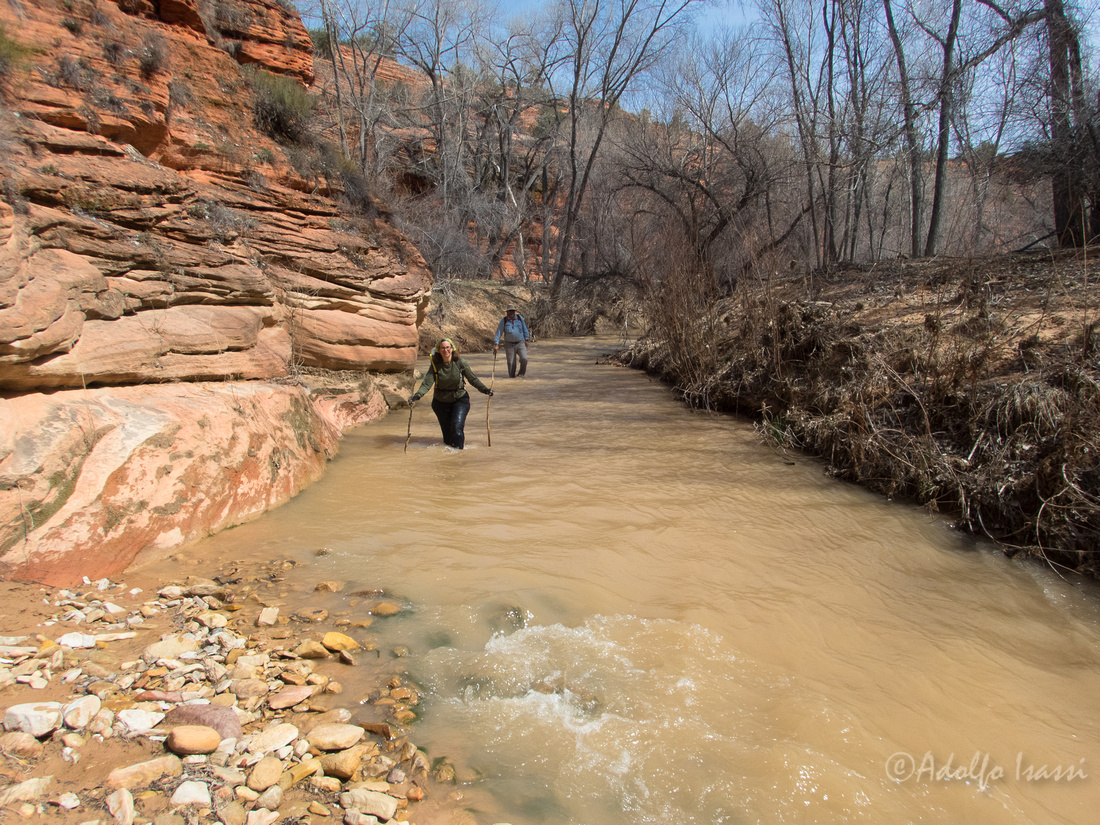
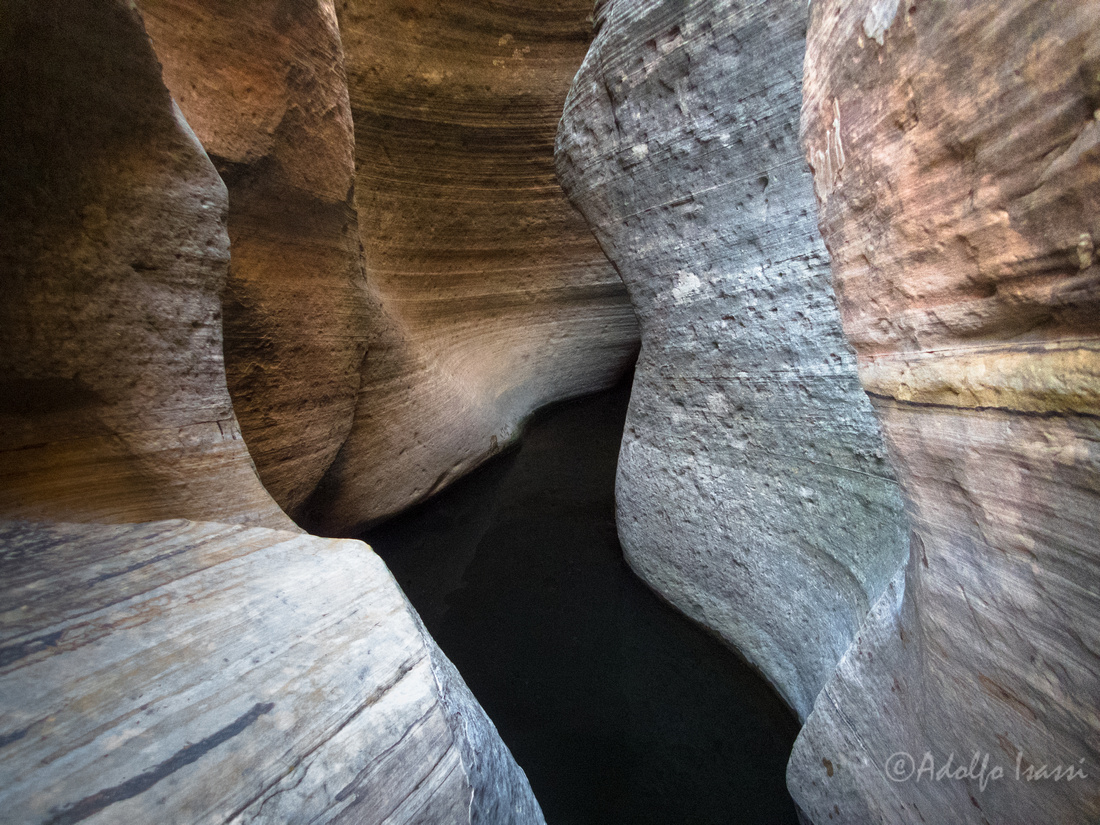
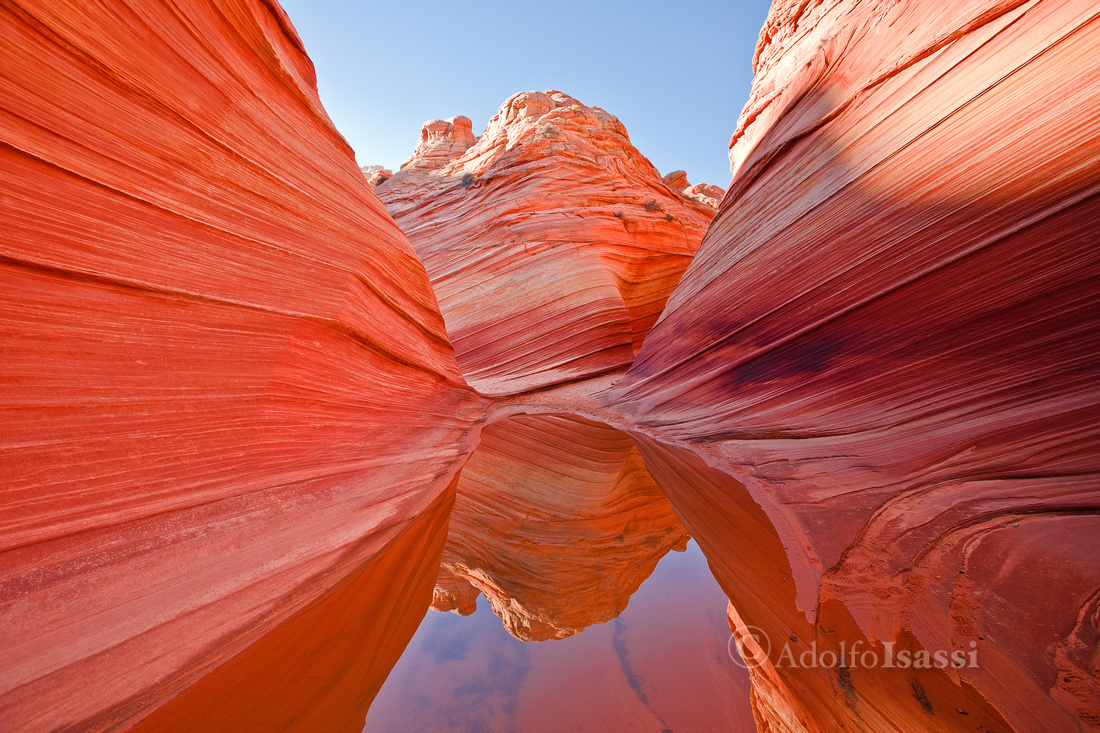
 A canyon in the American Southwest
Documenting landscape shots. Recording the location, date and time of the photograph, along with the, body, lens, film and exposure used to take it. Perhaps some notes about the weather and particular circumstances that affected the execution of the shot.
Through my years of landscape photography, I have slowly updated my documentation practices. Once I switched to digital photography, I used the metadata fields in the file header to store this information. The EXIF standard fields store all the camera and exposure information, and for a while, I had to record manually the location. Now, some of my camera bodies record the GPS location coordinates for every photograph.
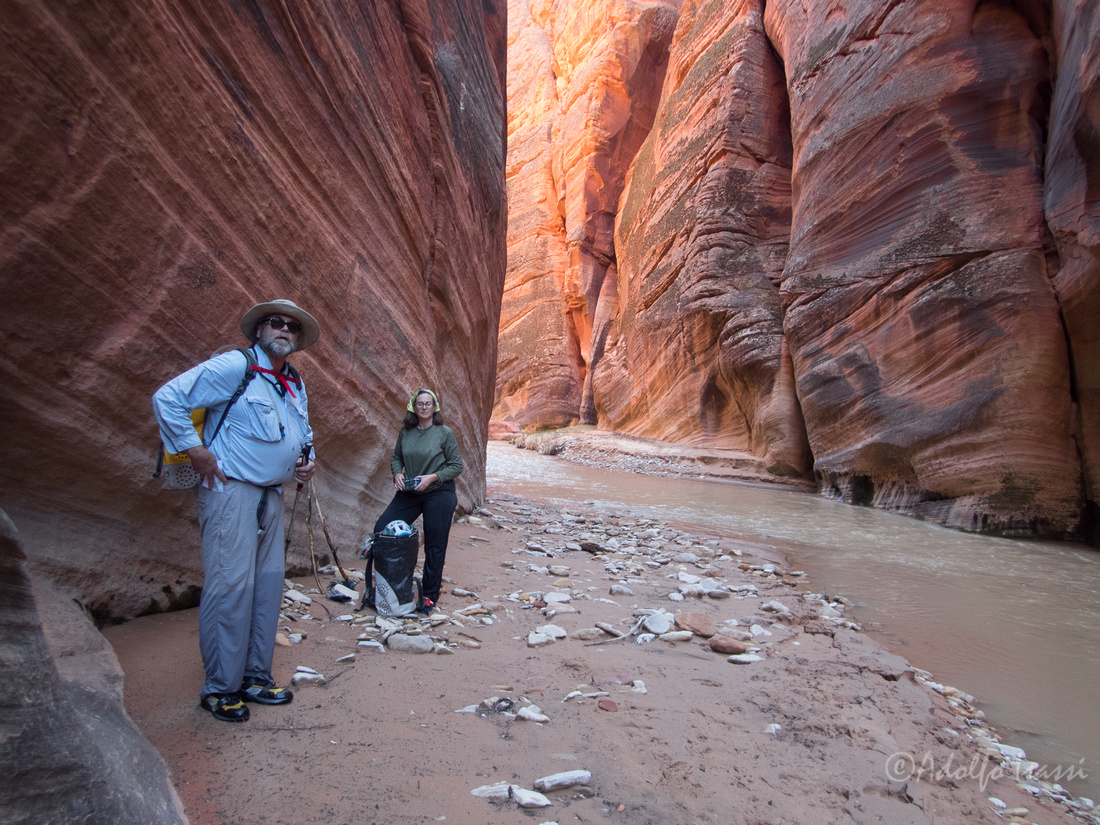
A canyon in the American Southwest
While selling prints, I always felt that it was important to provide the date and location of the scene. I would provide this information on the back of the print with an archival rated felt pen. When the era of "internet photography" came through, I noticed though the years a shift on the interest of this information (location) being used to go and take the same photo or photos at that location. Paired with the Internet as a new source of gorgeous photography destinations, I think that digital photography dramatically increased the number of people showing up at these destinations.
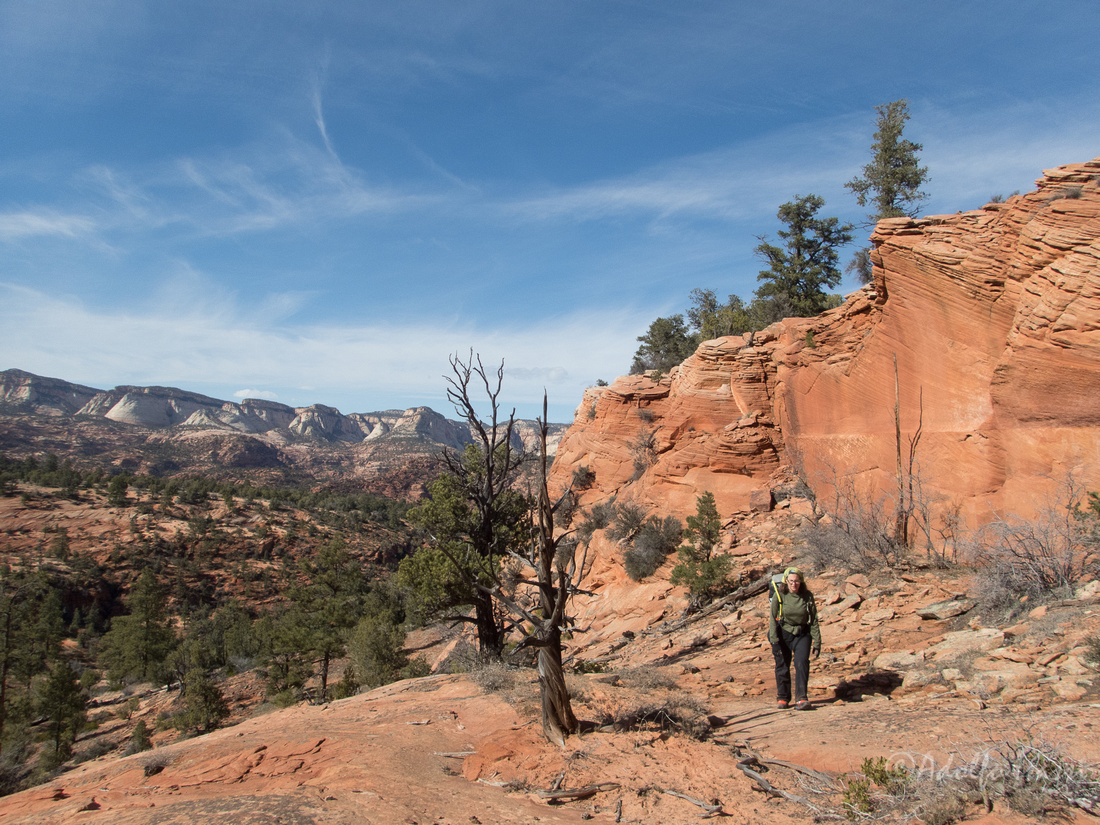
 A canyon in the American Southwest
Places like "Oxbow Bend", "Mesa Arch", "Sneak River Overlook", "Zion Virgin Bridge", "Zion Subway", "The Wave" and many others have become stunningly crowded with photographers that often are more concerned with photography than with the preservation of the place. Obviously, as I witness this, I can see that I am part of the problem.

Mesa Arch
Conflicted and without an easy answer, I have been modifying my documentation practices. Although I still retain all the location metadata, I strip it for any posting or publishing, and I no longer reference the specific location in the title. This has been the genesis of "Canyons of The American Southwest" title series, where I acknowledge the beauty of the region and landscape features, but do not provide a waypoint for people to travel and flood the place.
The infamous Wave
I think we live on a time where the combination of overpopulation and outdated notions of land usage are conspiring to degrade wilderness in general. Not sure at this point if photography will be critical to preserve some record before wilderness becomes an amusement park of sorts, or photography is a critical contributor to pave this path.
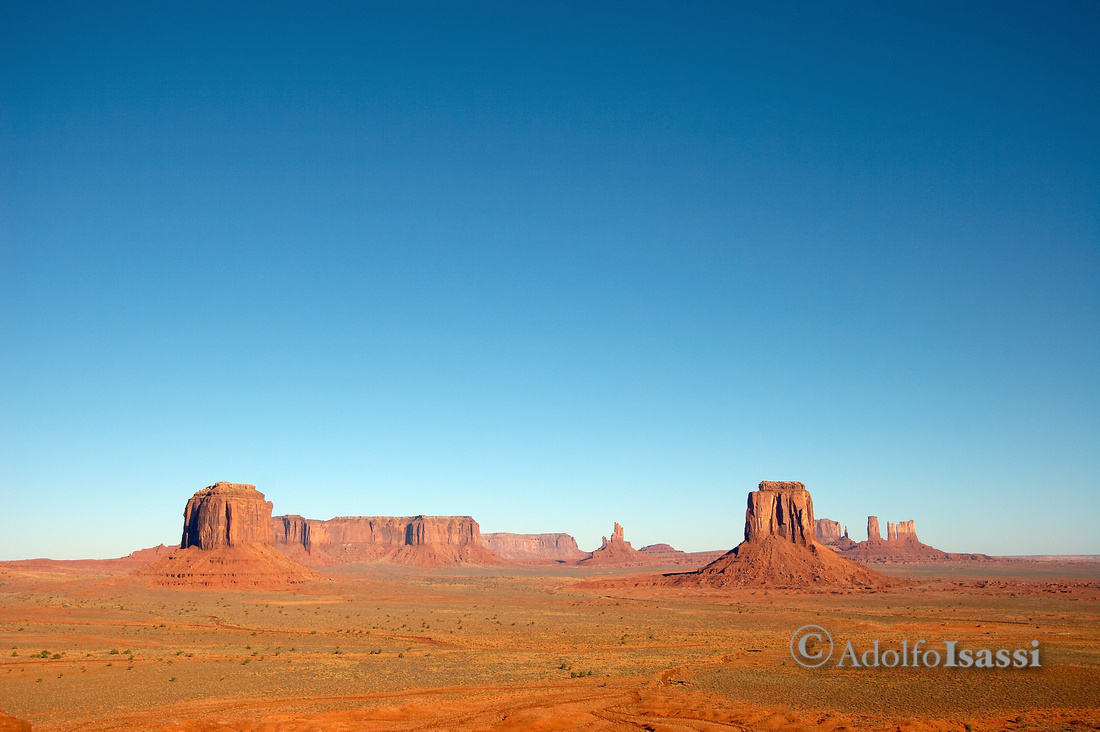
The American Southwest
]]>
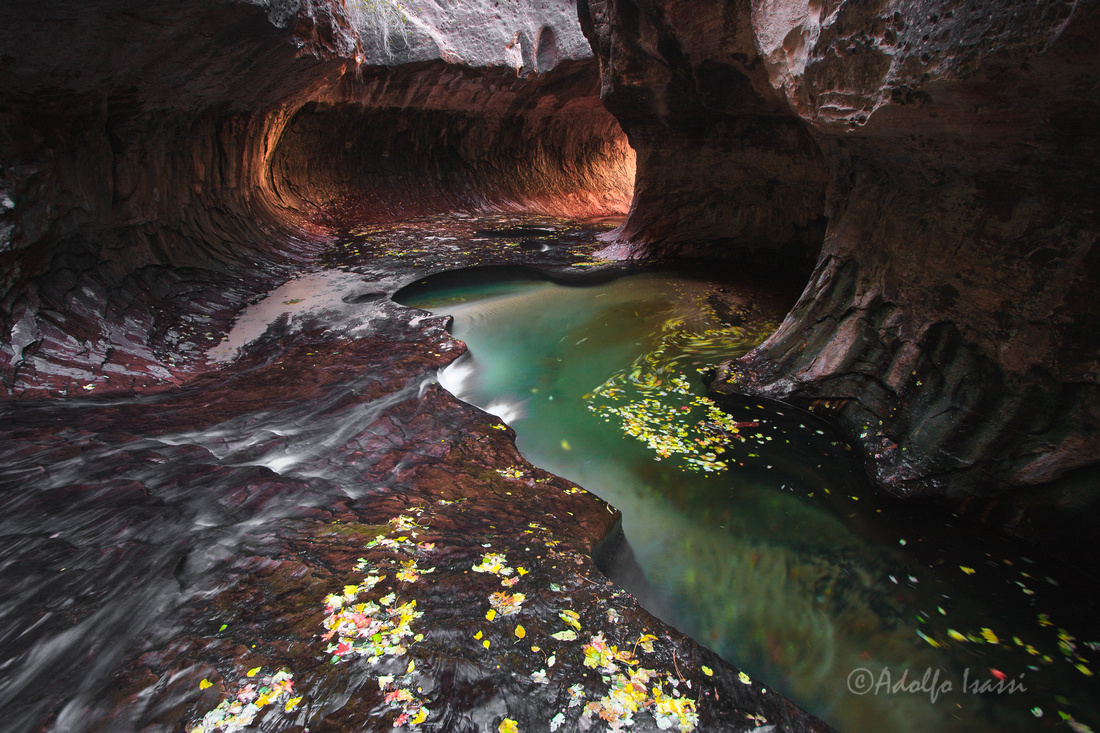
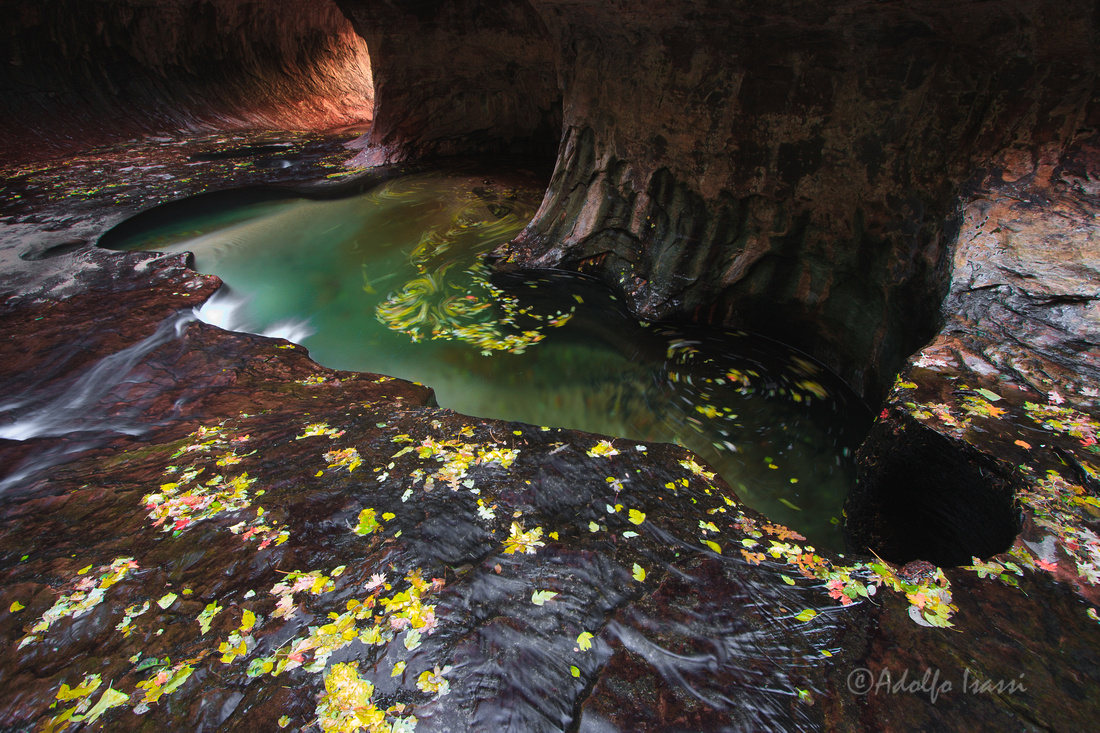
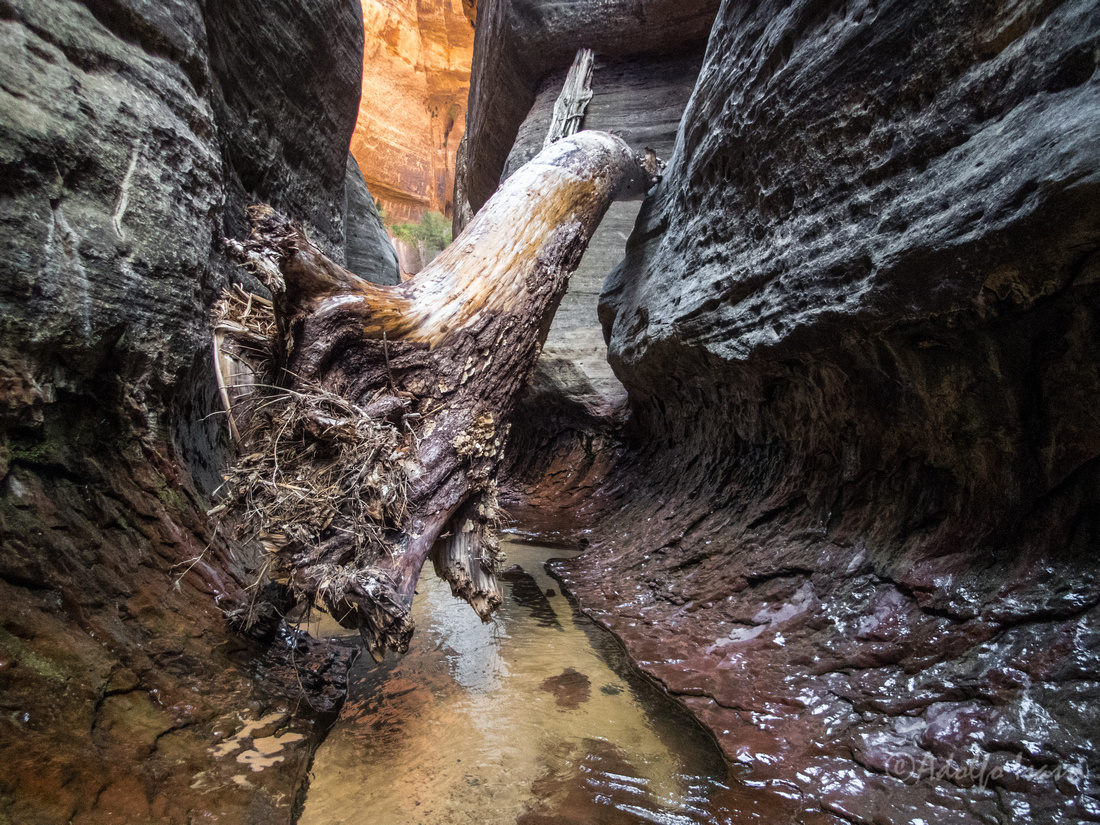
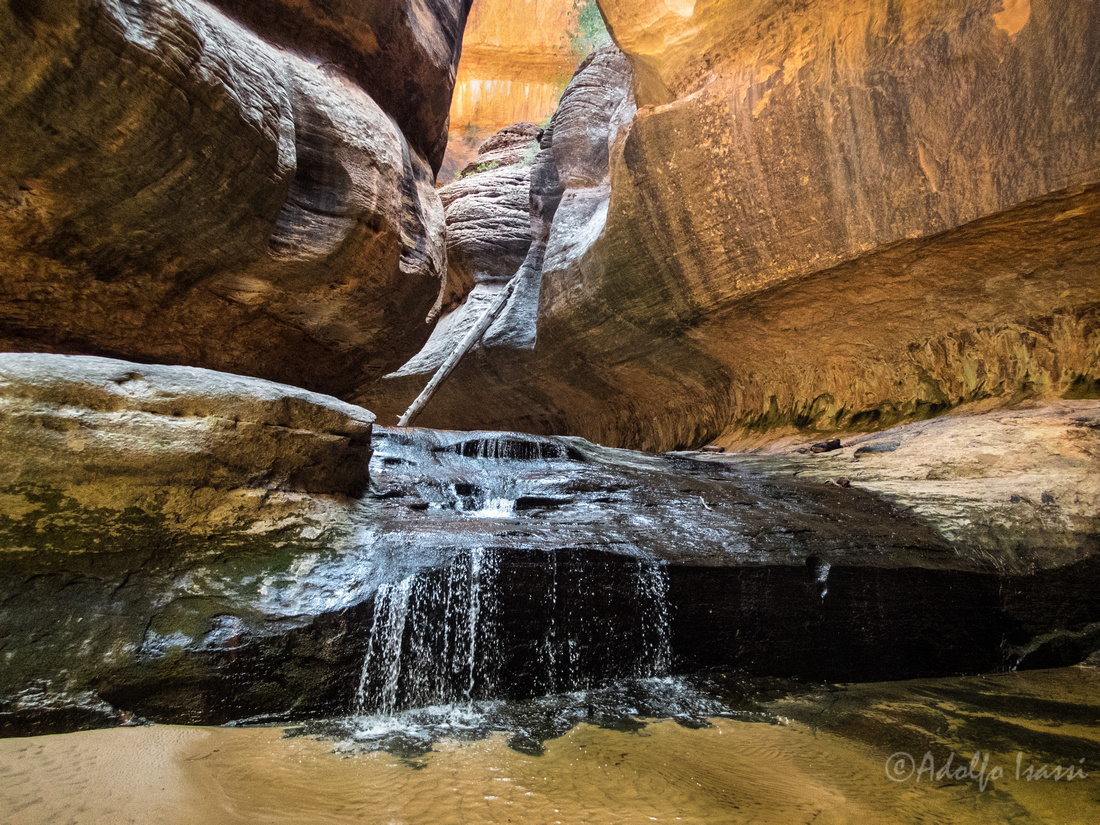
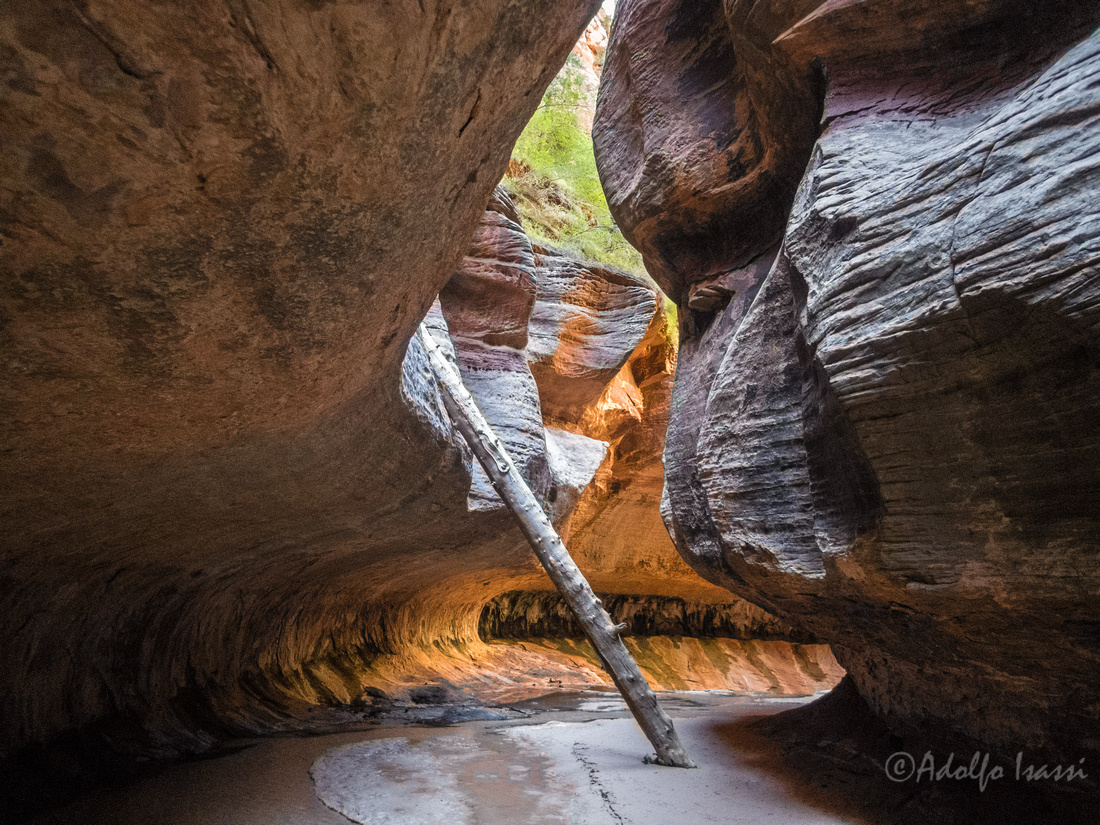
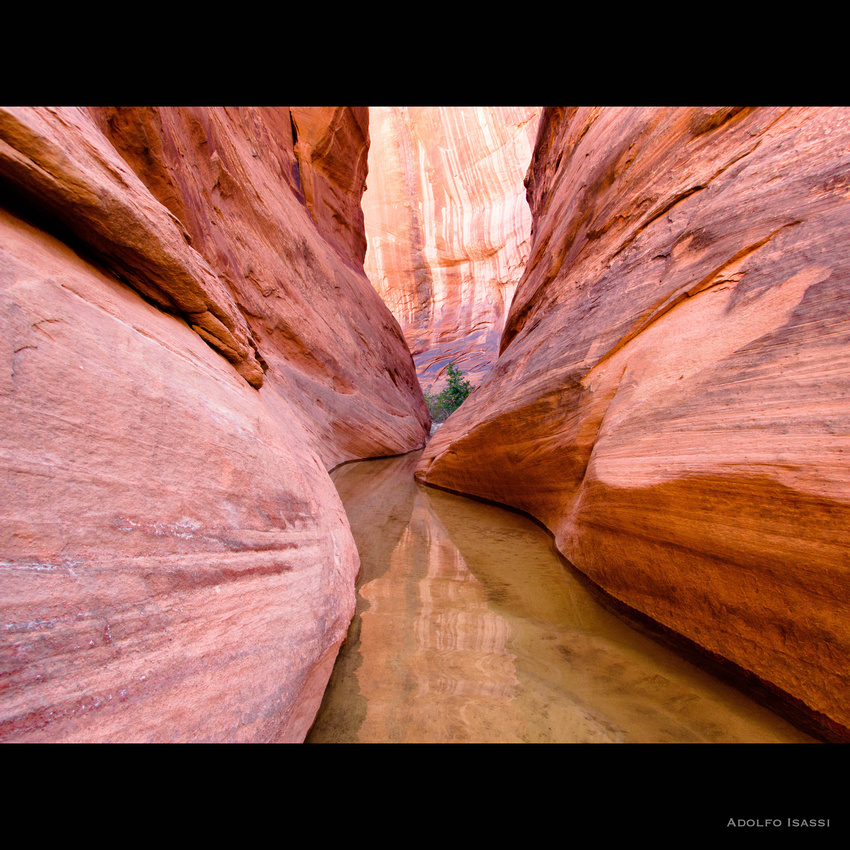
The Subway
The "Subway", that famous route in the north-west side of Zion National Park. As I watch the selection of Subway photos for this collection, I am not sure on what to make the focus of this blog entry. The beauty of the place? How it has become bureaucratically harder to access this place? How photography has been contributing to love and destroy gems like this.
This is an incredibly beautiful place. The entire route is beautiful, but at its middle point, there is about a half a mile of stunning water bored passages that ignite our Victorian fascination with "odd" rock formations. I was lucky enough to be able to do my first hike of this route in 2010, when there was no rigmarole lottery system to obtain a permit to access this place. I hiked the route two times in two weeks, and both times, all I did was walk to the backcountry permit desk and get a permit. Not even a waiting line. I do realize that the new and increasingly restricting permit system is probably a good thing. Otherwise the crowds will just destroy the place.
Talking about crowds...it does not take much people to crowd a place like this. In my two forays to photograph this place, I encountered small number of photographers hogging the best spots for....hours! This is, in part, the reason I had to come back a second time, with this in mind, to get the shots that I wanted. In essence, the first hike ended being a scouting trip for best time of the day for light, and getting there early enough to stake a spot.
Blur
I chose a late month in the year with the hope of getting some foliage color in the mix. Early November turned to be the ticket. At this time of the year, the hours between 11AM and 1PM were the best to catch the bounced light on the tunnel like walls of the Subway. There is a narrow ledge that offers the best POV for these shots. The ledge probably accommodates 7 to 10 photographers, depending on how much people are willing to invade each other's space. If you get there late, say 9, 10 am all the spots are taken. The second day, I started my hike early still in the dark, and I got there when only one other photographer was already staked on the 'optimal' spot.
Later on post-production, I realized that the first day, when I was 'late', the situation forced me to get-creative with compositions and points of view. Another unexpected positive experience, was that with the shoulder-to-shoulder long wait, I made a couple of photography buddies, and learned some tricks. The guy next to my left was shooting with a large format camera. It was a learning experience watching him operate his rig. Another photographer came equipped with a dry-suit to submerge himself neck deep in water and take water surface level shots.
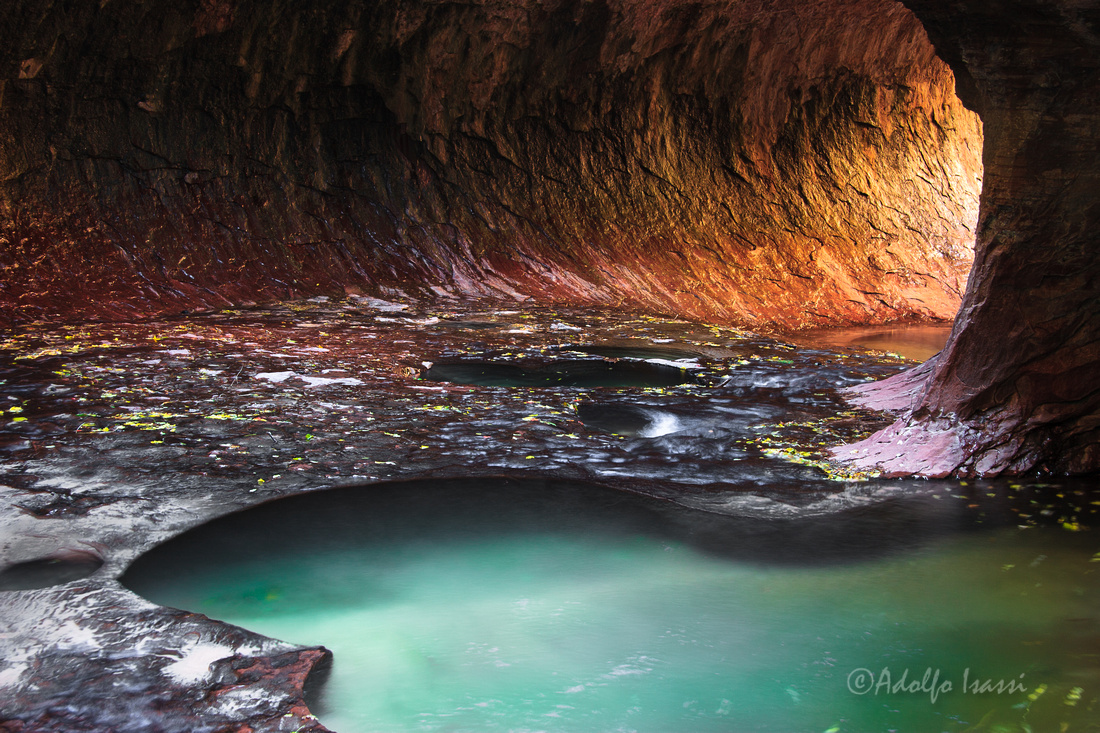
Unique S composition
The low light in this tunnel like chamber, results in low shutter speeds. This produces beautiful water blurs easily, without the need for Neutral Density filters. A visual bonus results when yellow leaves falling from the trees atop the canyon travel on the water current and produce interesting yellow streaks. It was interesting to witness photographers farming leaves form outside the tunnel to contrive this effect.
After 2010, I came back a couple of times. These times from the 'top' of the route. This part of the route gives you access to a couple of places that are famous and staple icons of American Southwest photography.
The ever changing conditions of nature
]]>
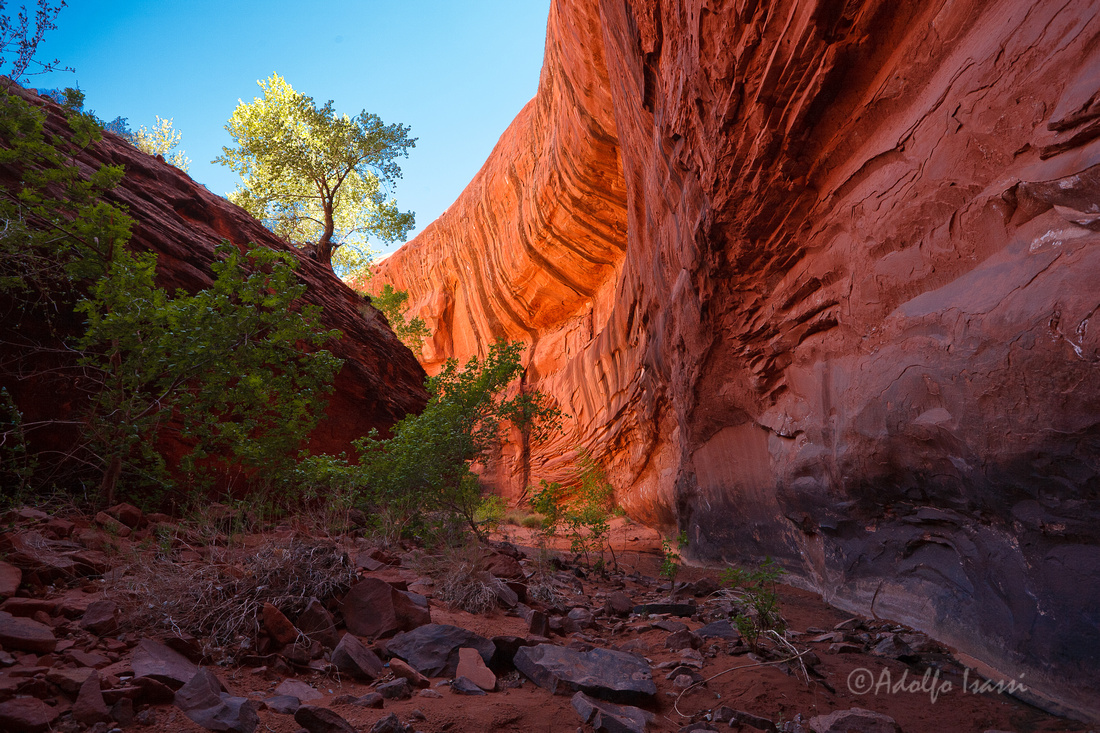
Before moving to Utah, I made my pilgrimage to Escalante twice a year on Spring and Fall. I would pour over maps and books, mainly Steve Allen's Canyoneering books, and plan hikes and photography destinations in the area. In the spring of 2013 I decided to explore Willow Gulch. During that morning, as I walked down the canyon, the walls soared higher, water ran deeper and cottonwood trees started to become prominent in the canyon floor. Cottonwoods or "Populus deltoides" (botanical name) they belong to the poplar family with other poplars like quaking aspen and Lombardy poplar.
I stopped to filter and re-fill my water bottles when a sudden wind blew through the canyon. As the wind blew through the cottonwood trees, the canyon air became engulfed with these fluffy cotton balls. This cottony material causes the small whitish cottonwood seeds to float on the wind for long distances.
It was a wonderful unexpected spectacle. I got my camera out and enjoyed the event for several minutes.
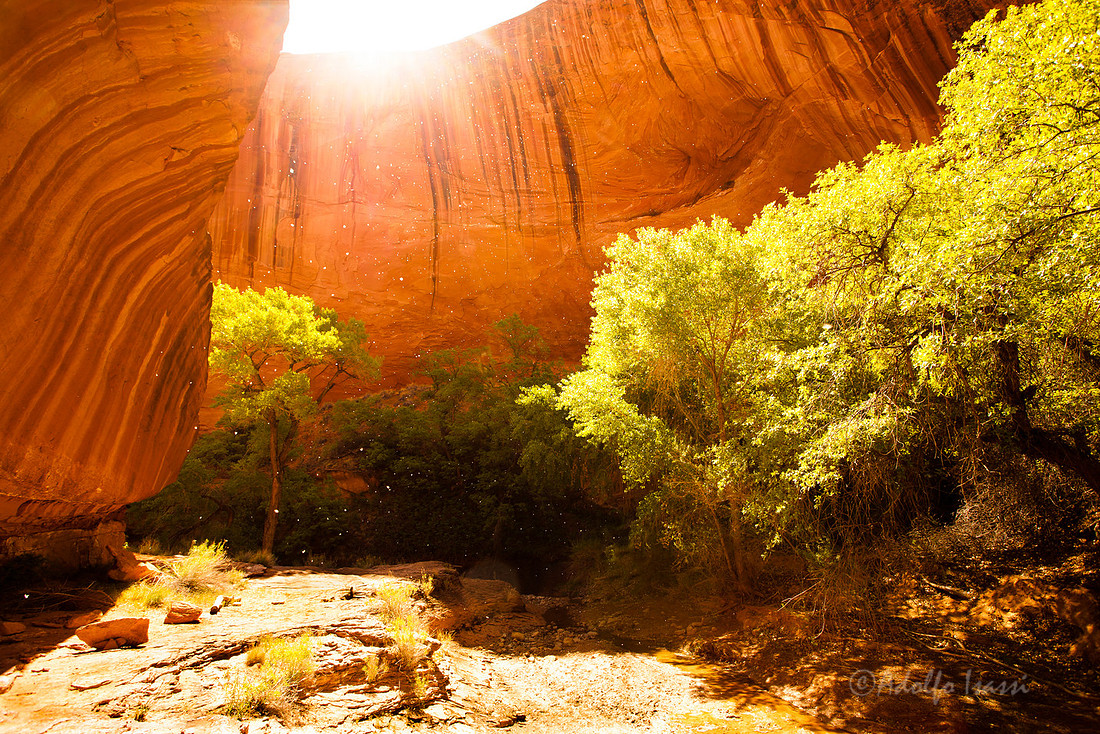 Cottonwood Storm from the Canyons Collection
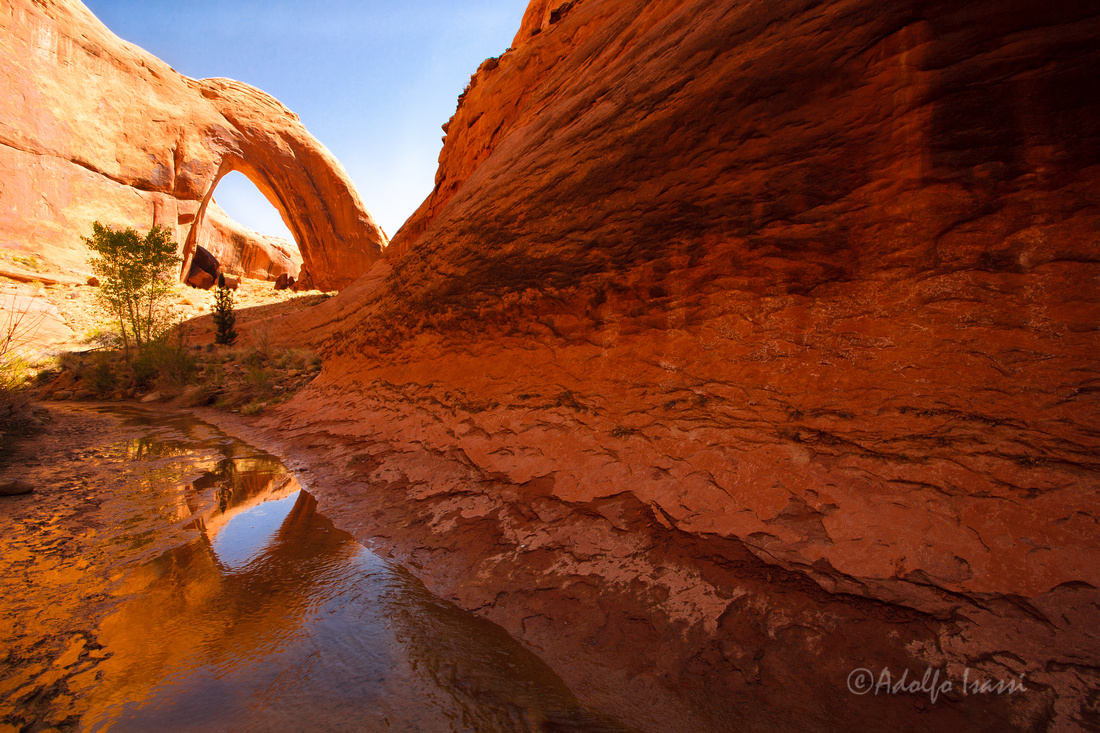
Broken Bow Arch from the Canyons Collection
]]>
Molted light affords me an otherwise not advisable centered composition highlighting and framing the subject: Bright Angel Trail leading to the Colorado via Indian Gardens.
In 2005, I took a photo expedition to the Grand Canyon and I was overwhelmed. In later years I came back a handful of times for more. The Grand gave me a ton of lessons over the years on landscape photography. Here I share some.
The Grand Canyon is a tough photographic subject in many respects:
Usually in landscape photography, finding a "Point Of View" (POV) is a fairly hard task. Particularly if searching for a unique fresh point of view. The Grand Canyon, especially the south rim, has been photographed to death. So, stay away from the rim sidewalk where your tripod and a million other tourists will take the same shot....most likely behind your shoulder with their crappy camera phone...or a selfie with you bent over your tripod as the background.
Next. Lets say that you stay away from the rim sidewalk, you scout some spots. Lets say you even used some software application like "The Photographer’s Ephemeris" to study the light at a particular location at a particular time of the year. You stake your tripod and wait for the light, you take 20, 30, 40, 50 photos and yet somehow none of them capture the grandeur that lays before your eyes.
In think that the singular most important and creative decision a photographer makes is what to leave out of the frame. This is the next challenge in a place like the Grand Canyon. Every grand view looks so amazing, how to decide what to leave out? What to leave in? What is the focal point of the photograph?
For a place like the Grand Canyon, your sense of composition needs to be dialed up and attune with many elements all at once: Light direction, shadows, horizon placement, sky conditions, major elements in the composition, dominant lines, frame ruptures, the list goes on...
On the field, usually there is not enough time to sweat all these factors. Sun and clouds moves fast, conditions change, so all you can do is sharpen your compositions skills so they become second nature.
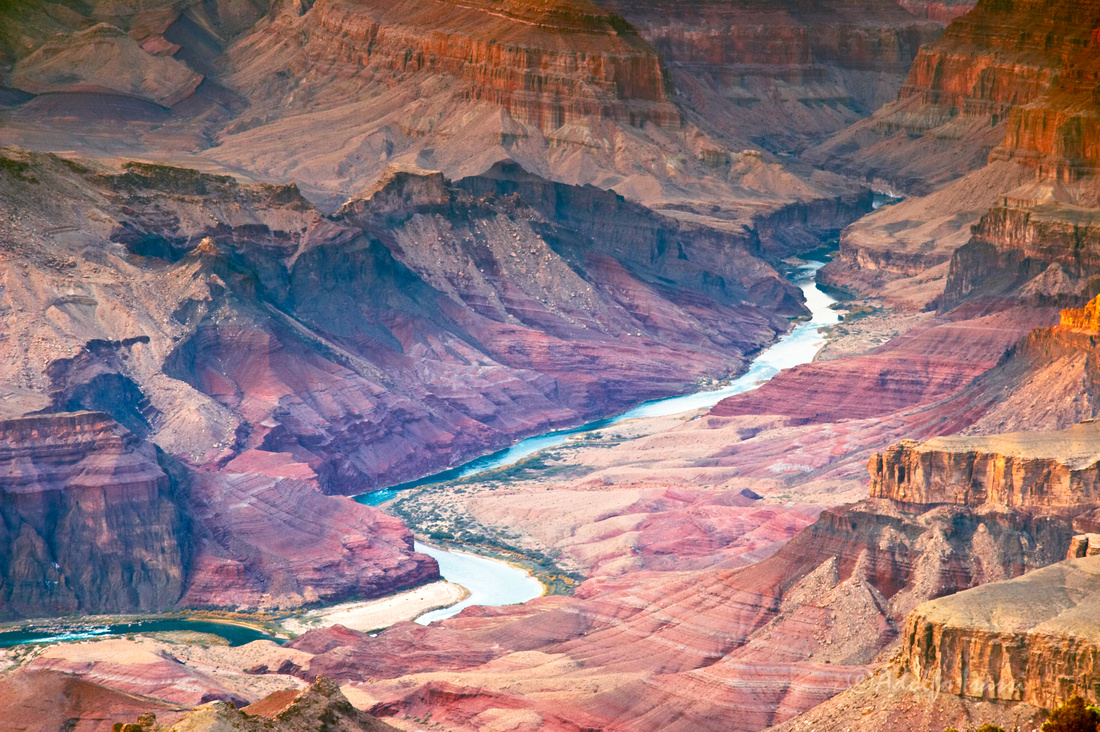
Diagonal composition of the Colorado River bisecting the Grand Canyon
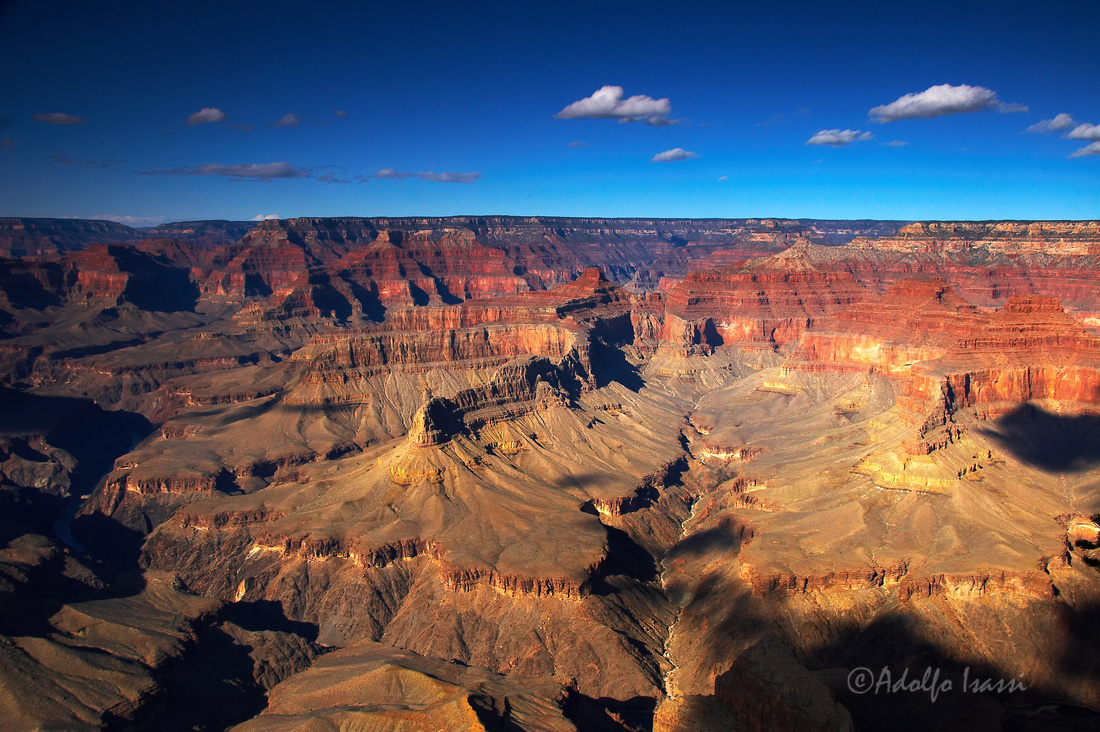 Upper third horizon placement leaves ample composition space for the eyes to enjoy the rugged universe of the Grand Canyon
After you are done and satisfied with some of your shots, how will you know if your photographic work in the Grand Canyon is...unique? offers a new point of view? Chances are you will never know....but if you are in for the long haul, get past the Ansel Adams stuff and get acquainted with the the work of the major landscape photographers that have dedicated part, or all of their time to the American Southwest: Fatali, Ilk, Dykinga, D. Muench, M. Muench, Wolfe, Rowel, Cornish, Buselle, K. Duncan, Everton, to mention some. As you become more familiar with their work, you will make more informed decisions on your own body of work.
Even if you do not come with groundbreaking images....the Grand Canyon will teach you tons about composition.
I close this post with one of my favorites quotes from one of my favorite art authors:
A truism from the experience of many landscape photographers: One does not for long wrestle with the view camera in the wind and heat and cold just to illustrate a philosophy. The thing that keeps you scrambling over the rocks. risking snakes, and swatting at the flies is the view. It is only your enjoyment of and commitment to what you see, not to what you rationally understand, that balances the otherwise absurd investment of labor.
--Robert Adams
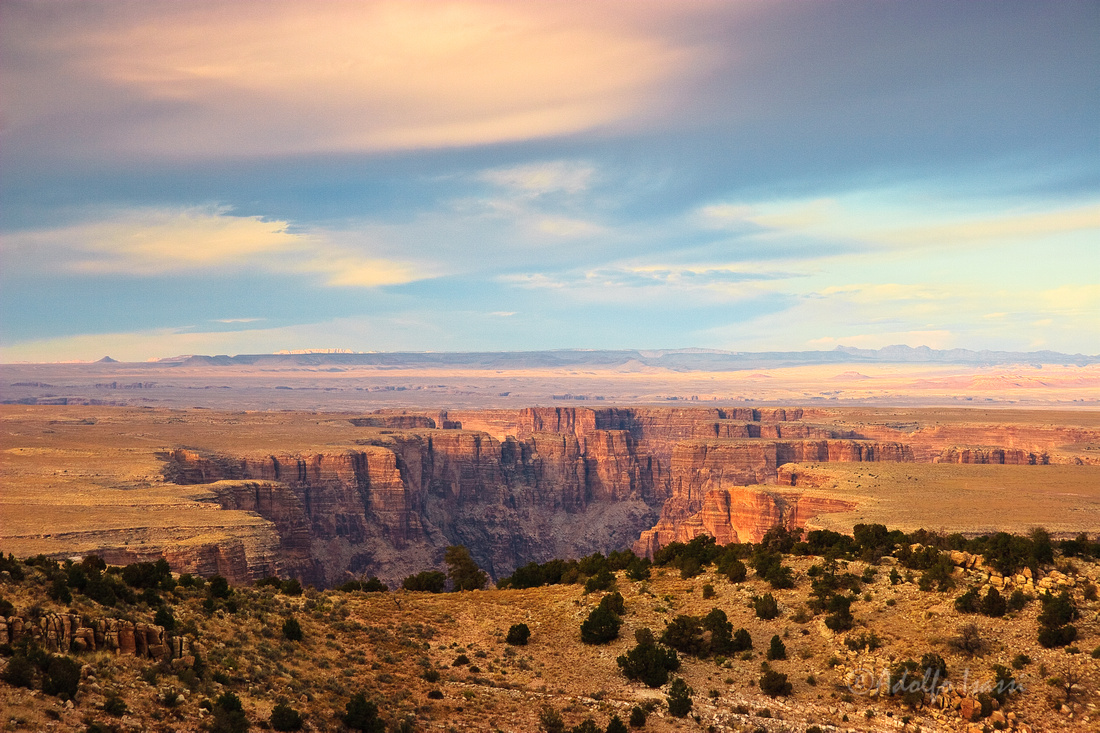
This is one of the earliest shots from the "Canyons of the Southwest" collection. It was taken during November 2005. The objectives from that particular expedition was to concentrate on the South Rim of the Grand Canyon, and other minor canyon around the Kayenta area.
One of the lessons from that trip is that the Grand is so...enormous, that 'atmosphere' becomes the subject of your image. Here, in this image of the Little Colorado River Gorge, you can almost 'feel' the soft light traveling through the air rendering the landscape in the warm tones of the "Golden Hour"....that precious hour of light before/after the sun touches the horizon at sunset or sunrise....before it turns -blue- and into the "Blue Hour".
While traveling from Kayenta to the South Rim, I realized that I wold hit this scene at the Golden Hour, so with anticipation, I scouted for the desired point of view. I shoot through the hour and back at home, I selected this particular shot, where there is still blue in the sky, before everything becomes a "golden bath" that drowns everything. I love how you can see the brush in the foreground, the canyon walls in a slight purple, and the cliffs in the far distance.
This shot belongs to what in retrospect I see as my "Golden Hour" seeking years, and marked a path that would lead me closed and deeper into canyons.
Technical details:
What is it about this type of canyons?
Around 2011, my approach to landscape photography took a drastic detour. After years of covering, and re-interpreting iconic landscapes, I felt the void and need to move into deeper places. Places that required a..."technical passport", in the form of harness, ropes, knots, climbing and canyoneering gear.
As I acquired the skills, I also had to adapt my photographic gear. Huge DSLRs with multiple lenses was no longer a sane option to take down these places. The years that I spent refining my knowledge of optics and exposure proved invaluable in the choosing of new gear and how to use it under adverse environments (water and sand) and adverse light conditions.
The rewards have been very sweet.
I will have to admit, that for a time, the descents into these places were to exhilarating, that I thought: "Who cares about photography? - I do not want to interrupt this moment".
But eventually, the other side of the coin shows up: "I do not want to forget this".
So, what is it about these canyons?
They are beautiful, but hidden. They are dangerous, yet they call you in. But most of all, somehow they make you feel more...alive.
 Another good example of the "golden hour" for sandstone canyons, i.e not the early or late hours of the day.
This type of image exemplifies my current pursuit of more....interesting, complex, rich lighting conditions.
And by the same token, the abandonment, of the mono-thematic, trite "golden hour" shots.
Also,
Here is a link to the latest first run of color prints.
]]>
The "magic" hour for canyons is not the same as the for open landscapes. It is different for every canyon. If I do not have the advantage of scouting the location beforehand, I use satellite imaging to see form above the canyon orientation relative to the traveling sunlight. You need to get to the desired location before the light hits directly any of the areas in direct view form your chosen Point of View.
]]>